How to Create macOS Big Sur Bootable USB on Windows PC

Currently, one of the most powerful operating systems of Mac is the macOS Big Sur which is the 11th version of the macOS operating system. The previous version of Mac was macOS Catalina 10.15, we all expected to have 10.16 versions but we were badly surprised with the macOS 11.0 version which is a great move of all the time.macOS Big Sur has a bundle of features and functionalities which blew the mind of everyone. But, on unsupported Mac, you won’t be able to enjoy the complete features and performance of macOS Big Sur. macOS Big Sur is the operating system that is inspired by iOS 14. However, let’s know How to Create macOS Big Sur Bootable USB on Windows PC.
With the help of Bootable USB, you will have the ability to perform the clean installation of macOS Big Sur on Mac. Fortunately, you can easily create macOS Big Sur Bootable USB on your Windows PC without any high requirements. Creating Bootable USB on Mac is somehow tricky but when you perform on Windows then you will just need software for that. No worries about the process because I will guide you on the full process of How to Create macOS Big Sur Bootable USB on Windows PC.
System Requirements for Installing macOS 11 Big Sur
The most important thing is to know the system requirements for installing macOS Big Sur. Before going to install macOS Big Sur on your Mac and before downloading the Beta file from a developer you need to have an idea about it. Because it only allows some Mac. So, the following list is those Mac that support macOS Big Sur.
- MacBook 2015 and later
- MacBook Air 2013 and later
- MacBook Pro late 2013 and later
- Mac mini 2014 and later
- iMac 2014 and later
- iMac Pro 2017 and later (all models)
- Mac Pro 2013 and later
Required Files:
Before creating macOS Big Sur Bootable SUB, you have to download some required files which will be in need while process.
- Download macOS Big Sur Installer File.
- 16GB storage of USB Flash Drive.
- Download Transmac.
Install TransMac on Windows PC
Step 1. Go to the Download Folder and double-click on the set up of TransMac.
Step 2. TransMac window will be opened, you will see the Welcome screen just click on Next.
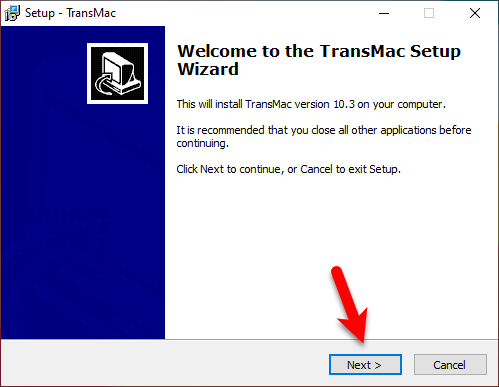 Welcome Wizard
 Step 3. Read out the license agreement of TransMac before moving on, choose the first option which is I accept the agreement and click Next.
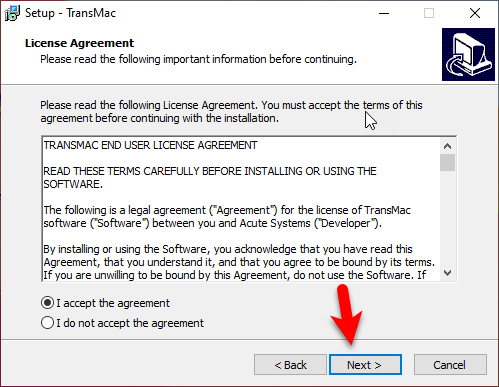 License Agreement
 Step 4. Choose where you want to install TransMac, select the destination folder for TransMac, and click Next.
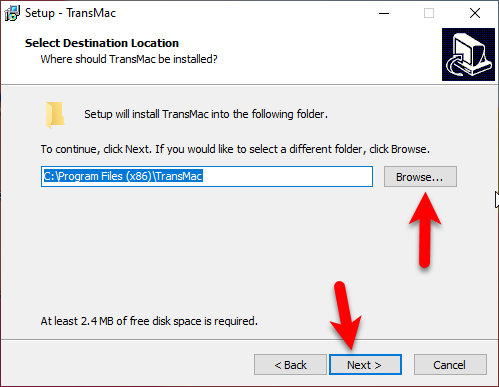 Select Destination Folder
 Step 5. Select the Start Menu folder wherever you want and click Next.
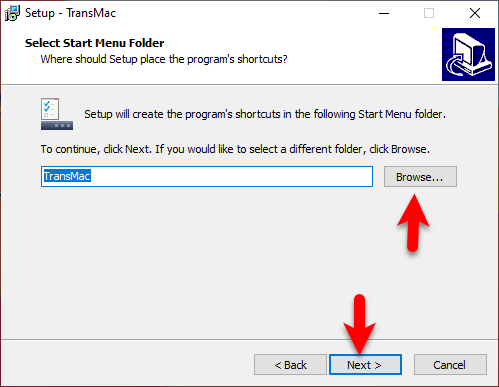 Start Menu Folder
 Step 6. Select the additional task you would like the setup to perform while installing TransMac and click Next.
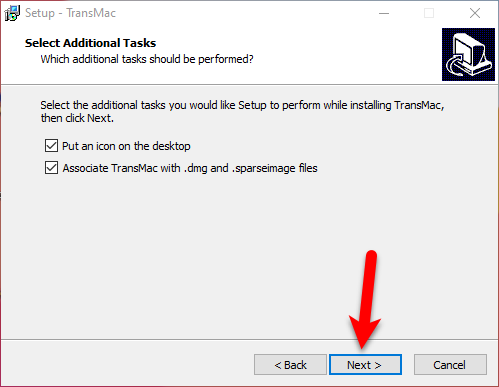 Additional Tasks
 Step 7. When each and everything goes right. Finally, click on the Install option to begin the installation process.
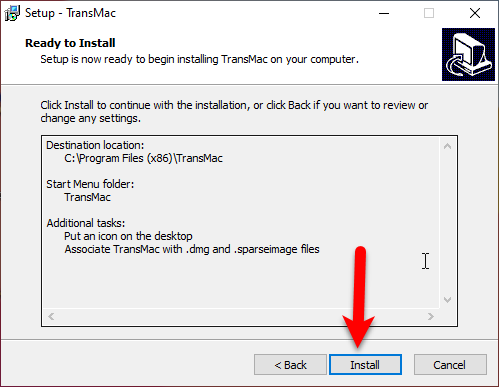 Ready to install
 Create macOS Big Sur Bootable USB using TransMac
- Once you have downloaded TransMac through the above steps, Now it is time to run as Administrator the TransMac.
- Attach the USB Flash Drive to your Computer.
- When you open the TransMac, right-click on the USB drive from the left side and click on the Restore with the disk image.
- The warning page will be opened, click on the OK.
- Now, click on the three dots option in order to browse for macOS Big Sur DMG File. Make sure to select the correct file.
- You will get another warning page, just click Yes.
- Finally, TransMac will start creating macOS Big Sur Bootable USB which will take some more to be created. Don’t do anything just have a cup of coffee and be patient.
Bottom Line
You have created macOS Big Sur Bootable USB on Windows 10 PC. TransMac is one of the greatest premium software in order to create bootable USB multiple times. The user can use it for 15 days of trial, after the trial you have to purchase the key to use more. Personally, whenever I try to create a bootable USB then probably I choose TransMac because it offers easy user interface. Therefore, most of the Windows users use TransMac for different purposes.
Tagged
Share This Article
Currently, one of the most powerful operating systems of Mac is the macOS Big Sur which is the 11th version of the macOS operating system. The previous version of Mac was macOS Catalina 10.15, we all expected to have 10.16 versions but we were badly surprised with the macOS 11.0 version which is a great move of all the time.macOS Big Sur has a bundle of features and functionalities which blew the mind of everyone. But, on unsupported Mac, you won’t be able to enjoy the complete features and performance of macOS Big Sur. macOS Big Sur is the operating system that is inspired by iOS 14. However, let’s know How to Create macOS Big Sur Bootable USB on Windows PC.
With the help of Bootable USB, you will have the ability to perform the clean installation of macOS Big Sur on Mac. Fortunately, you can easily create macOS Big Sur Bootable USB on your Windows PC without any high requirements. Creating Bootable USB on Mac is somehow tricky but when you perform on Windows then you will just need software for that. No worries about the process because I will guide you on the full process of How to Create macOS Big Sur Bootable USB on Windows PC.
System Requirements for Installing macOS 11 Big Sur
The most important thing is to know the system requirements for installing macOS Big Sur. Before going to install macOS Big Sur on your Mac and before downloading the Beta file from a developer you need to have an idea about it. Because it only allows some Mac. So, the following list is those Mac that support macOS Big Sur.
- MacBook 2015 and later
- MacBook Air 2013 and later
- MacBook Pro late 2013 and later
- Mac mini 2014 and later
- iMac 2014 and later
- iMac Pro 2017 and later (all models)
- Mac Pro 2013 and later
Required Files:
Before creating macOS Big Sur Bootable SUB, you have to download some required files which will be in need while process.
- Download macOS Big Sur Installer File.
- 16GB storage of USB Flash Drive.
- Download Transmac.
Install TransMac on Windows PC
Step 1. Go to the Download Folder and double-click on the set up of TransMac.
Step 2. TransMac window will be opened, you will see the Welcome screen just click on Next.
 Welcome Wizard
 Step 3. Read out the license agreement of TransMac before moving on, choose the first option which is I accept the agreement and click Next.
 License Agreement
 Step 4. Choose where you want to install TransMac, select the destination folder for TransMac, and click Next.
 Select Destination Folder
 Step 5. Select the Start Menu folder wherever you want and click Next.
 Start Menu Folder
 Step 6. Select the additional task you would like the setup to perform while installing TransMac and click Next.
 Additional Tasks
 Step 7. When each and everything goes right. Finally, click on the Install option to begin the installation process.
 Ready to install
 Create macOS Big Sur Bootable USB using TransMac
- Once you have downloaded TransMac through the above steps, Now it is time to run as Administrator the TransMac.
- Attach the USB Flash Drive to your Computer.
- When you open the TransMac, right-click on the USB drive from the left side and click on the Restore with the disk image.
- The warning page will be opened, click on the OK.
- Now, click on the three dots option in order to browse for macOS Big Sur DMG File. Make sure to select the correct file.
- You will get another warning page, just click Yes.
- Finally, TransMac will start creating macOS Big Sur Bootable USB which will take some more to be created. Don’t do anything just have a cup of coffee and be patient.
Bottom Line
You have created macOS Big Sur Bootable USB on Windows 10 PC. TransMac is one of the greatest premium software in order to create bootable USB multiple times. The user can use it for 15 days of trial, after the trial you have to purchase the key to use more. Personally, whenever I try to create a bootable USB then probably I choose TransMac because it offers easy user interface. Therefore, most of the Windows users use TransMac for different purposes.


