How to Display Internet Speed Meter in Windows 11?


In this article, you will learn How to Display Internet Speed Meter in Windows 11? Checking internet speed we well get information about internet speed. If you know that how is your internet speed then you can know that will app or something else will download fast. When you want to check your internet speed then you don’t know the way that you can check the internet speed. Moreover, this method will be done by software. If you download the software after that you will check your internet speed live. If you want to enable internet speed on the taskbar then you need to read this article.
How to Display Internet Speed Meter in Windows 11?
You will do this method with the help of third-party software. So, follow the steps down below.
Step 1. First of all, you need to open your Microsoft Store.
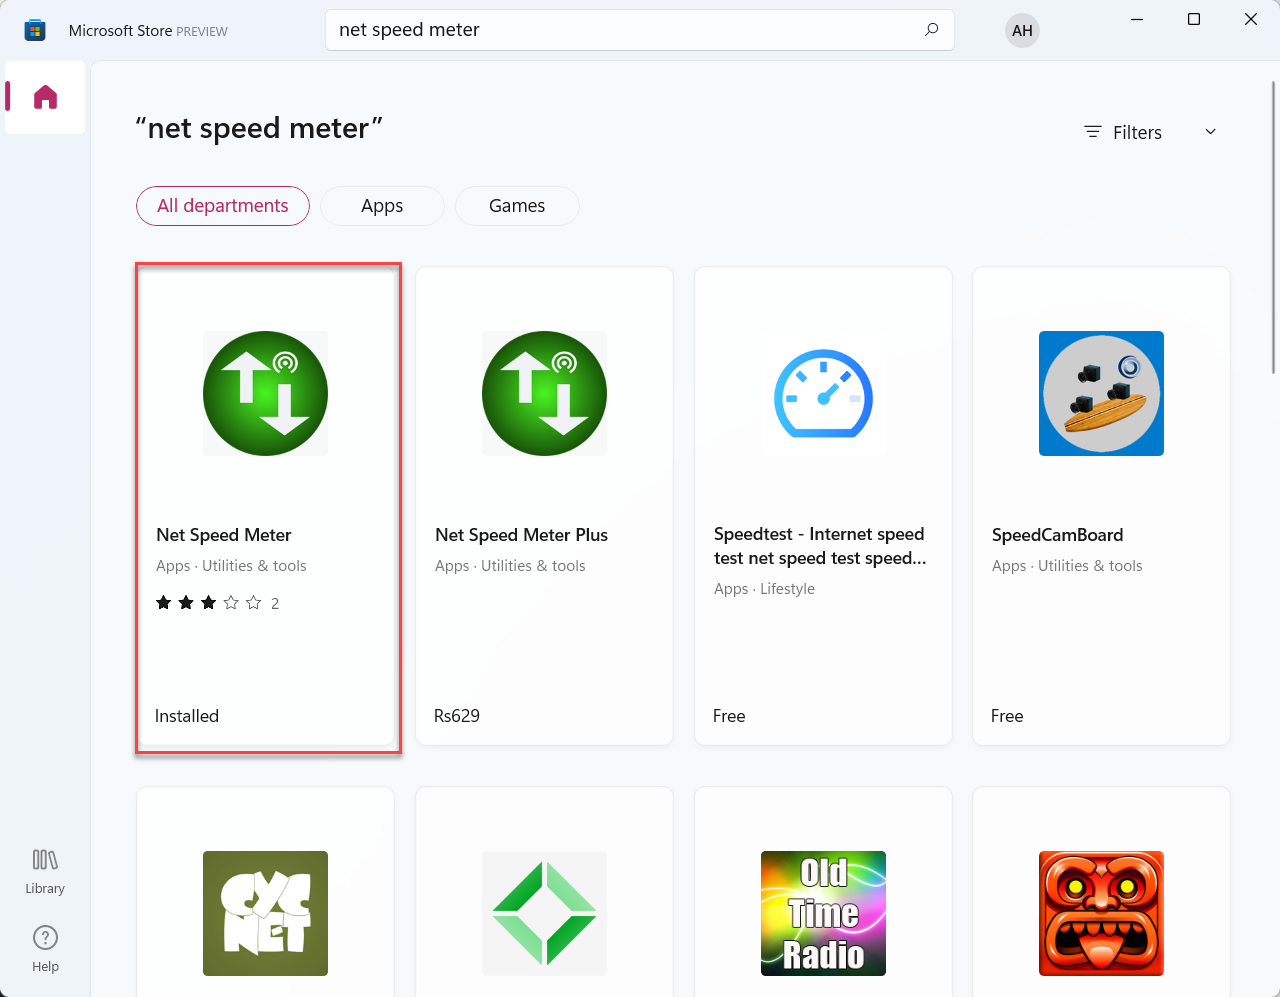
Step 2. When the Microsoft Store is launch then go to the search bar after that type Net Speed Meter.
Step 3. After that, you will get the speed meter simply click on that.

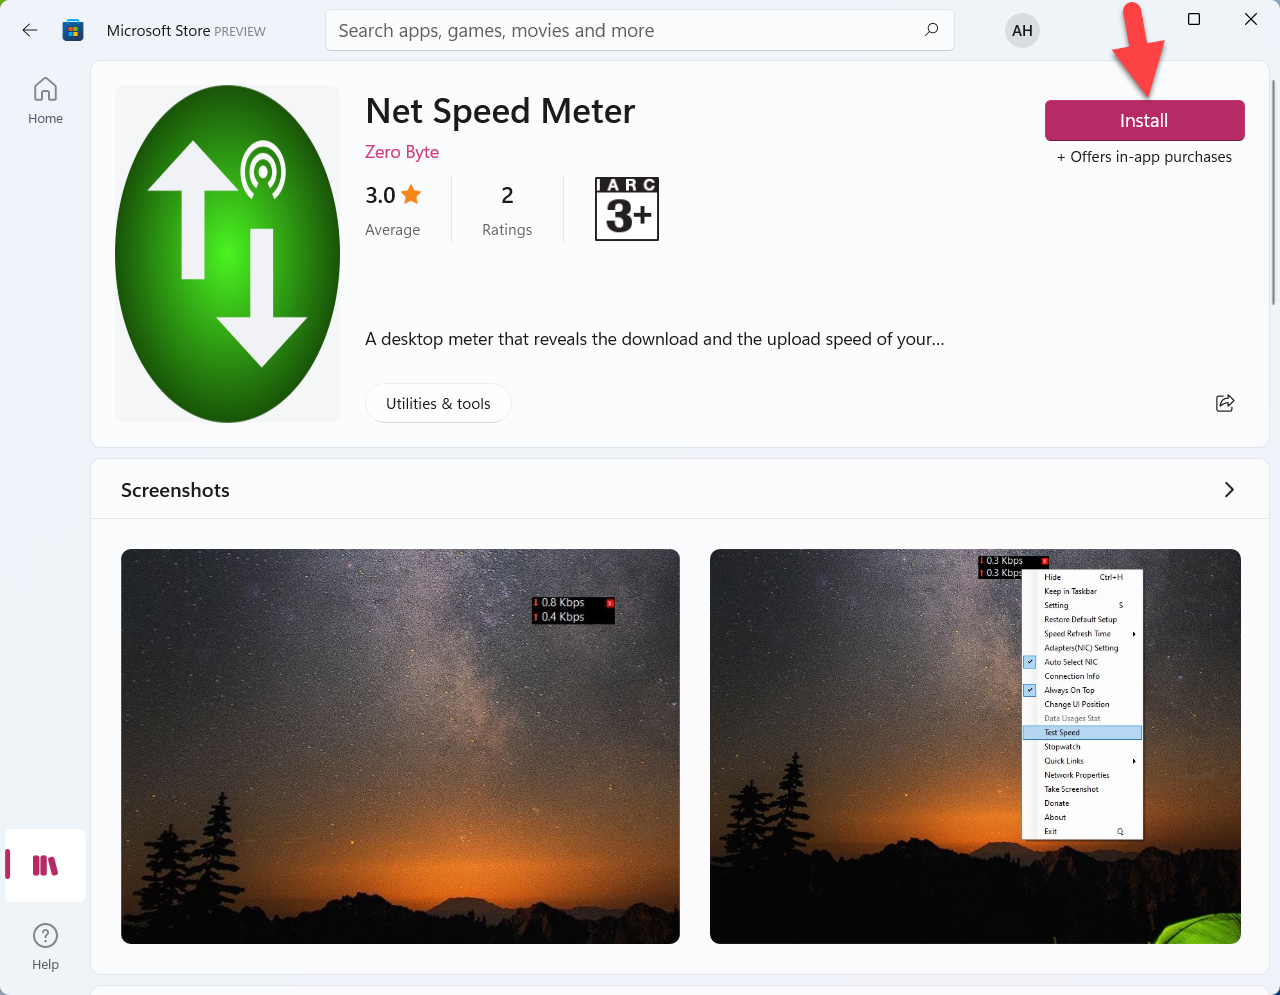
Step 4. Click on the Install.
 Click on the Install
 Step 5. When you click on the get then if you log in to your Microsoft account then you can download that app.
Step 6. Once you sign your Microsoft account then it will start downloading.
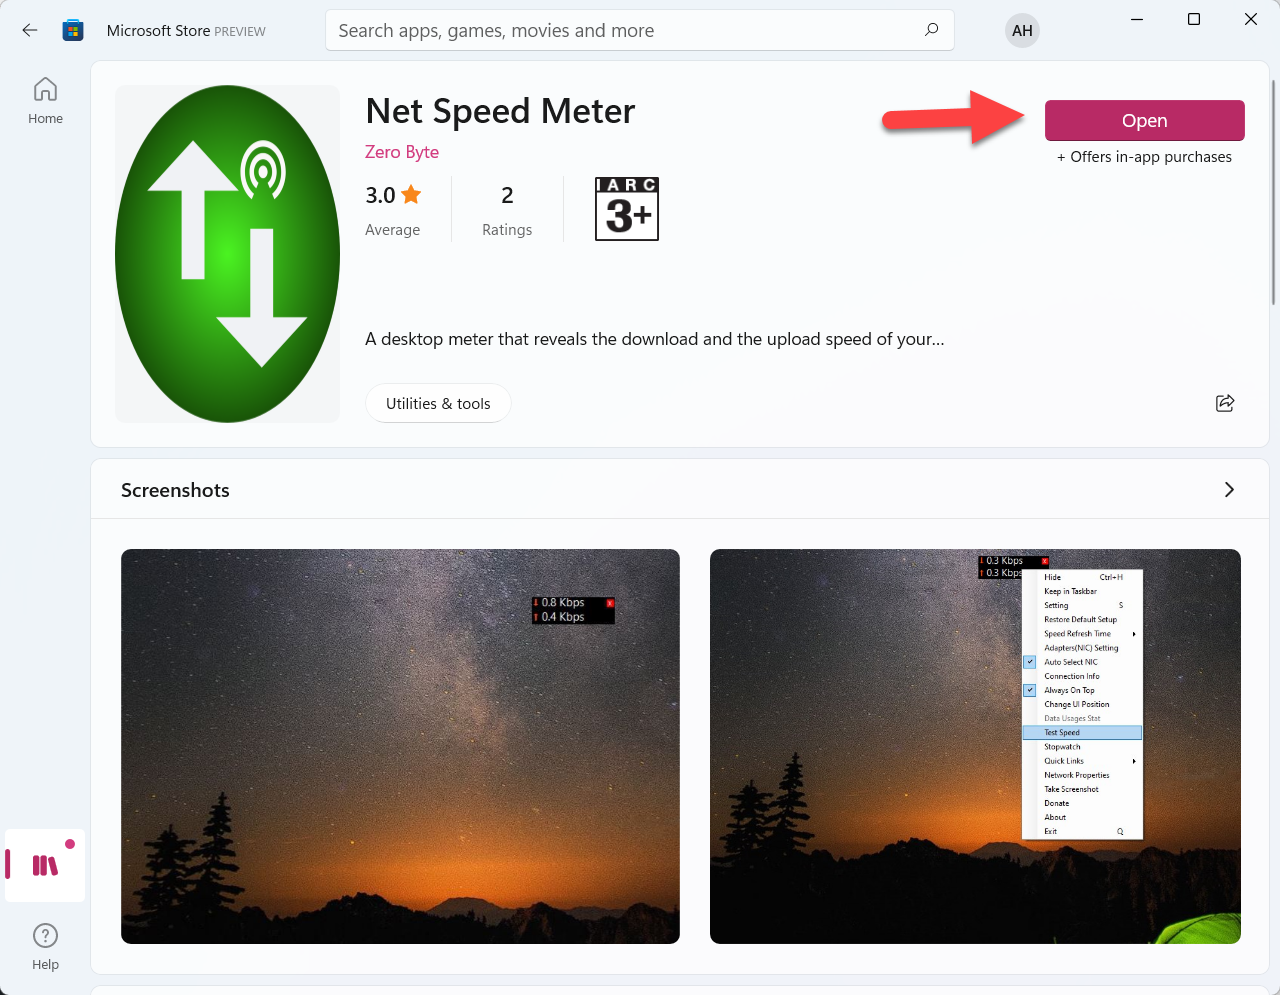
Step 7. Moreover, when the downloading is done after that open the Net Speed Meter.
 Open the Net Speed Meter
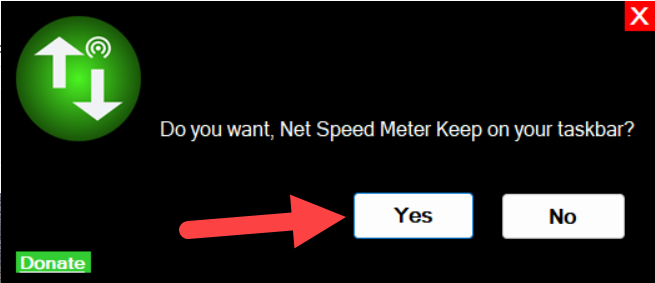
 Step 8. Then the message will pop up that you want that speed meter in your taskbar simply click on the Yes.
 Click on the Yes
 Step 9. Finally, as you can see that net speed meter is on your taskbar.
Bottom Line
It was all about How to Display Internet Speed Meter in Windows 11? I hope this article is very helpful for you to enable internet speed. From this article, you will get something good. This is the right place where you can easily solve your problem. After following these steps I hope you will not face any kind of problem. If you faced any kind of problem and if you have any type of suggestions then do comment.
Related Post:
Tagged
Share This Article
In this article, you will learn How to Display Internet Speed Meter in Windows 11? Checking internet speed we well get information about internet speed. If you know that how is your internet speed then you can know that will app or something else will download fast. When you want to check your internet speed then you don’t know the way that you can check the internet speed. Moreover, this method will be done by software. If you download the software after that you will check your internet speed live. If you want to enable internet speed on the taskbar then you need to read this article.
How to Display Internet Speed Meter in Windows 11?
You will do this method with the help of third-party software. So, follow the steps down below.
Step 1. First of all, you need to open your Microsoft Store.
Step 2. When the Microsoft Store is launch then go to the search bar after that type Net Speed Meter.
Step 3. After that, you will get the speed meter simply click on that.

Step 4. Click on the Install.
 Click on the Install
 Step 5. When you click on the get then if you log in to your Microsoft account then you can download that app.
Step 6. Once you sign your Microsoft account then it will start downloading.
Step 7. Moreover, when the downloading is done after that open the Net Speed Meter.
 Open the Net Speed Meter
 Step 8. Then the message will pop up that you want that speed meter in your taskbar simply click on the Yes.
 Click on the Yes
 Step 9. Finally, as you can see that net speed meter is on your taskbar.
Bottom Line
It was all about How to Display Internet Speed Meter in Windows 11? I hope this article is very helpful for you to enable internet speed. From this article, you will get something good. This is the right place where you can easily solve your problem. After following these steps I hope you will not face any kind of problem. If you faced any kind of problem and if you have any type of suggestions then do comment.
Related Post:


