How to Transfer Photos From iPhone to a Windows 11 PC?


In this article, you will learn How to Transfer Photos From iPhone to a Windows 11 PC? On your mobile you have many photos like it can be anything. If you have too many photos then you want to transfer photos in your PC urgently. Or it should not be for urgent work it may work for something else like thumbnails, and you keep that photo safe in your PC. Furthermore, when you want the photo then you don’t know the way that transfer photos. But don’t worry I am here to solve your problem. If you want to transfer photos from iPhone to a Windows 11 then you need to read this article. So, without wasting any time let’s get has started.
How to Transfer Photos From iPhone to a Windows 11 With File Explorer
Step 1. At first, attract a cable wire with your PC and your iOS.
Step 2. Then give permission that you are allowing this PC.
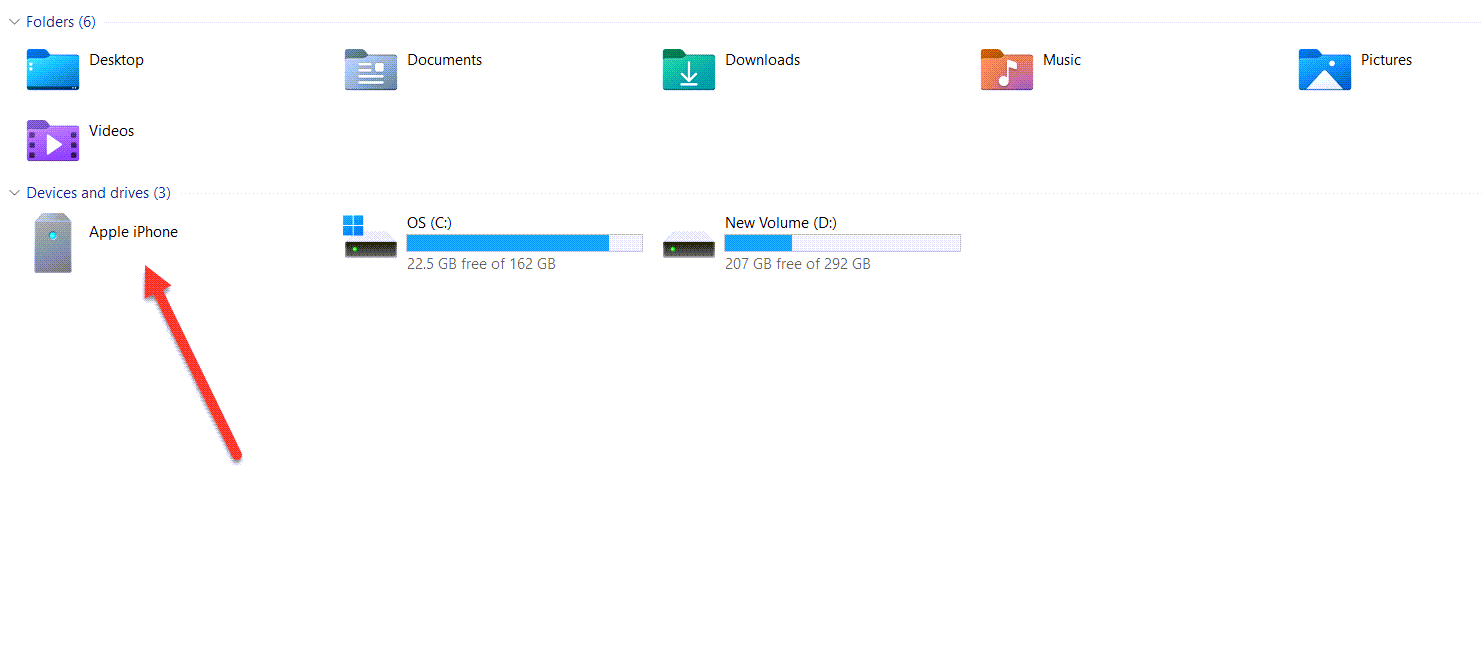
Step 3. Go to File Explorer after that select the name of your phone.

Step 4. Click on the Internal Storage.
 Click on the Internal Storage
 Step 5. Moreover, click on the DCIM.
 Click on the DCIM
 Step 6. At last, you will get several folders to find the file from that you want to download photos.
Step 7. When you find the file then copy that photo then paste it anywhere you want.
How to Transfer Photos From iPhone to a Windows 11 Using iCloud
Further, if you want to transfer photos from iPhone to a Windows 11 then you need to must have an iCloud app. If you don’t know how to download the iCloud app then you will find a bunch of articles that will help you to download. When you download the iCloud app then follow the other steps down below.
Step 1. First of all, you need to open the Settings of your iOS then scroll down click on the Photos after that turn on the toggle of iCloud Photos.
Step 2. Next, download the iCloud app from anywhere that you want then go to File Explorer.
Step 3. When the file explorer is open then head towards the iCloud Photos.
Step 4. Now, you will see the that is present in your iPhone.
Step 5. Whether you want to download the photo simply double-click on that photo after that when the green tick appears below that photo it means that the photo is downloaded on your phone.
Step 6. However, if you want to download any photo permanently then right-click on that photo after that select Always Keep on This Device.
Bottom Line
It was all about to How to Transfer Photos From iPhone to a Windows 11 PC? I hope this article is very helpful for you to transfer photos. From this article, you will get something good. This is the right place where you can easily solve your problem. After following these steps I hope you will not face any kind of problem. If you faced any kind of problem and if you have any type of suggestions then do comment.
Related Post:
Tagged
Share This Article
In this article, you will learn How to Transfer Photos From iPhone to a Windows 11 PC? On your mobile you have many photos like it can be anything. If you have too many photos then you want to transfer photos in your PC urgently. Or it should not be for urgent work it may work for something else like thumbnails, and you keep that photo safe in your PC. Furthermore, when you want the photo then you don’t know the way that transfer photos. But don’t worry I am here to solve your problem. If you want to transfer photos from iPhone to a Windows 11 then you need to read this article. So, without wasting any time let’s get has started.
How to Transfer Photos From iPhone to a Windows 11 With File Explorer
Step 1. At first, attract a cable wire with your PC and your iOS.
Step 2. Then give permission that you are allowing this PC.
Step 3. Go to File Explorer after that select the name of your phone.

Step 4. Click on the Internal Storage.
 Click on the Internal Storage
 Step 5. Moreover, click on the DCIM.
 Click on the DCIM
 Step 6. At last, you will get several folders to find the file from that you want to download photos.
Step 7. When you find the file then copy that photo then paste it anywhere you want.
How to Transfer Photos From iPhone to a Windows 11 Using iCloud
Further, if you want to transfer photos from iPhone to a Windows 11 then you need to must have an iCloud app. If you don’t know how to download the iCloud app then you will find a bunch of articles that will help you to download. When you download the iCloud app then follow the other steps down below.
Step 1. First of all, you need to open the Settings of your iOS then scroll down click on the Photos after that turn on the toggle of iCloud Photos.
Step 2. Next, download the iCloud app from anywhere that you want then go to File Explorer.
Step 3. When the file explorer is open then head towards the iCloud Photos.
Step 4. Now, you will see the that is present in your iPhone.
Step 5. Whether you want to download the photo simply double-click on that photo after that when the green tick appears below that photo it means that the photo is downloaded on your phone.
Step 6. However, if you want to download any photo permanently then right-click on that photo after that select Always Keep on This Device.
Bottom Line
It was all about to How to Transfer Photos From iPhone to a Windows 11 PC? I hope this article is very helpful for you to transfer photos. From this article, you will get something good. This is the right place where you can easily solve your problem. After following these steps I hope you will not face any kind of problem. If you faced any kind of problem and if you have any type of suggestions then do comment.
Related Post:


