How to Install macOS Monterey on VMware on Windows PC?
In this article, I will show you how to install macOS Monterey on VMware on Windows. macOS Monterey is the greatest and newest operating system of Mac computer. That is called macOS Monterey. Apple has recently announced the new operating system on 7th June. Now macOS Monterey is a Beta version, it would be really better to install and test on a virtual machine. It contains a lot of handy features which show that it is better than macOS Monterey.
Installing and trying the new operating system on VMware is really useful. Because the new operating system is buggy and contains too much glitch which can also destroy the system. In this case, it is better to give it a try on the virtual machine. For step by step guide, you have to go through the below guidance.
Step 1: Download Required Files
To start installing macOS Monterey on VMware, you have to download or install some useful files which will be needed while the installation process. If you have these all files then you can skip this part. Here’s are all the necessary files, just click to download.
- Download VMware Workstation Pro (Latest Version).
- Download macOS Unlocker by TechSpite
- macOS Monterey ISO Image (Download now)
Step 2: Install VMware on your Windows – PC
- Download the VMware Workstation from the above section.
- Once it is downloaded, open up the folder where you have downloaded it. Double-click to open the installer window.
- On the installer window, click Next to proceed.
- Check the option ” I accept the terms in the license agreement ” and click next.
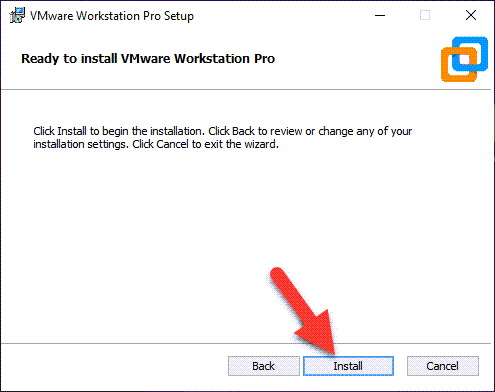
- Just click Next on all coming screens.
- Then, click Install and finish to close the installer window.
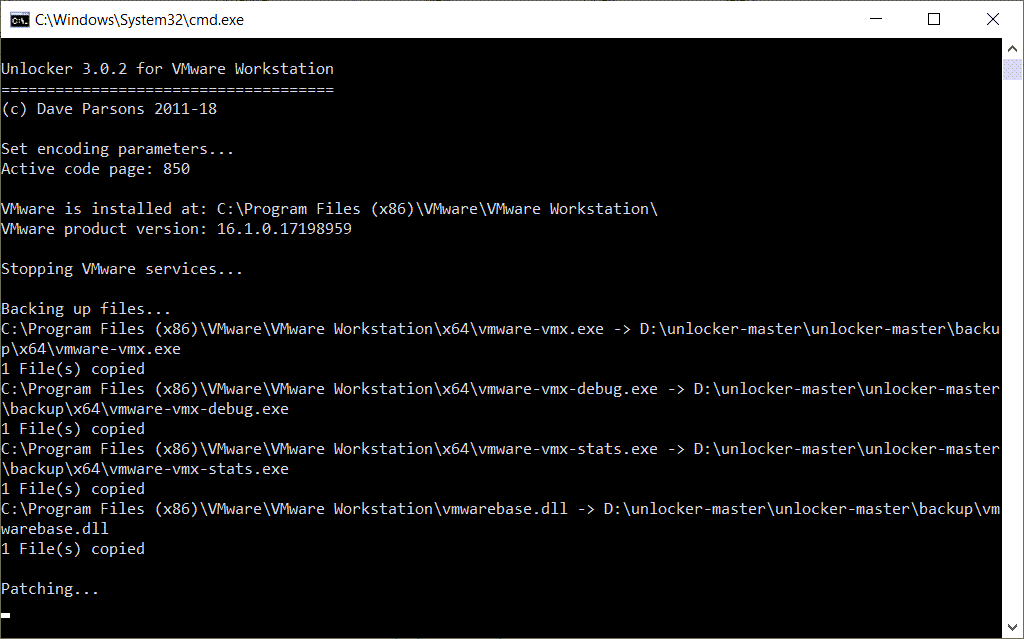
Step 3: Install macOS Unlocker to Install macOS on VMware
- At first, completely close the VMware Workstation from the desktop. Otherwise, the macOS unlocker won’t work.
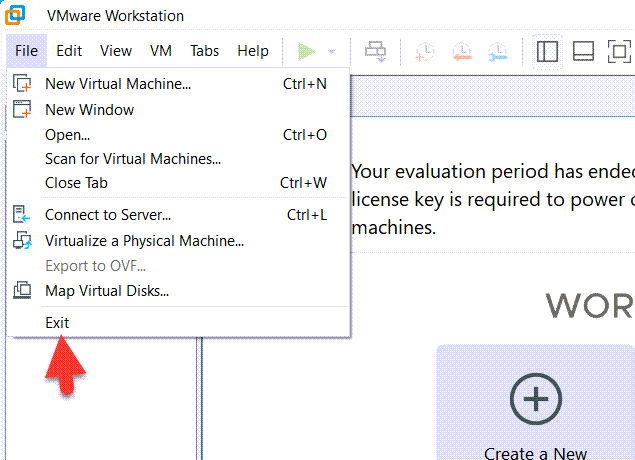 Close VMware
 - Download the macOS unlocker from the above link, then open up the file. And find out the win-install.cmd right-click on it and choose run as administrator.
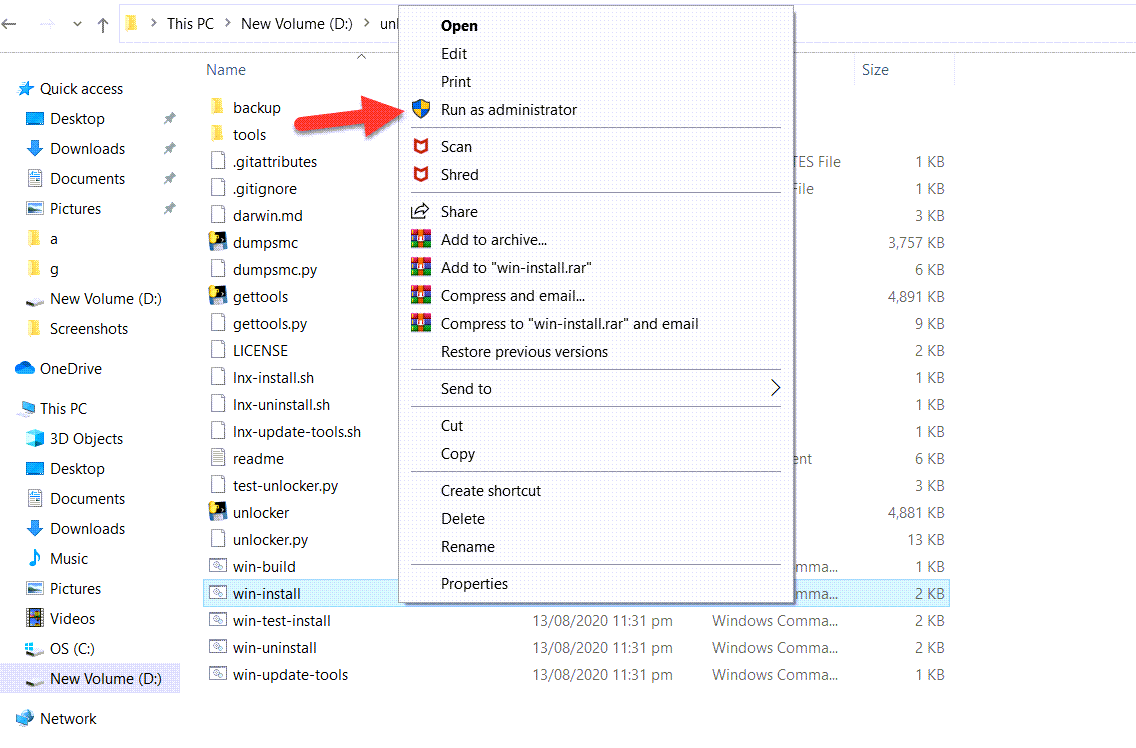 Run as administrator
 - It will start unlocking the macOS option in VMware Workstation.
Step 4: Create a New Virtual Machine
1. Open up the VMware and select ‘create a new virtual machine’. A new window will pop up, you have to select ‘Typical’ and click next.
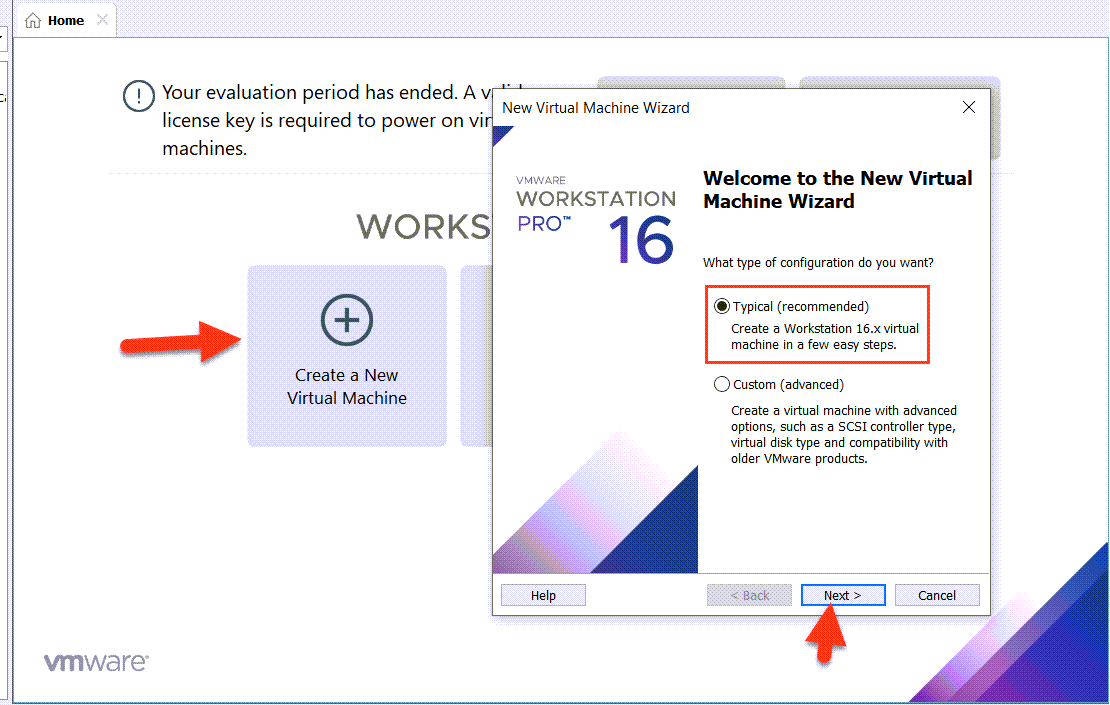 Create a new virtual machine
 2. Then, select the last option that is ‘I will install the operating system later’, and click next.
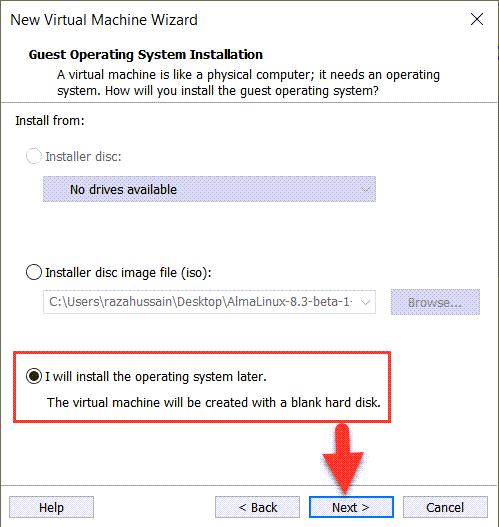 Install the OS later
 3. Now select ‘Apple Mac OS X’ from operating systems and the version should ‘macOS 11.1’ again click next.
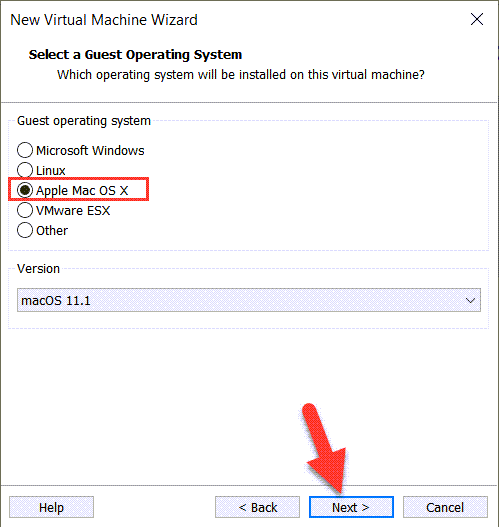 Apple Mac OS X
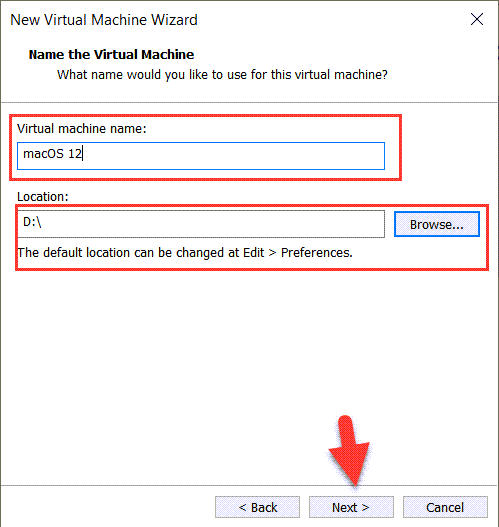
 4. Name the virtual machine, as I suggest to type macOS Monterey to find out easily. Also, select a location for the virtual machine file, for that click Browse.
5. Specify the disk size for macOS Monterey. It would be better if you increase the size up to 50GB. And select Store virtual disk as a single file the click next.
 Specify disk size
 6. On ready to create virtual machine window, click customize hardware.
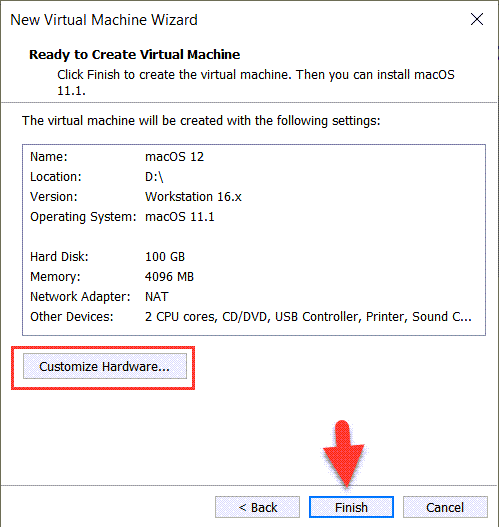 Customize hardware
 7. On customize window, go to the Memory tab and increase the size from 4GB up to 8GB for better performance.
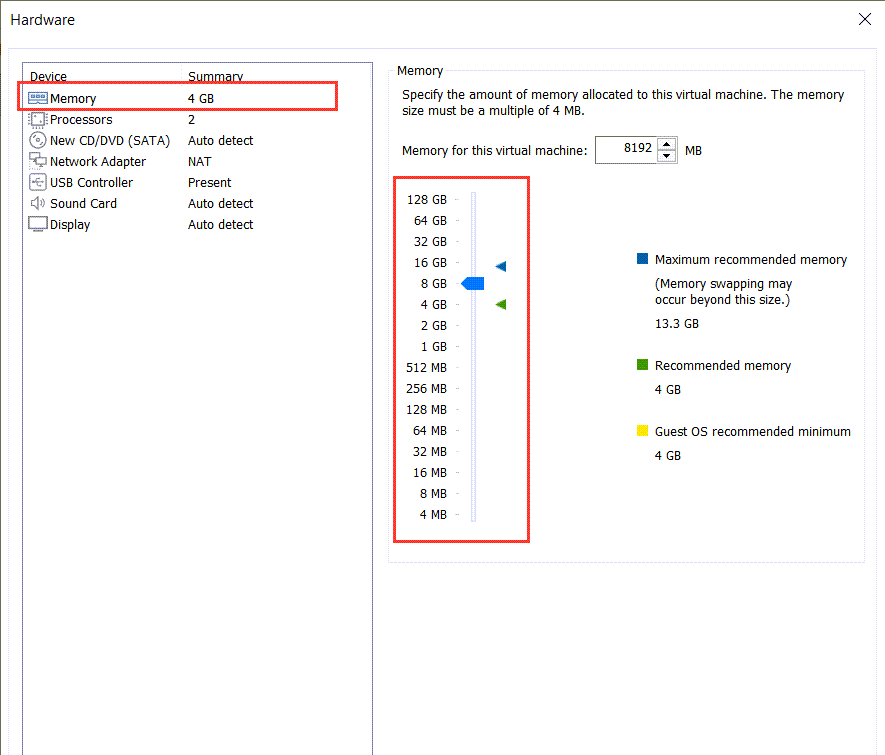 Memory
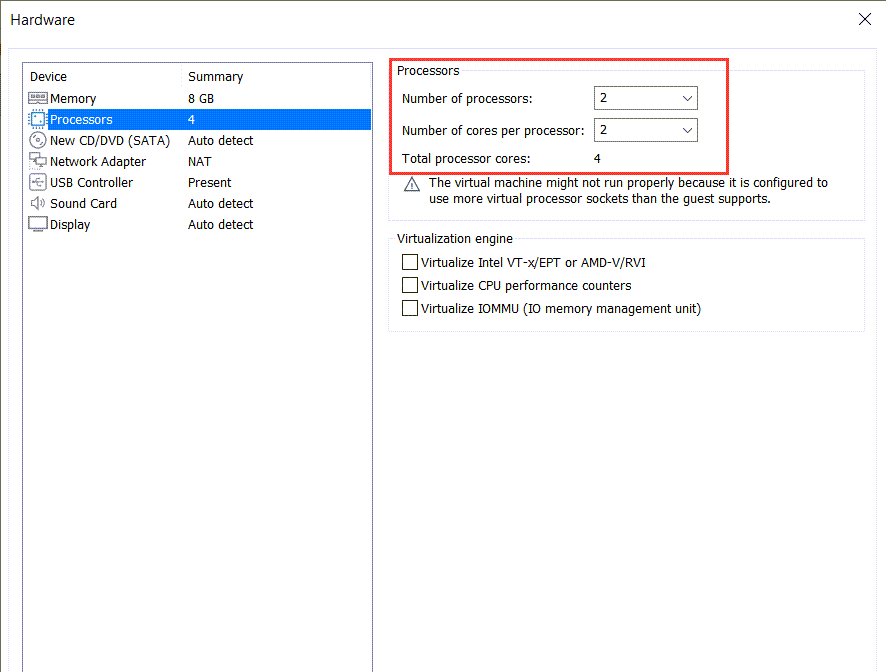
 8. Now head over towards the processor tab and increase the number up to 2.
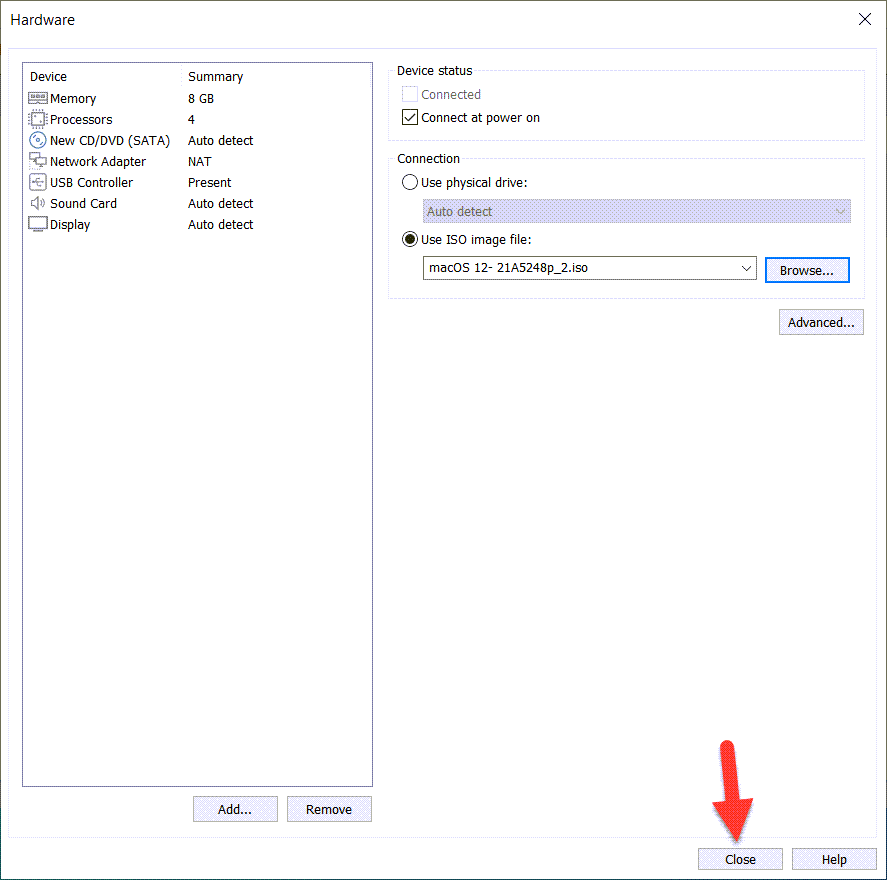
9. Go to the CD/DVD (SATA), then select Use ISO Image File: and click browse. Select the macOS Monterey ISO File which you have downloaded.
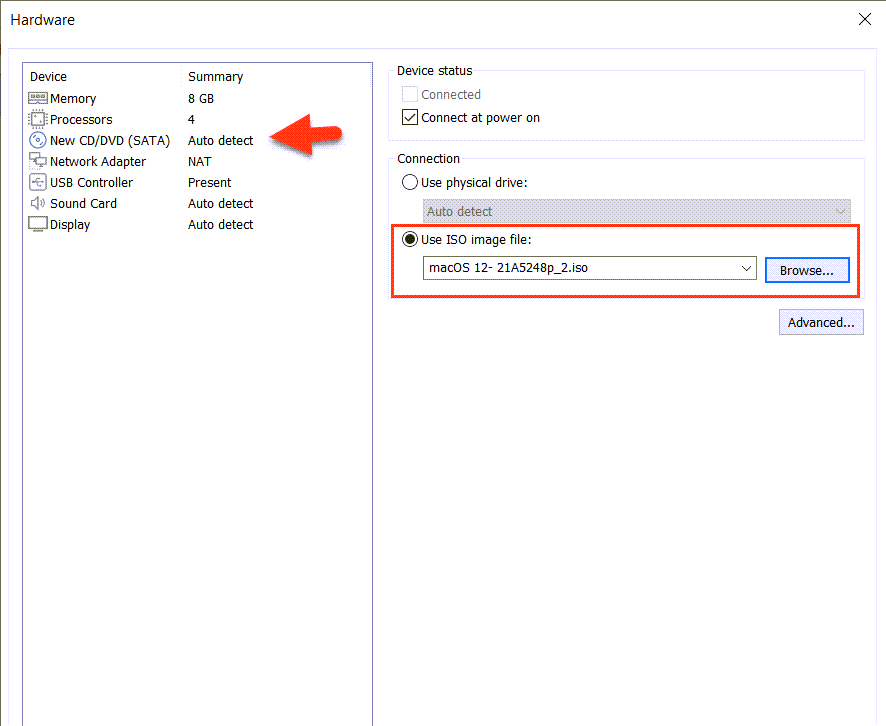 Use ISO image file
 Now, click close to save all the changes.
Step 5: Edit macOS Monterey VMX File
1. Find out the macOS Monterey file which you have just created. Then right-click on macOS Monterey.vmx and open with Notepad.
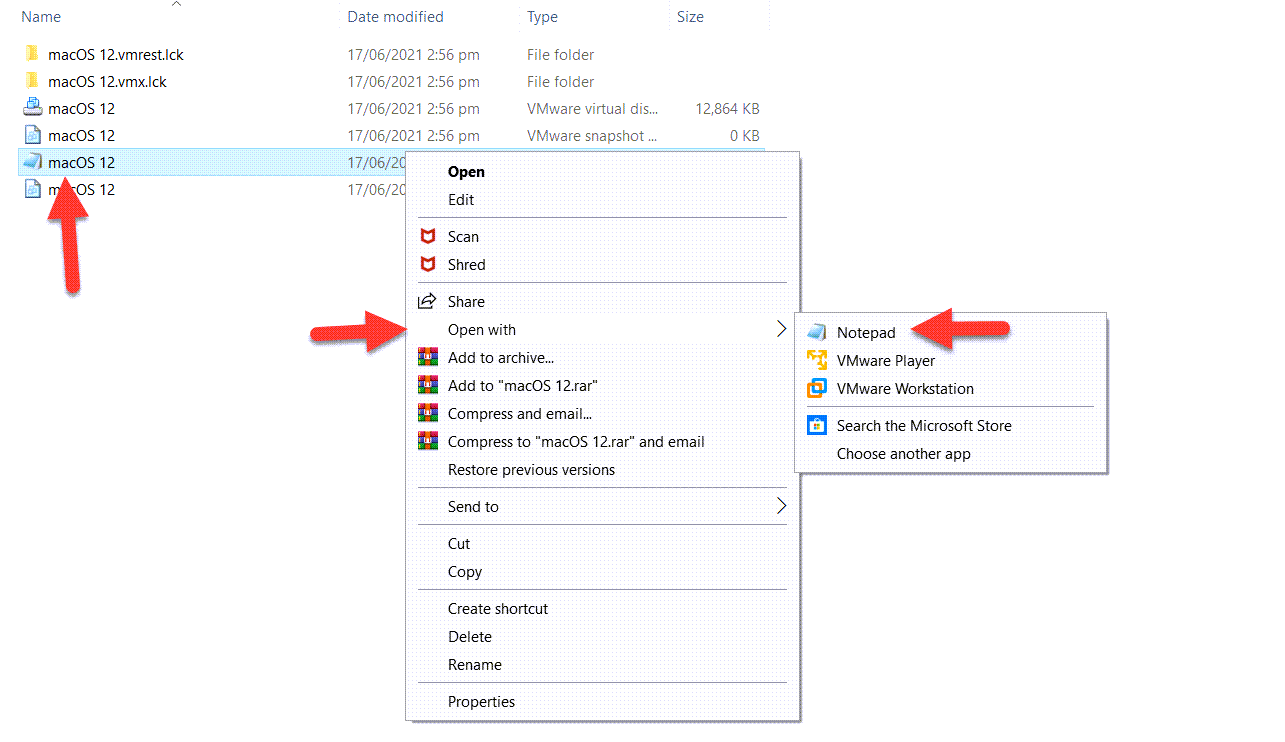 VMX File
 2. On Notepad, scroll down to the bottom and copy and paste the following code. Then save the Notepad and close it.
| smc.version = “0” |
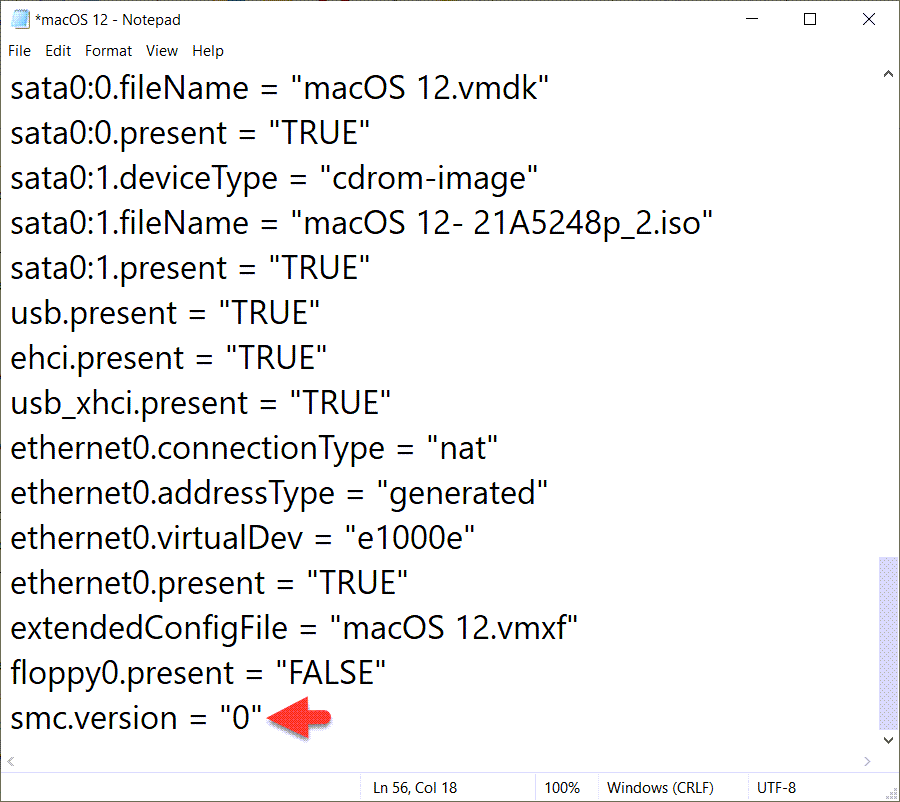 Paste code
 Step 6: Start macOS Monterey Virtual Machine
1. Once again open up the VMware Workstation, there click on the Power on Virtual Machine.
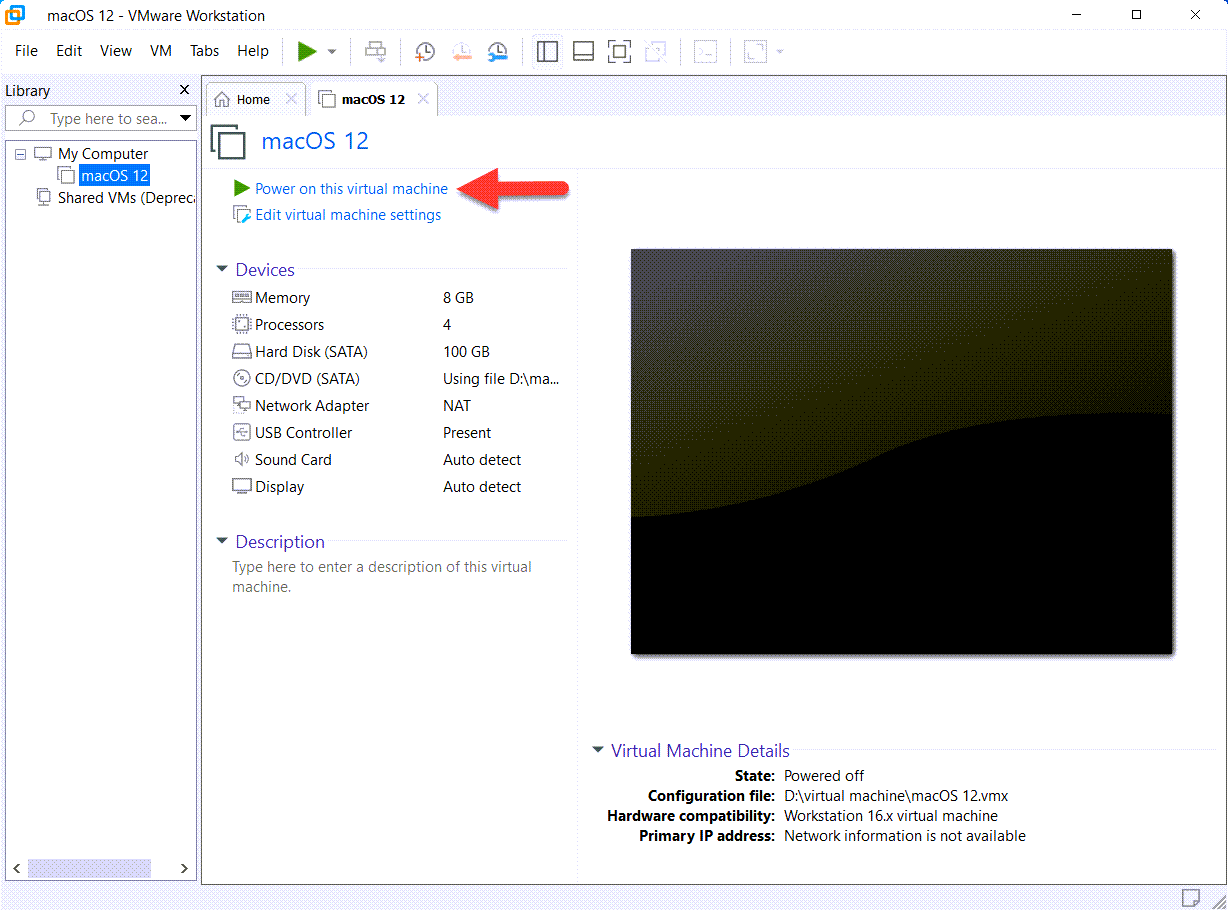 Power on this virtual machine
 2. Apple logo will appear, wait until it boots up.
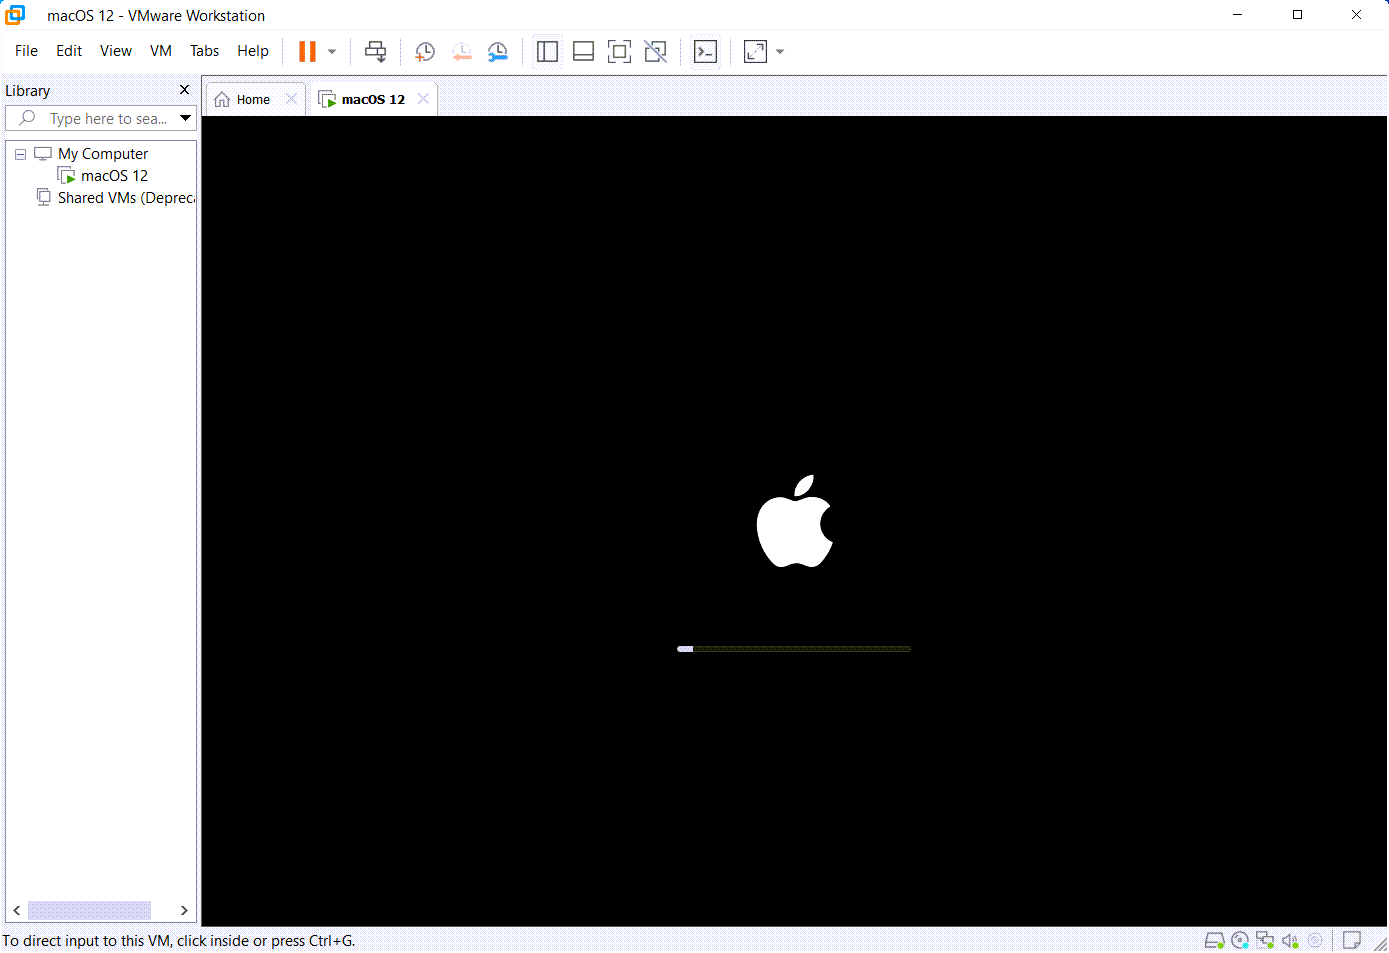 Booting
 3. Langauge window will be opened, select English and click on the Next arrow.
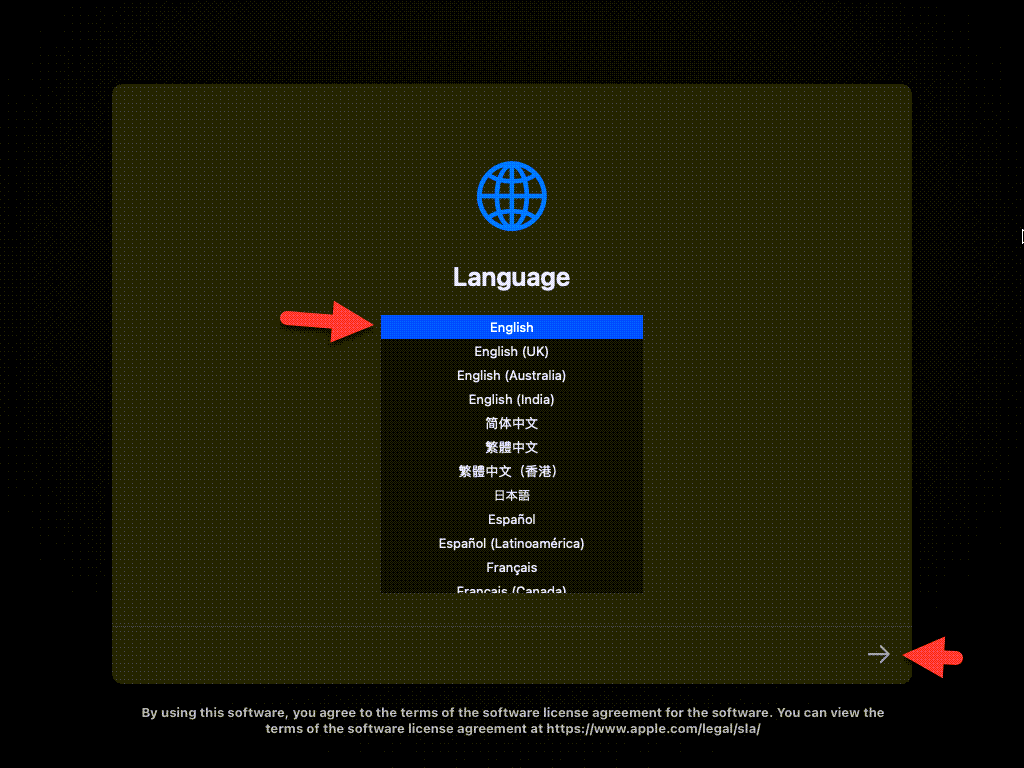 Language
 4. Now select the Disk Utility and click continue.
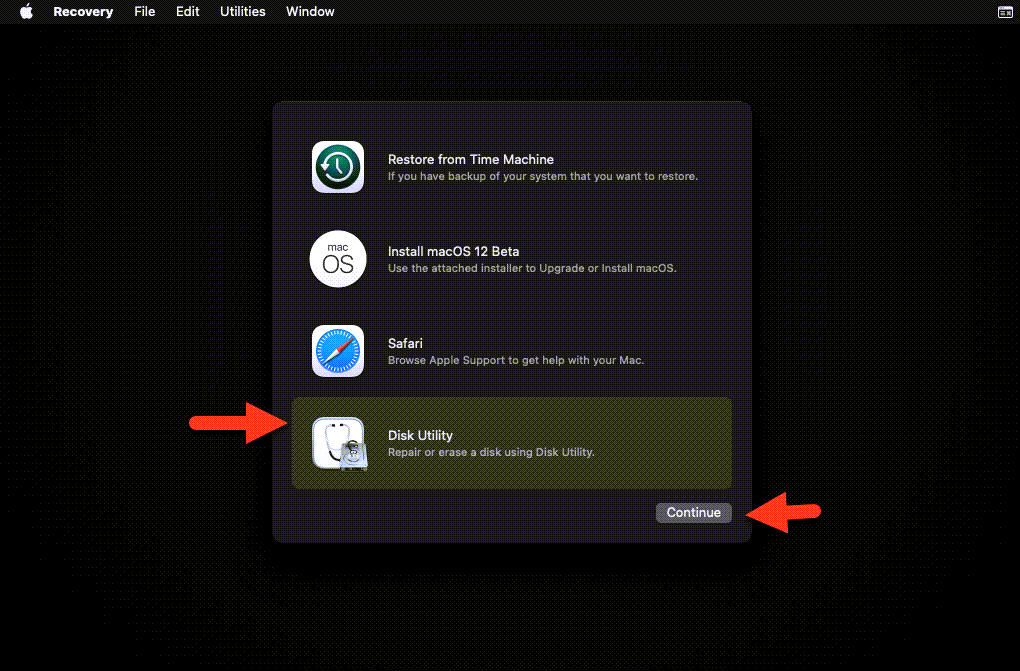 Disk Utility
 5. On the disk utility window, select VMware Virtual SATA Hard Drive Media and click Erase button.
 Erase disk
 6. Then, type the name macOS 12, select the APFS format, and click on the Erase button.
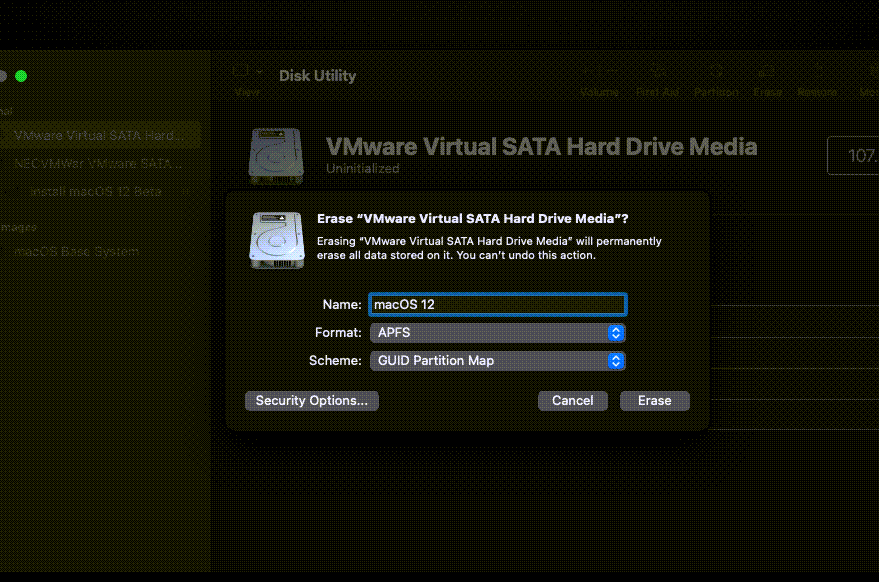 Erase now
 7. Click Done to close the small dialogue box on the screen.
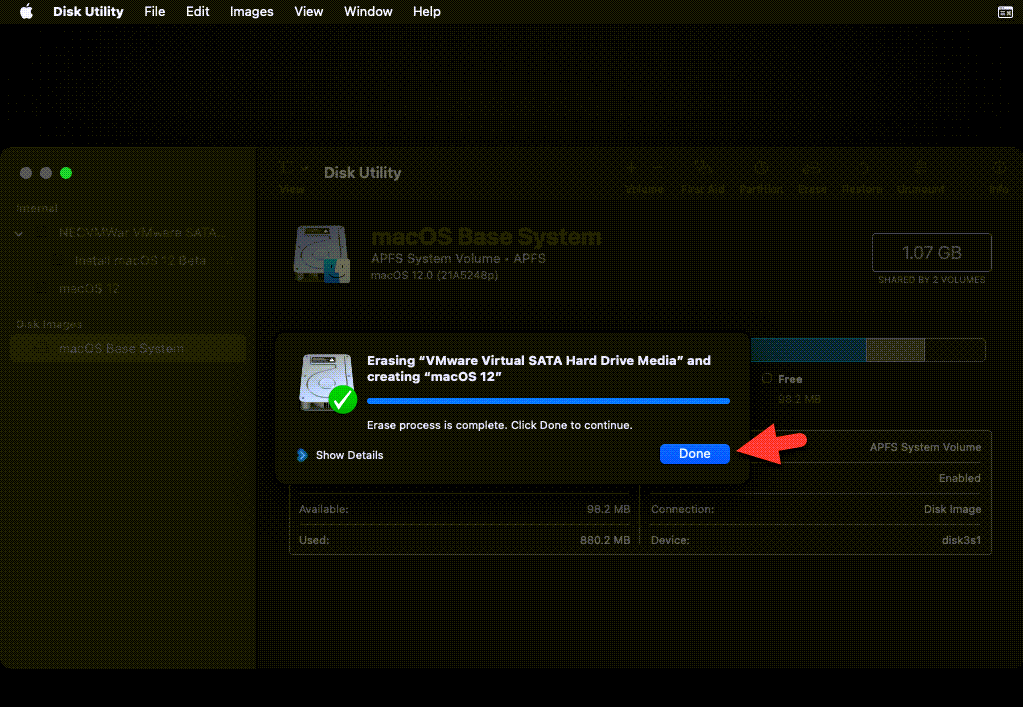 Done
Done 8. From the disk utility tab, you have to click Quit disk utility.
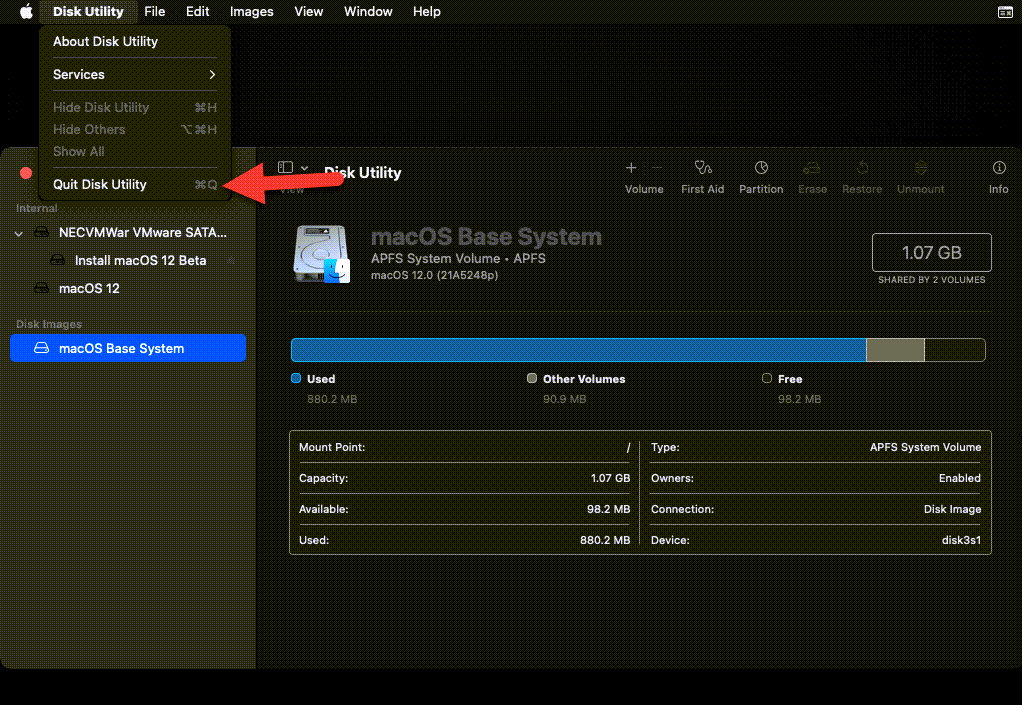 Install macOS Monterey on VMware
 9. After that, select Install macOS 12 Beta and click Continue.
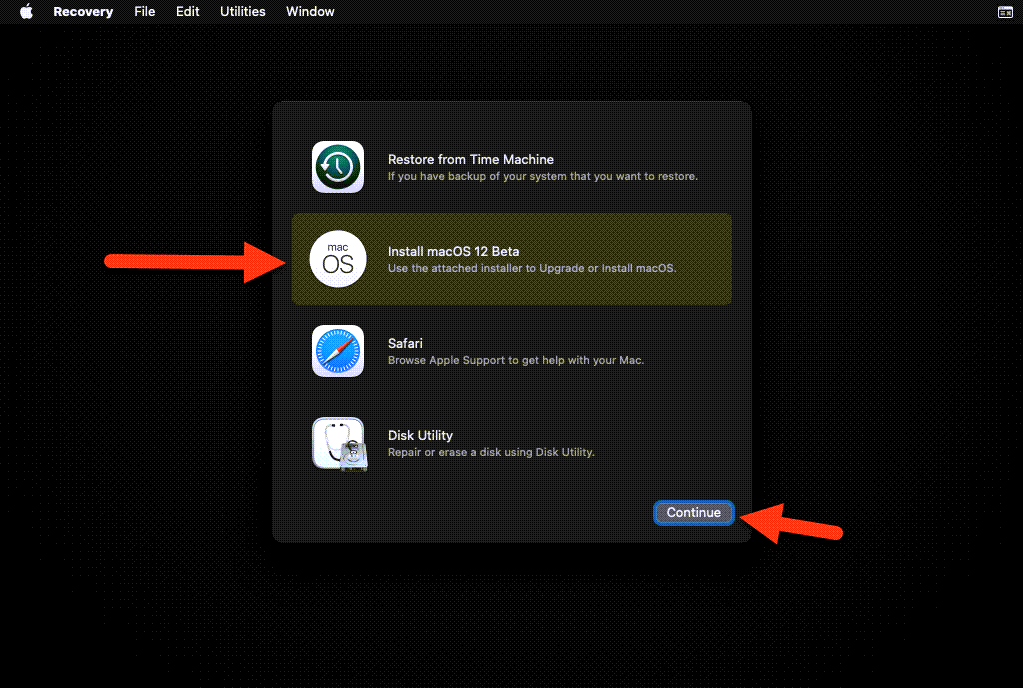 Install macOS 12 Beta
 10. Simply click Continue.
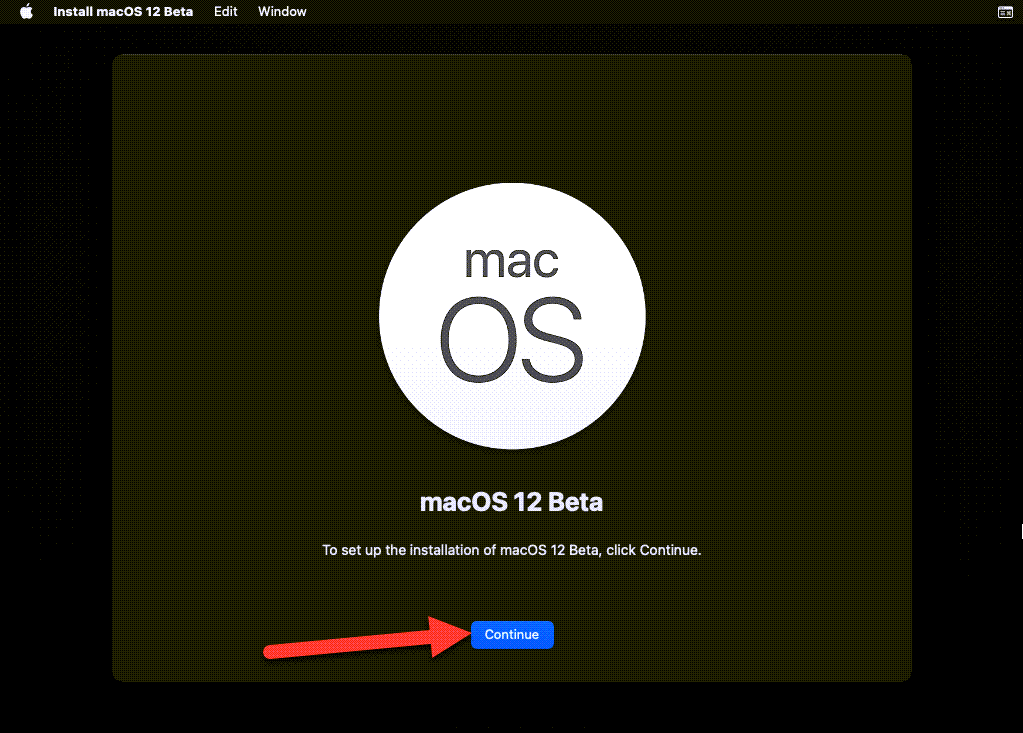 Continue
 11. Click Agree to the terms of the software license agreement.
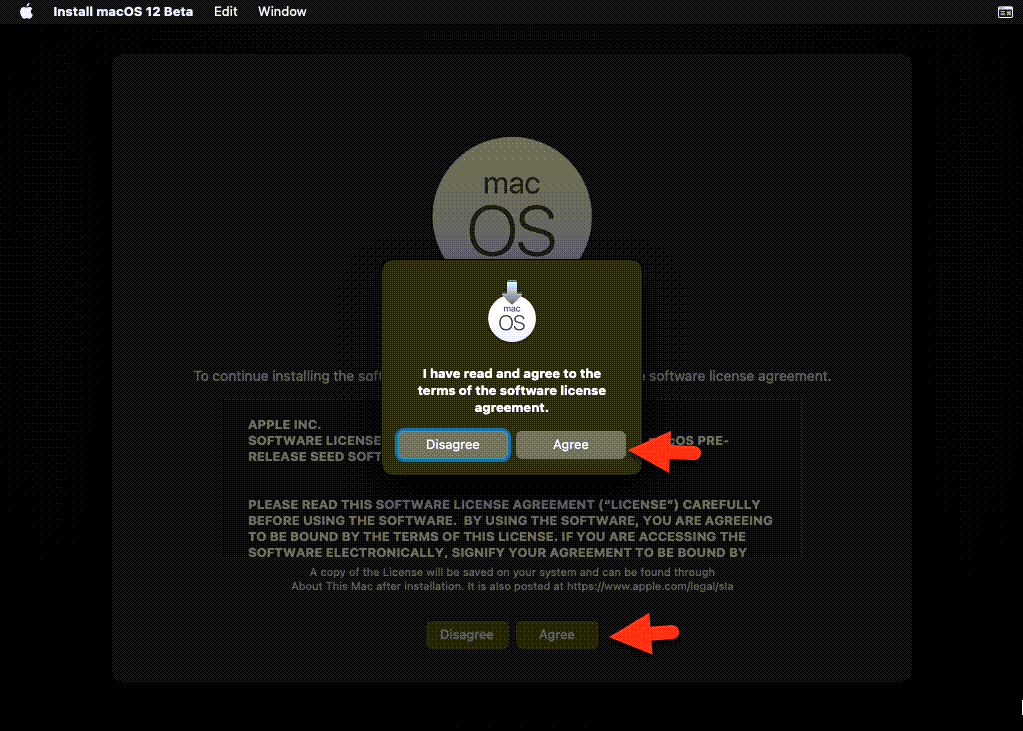 Agree to the software license agreement
 12. Select the appeared disk and click Install.
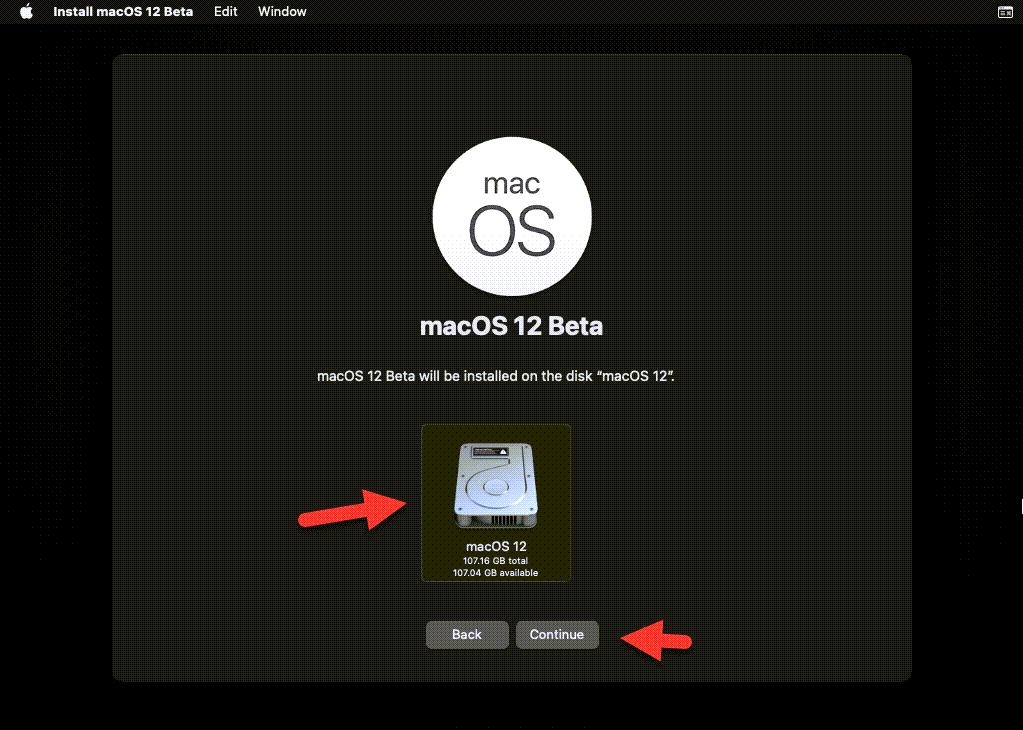 macOS disk
 13. Now, macOS will restart 2 or 3 times while installing, it will take some to be completed. So, just wait and be patient.
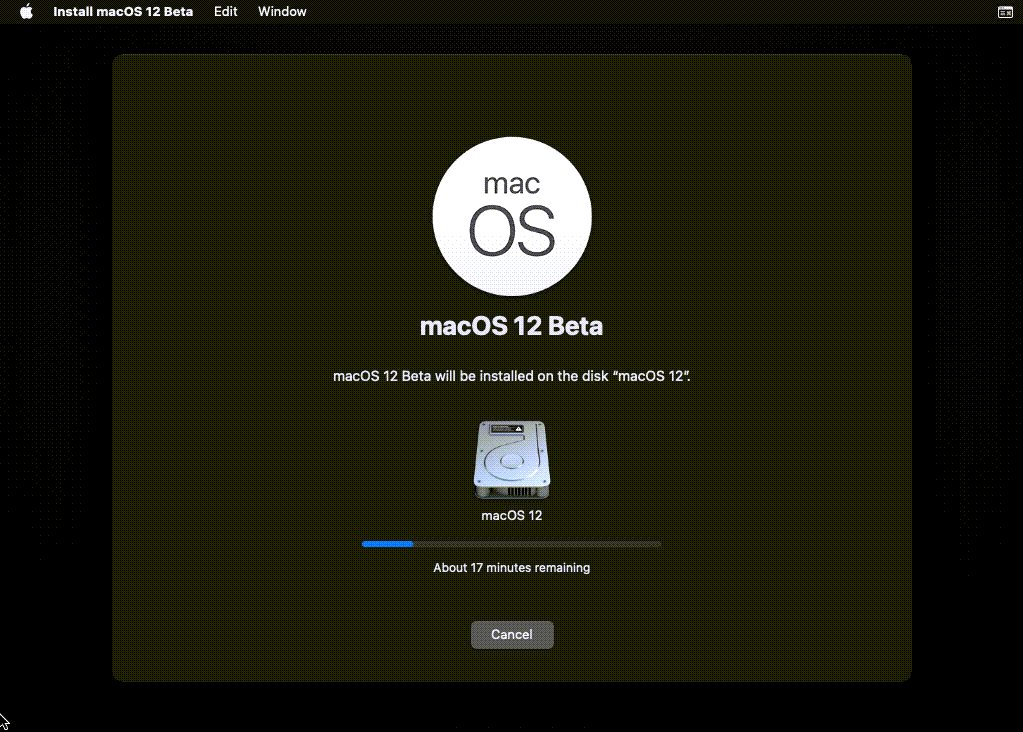 Installing macOS
 Step 7: Complete macOS Monterey Settings
- Select the Country and click Continue.
- Choose your keyboard layout for macOS Monterey.
- On the Accessibility page, choose the Not Now option.
- Select my computer doesn’t need to connect to the internet and click Continue.
- Click Continue to proceed.
- Data & Privacy window will appear, simply click Continue.
- Again click the Not Now option.
- Agree to the terms and agreements of macOS Monterey and click Continue.
- Complete the account details, Full name, account name, password, and hint then click Continue.
- Again click Continue, just go with default settings.
- On-screen time window, click on the setup later.
- On the Siri window, just click Continue.
- Select your favorite language for Safari.
- Then, Siri & dictation window will appear simply click Continue.
- Now, select your favorite theme for macOS Monterey whether light or dark theme.
- Wait until it should macOS Monterey for you.
- At last, you will have the beautiful screen of macOS Monterey.
Last Words
That’s all about How to Install macOS Monterey on VMware on Windows – PC. It was the best and step-by-step guide about installing macOS Monterey on VMware. Now, you can enjoy the unlimited features of macOS Monterey on VMware without any disturbance. However, if you are facing any kind of problem then share with us via comment, we will try to reply as soon as possible.
Tagged
Share This Article
In this article, I will show you how to install macOS Monterey on VMware on Windows. macOS Monterey is the greatest and newest operating system of Mac computer. That is called macOS Monterey. Apple has recently announced the new operating system on 7th June. Now macOS Monterey is a Beta version, it would be really better to install and test on a virtual machine. It contains a lot of handy features which show that it is better than macOS Monterey.
Installing and trying the new operating system on VMware is really useful. Because the new operating system is buggy and contains too much glitch which can also destroy the system. In this case, it is better to give it a try on the virtual machine. For step by step guide, you have to go through the below guidance.
Step 1: Download Required Files
To start installing macOS Monterey on VMware, you have to download or install some useful files which will be needed while the installation process. If you have these all files then you can skip this part. Here’s are all the necessary files, just click to download.
- Download VMware Workstation Pro (Latest Version).
- Download macOS Unlocker by TechSpite
- macOS Monterey ISO Image (Download now)
Step 2: Install VMware on your Windows – PC
- Download the VMware Workstation from the above section.
- Once it is downloaded, open up the folder where you have downloaded it. Double-click to open the installer window.
- On the installer window, click Next to proceed.
- Check the option ” I accept the terms in the license agreement ” and click next.
- Just click Next on all coming screens.
- Then, click Install and finish to close the installer window.
Step 3: Install macOS Unlocker to Install macOS on VMware
- At first, completely close the VMware Workstation from the desktop. Otherwise, the macOS unlocker won’t work.
Close VMware - Download the macOS unlocker from the above link, then open up the file. And find out the win-install.cmd right-click on it and choose run as administrator.
Run as administrator - It will start unlocking the macOS option in VMware Workstation.
Step 4: Create a New Virtual Machine
1. Open up the VMware and select ‘create a new virtual machine’. A new window will pop up, you have to select ‘Typical’ and click next.
Create a new virtual machine 2. Then, select the last option that is ‘I will install the operating system later’, and click next.
Install the OS later 3. Now select ‘Apple Mac OS X’ from operating systems and the version should ‘macOS 11.1’ again click next.
Apple Mac OS X 4. Name the virtual machine, as I suggest to type macOS Monterey to find out easily. Also, select a location for the virtual machine file, for that click Browse.
5. Specify the disk size for macOS Monterey. It would be better if you increase the size up to 50GB. And select Store virtual disk as a single file the click next.
Specify disk size 6. On ready to create virtual machine window, click customize hardware.
Customize hardware 7. On customize window, go to the Memory tab and increase the size from 4GB up to 8GB for better performance.
Memory 8. Now head over towards the processor tab and increase the number up to 2.
9. Go to the CD/DVD (SATA), then select Use ISO Image File: and click browse. Select the macOS Monterey ISO File which you have downloaded.
Use ISO image file Now, click close to save all the changes.
Step 5: Edit macOS Monterey VMX File
1. Find out the macOS Monterey file which you have just created. Then right-click on macOS Monterey.vmx and open with Notepad.
VMX File 2. On Notepad, scroll down to the bottom and copy and paste the following code. Then save the Notepad and close it.
| smc.version = “0” |
Paste code Step 6: Start macOS Monterey Virtual Machine
1. Once again open up the VMware Workstation, there click on the Power on Virtual Machine.
Power on this virtual machine 2. Apple logo will appear, wait until it boots up.
Booting 3. Langauge window will be opened, select English and click on the Next arrow.
Language 4. Now select the Disk Utility and click continue.
Disk Utility 5. On the disk utility window, select VMware Virtual SATA Hard Drive Media and click Erase button.
Erase disk 6. Then, type the name macOS 12, select the APFS format, and click on the Erase button.
Erase now 7. Click Done to close the small dialogue box on the screen.
Done 8. From the disk utility tab, you have to click Quit disk utility.
Install macOS Monterey on VMware 9. After that, select Install macOS 12 Beta and click Continue.
Install macOS 12 Beta 10. Simply click Continue.
Continue 11. Click Agree to the terms of the software license agreement.
Agree to the software license agreement 12. Select the appeared disk and click Install.
macOS disk 13. Now, macOS will restart 2 or 3 times while installing, it will take some to be completed. So, just wait and be patient.
Installing macOS Step 7: Complete macOS Monterey Settings
- Select the Country and click Continue.
- Choose your keyboard layout for macOS Monterey.
- On the Accessibility page, choose the Not Now option.
- Select my computer doesn’t need to connect to the internet and click Continue.
- Click Continue to proceed.
- Data & Privacy window will appear, simply click Continue.
- Again click the Not Now option.
- Agree to the terms and agreements of macOS Monterey and click Continue.
- Complete the account details, Full name, account name, password, and hint then click Continue.
- Again click Continue, just go with default settings.
- On-screen time window, click on the setup later.
- On the Siri window, just click Continue.
- Select your favorite language for Safari.
- Then, Siri & dictation window will appear simply click Continue.
- Now, select your favorite theme for macOS Monterey whether light or dark theme.
- Wait until it should macOS Monterey for you.
- At last, you will have the beautiful screen of macOS Monterey.
Last Words
That’s all about How to Install macOS Monterey on VMware on Windows – PC. It was the best and step-by-step guide about installing macOS Monterey on VMware. Now, you can enjoy the unlimited features of macOS Monterey on VMware without any disturbance. However, if you are facing any kind of problem then share with us via comment, we will try to reply as soon as possible.