How to Install SteamOS in VirtualBox – Step by Step
In this article, I am going to show you How to Install SteamOS in VirtualBox – Step by Step. SteamOS is the primary operating system for the Steam Machine gaming platform and Steam Deck hybrid video game console by Valve. The initial versions of SteamOS, versions 1.0 and 2.0, were based on the Debian distribution of Linux. If you are a gamer and playing games on a daily basis then you will probably know about SteamOS which is a great operating system for Gaming.
SteamOS is the latest and new operating system that is especially used for dedicated gaming computers. Most of the gamers really want to use and test SteamOS that how it looks like and how it functions. If you don’t want to buy an extra system from SteamOS then you can easily use it on your current computer. You don’t need to install it in place of your physical system, because if you have VirtualBox you won’t need to buy extra things. VirtualBox works similarly to your current system.
Believe me, you will like SteamOS in VirtualBox as hell. Because you will have all the functions and features of SteamOS in VirtualBox. If you want to install SteamOS in VirtualBox then you need to follow all the steps down below
Download Required Files
Steps to Install SteamOS in VirtualBox
Step 1. Open your computer and then open then VirtualBox and click on the New.
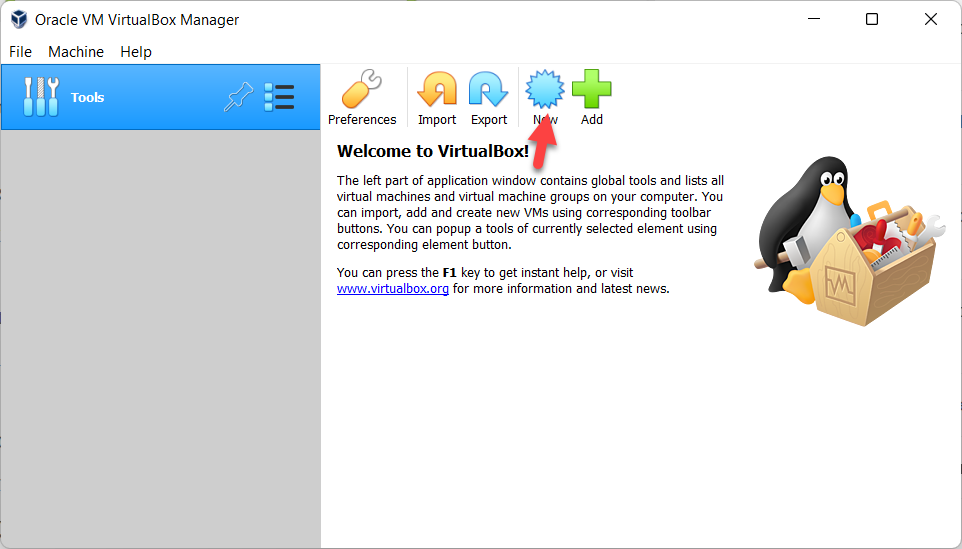 Click On The New
 Step 2. Now, in name type, SteamOS and select a type from the Linux and install the version in Debian (64 bit) and click on the Next.
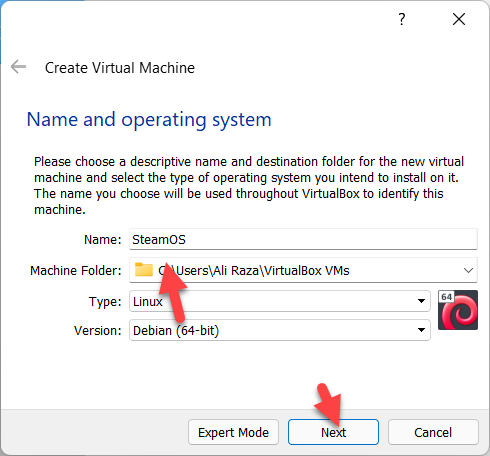 Click On The Next
 Step 3. Select the amount of RAM you want to allocate to the virtual machine and then click on the Next.
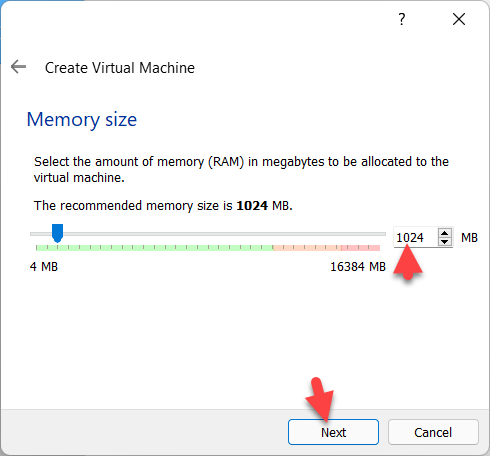 Click On The Next
 Step 4. Select the Create a virtual hard drive now and click on the Create.
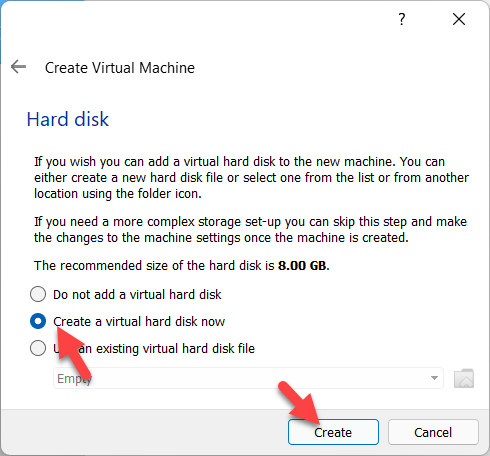 Click On The Create
 Step 5. Select the VDI and then click on the Next.
 Click On The Next
 Step 6. Select the Dynamically allocated and click on the Next.
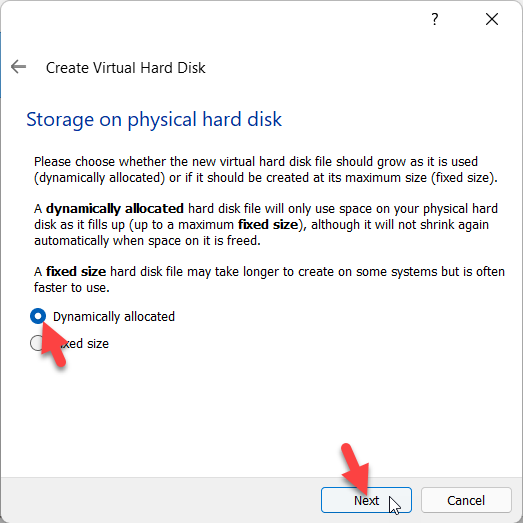 Click On The Next
 Step 7. Select your file location and select the amount of disk size you want and then click on the Create.
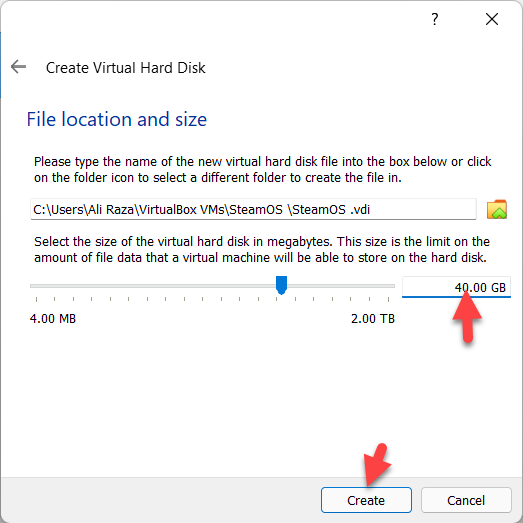 Click On The Create
 Edit your VM
Step 1. When it is created then click on the Setting.
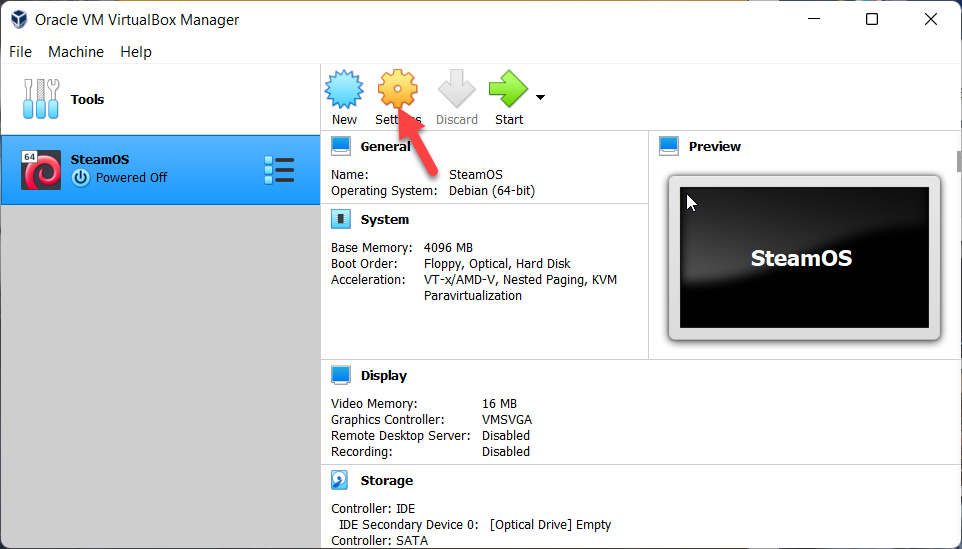 Click On The Setting
 Step 2. Go to the System tab and deselect the Floppy and click on the Enable EFI (special OSes only) checkbox.
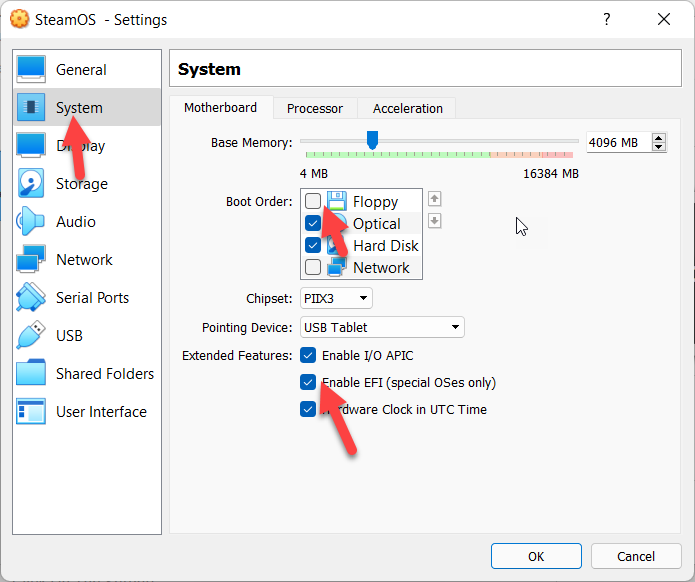 Click on the Enable EFI (special OSes only
 Step 3. Now Go to the Display tab and change the video memory settings to 128 MB Click On the Enable 3D Acceleration.
 Click On the Enable 3D Acceleration
 Step 4. Go to the Storage tab and click on the empty and then click on the CD icon and click on the Choose/create a Virtual optical Disk.
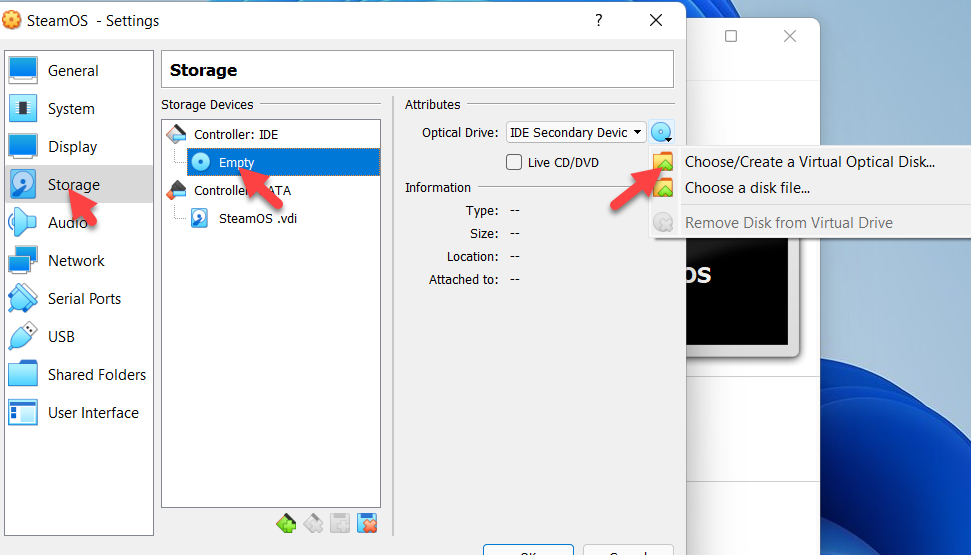 Click on the Choose/create a Virtual optical Disk.
 Step 5. Now, Select the SteamOSDVD.iso file and click on the Open.
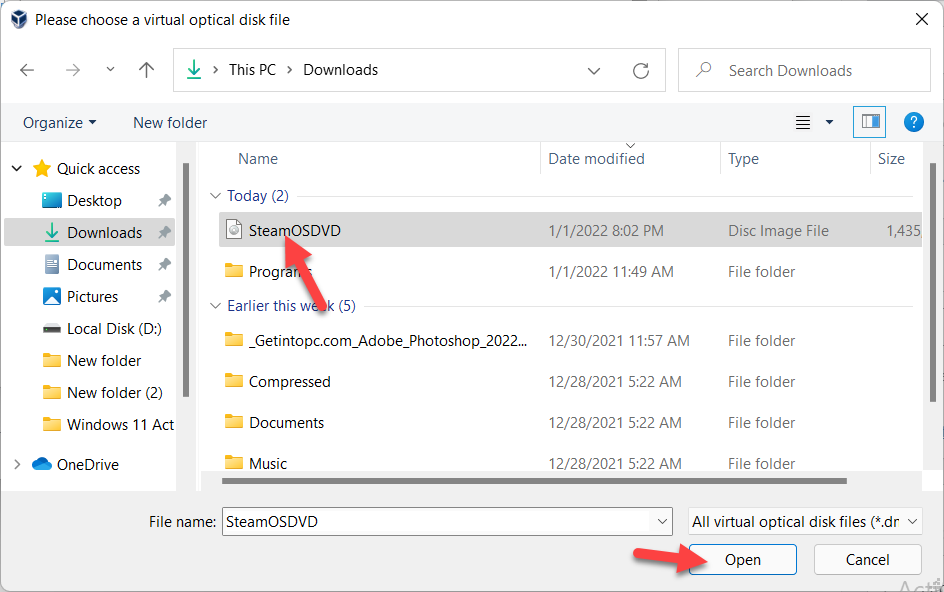 Click On The Open
 Step 6. Go to the Network tab and change the network adapter to Bridged Adapter.
 Select the Bridged Adapter
 Install Steam OS
Step 1. Now, when all thing is done then click on the Start.
 Click On The Start
 Step 2. Select the Automated install “WILL ERASE DISK and press enter.
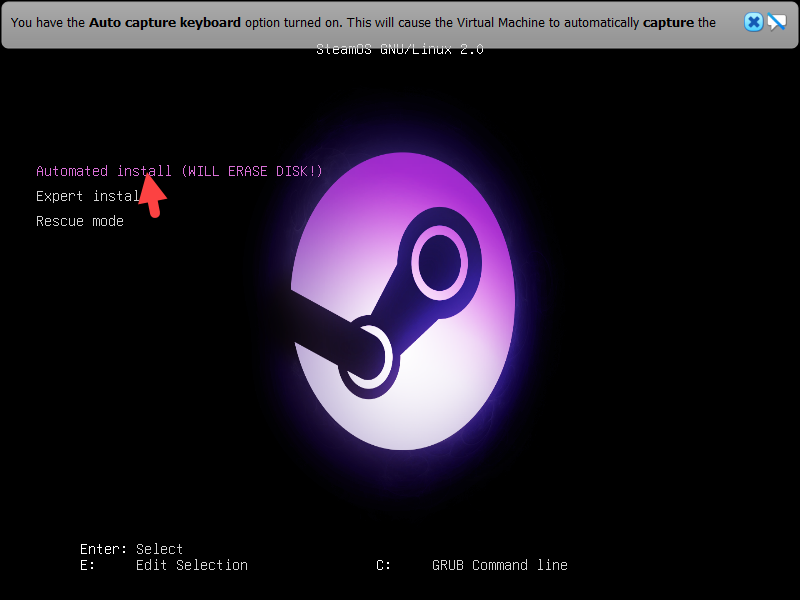 Select the Automated install “WILL ERASE DISK
 Step 3. Wait for installing it take some minute.
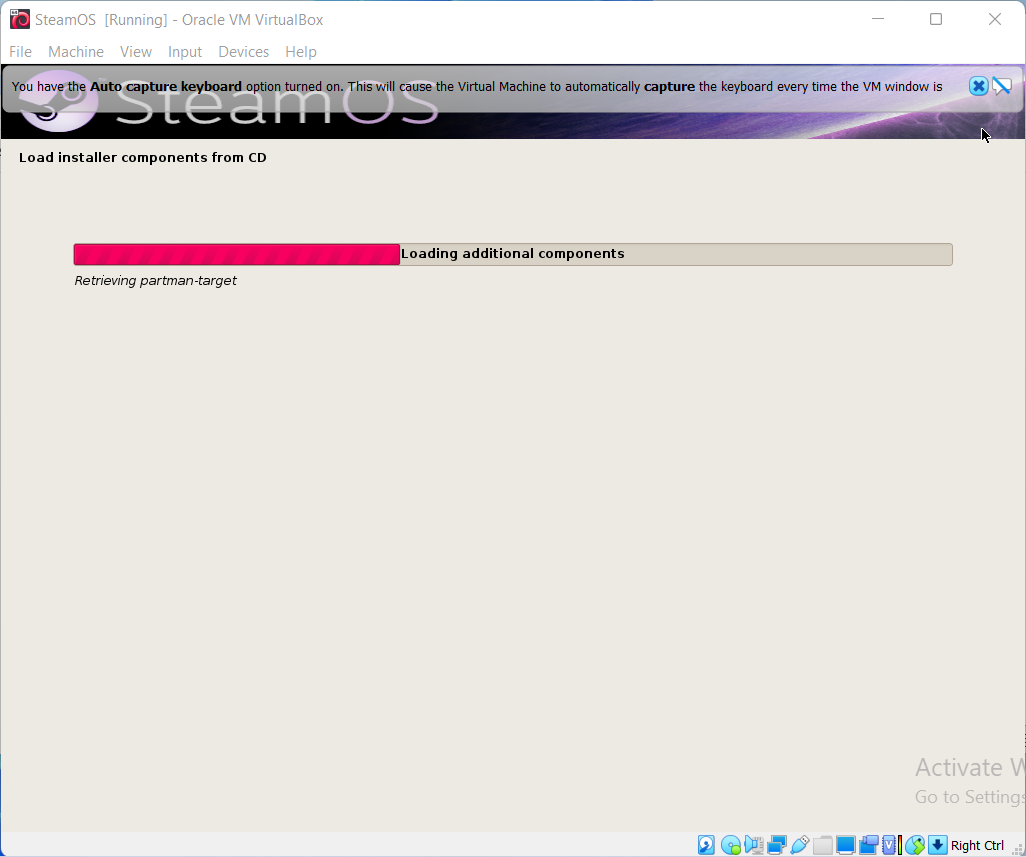 Wait for installing
 Step 4. First login steam and then automatically begin downloading any updates that are available.
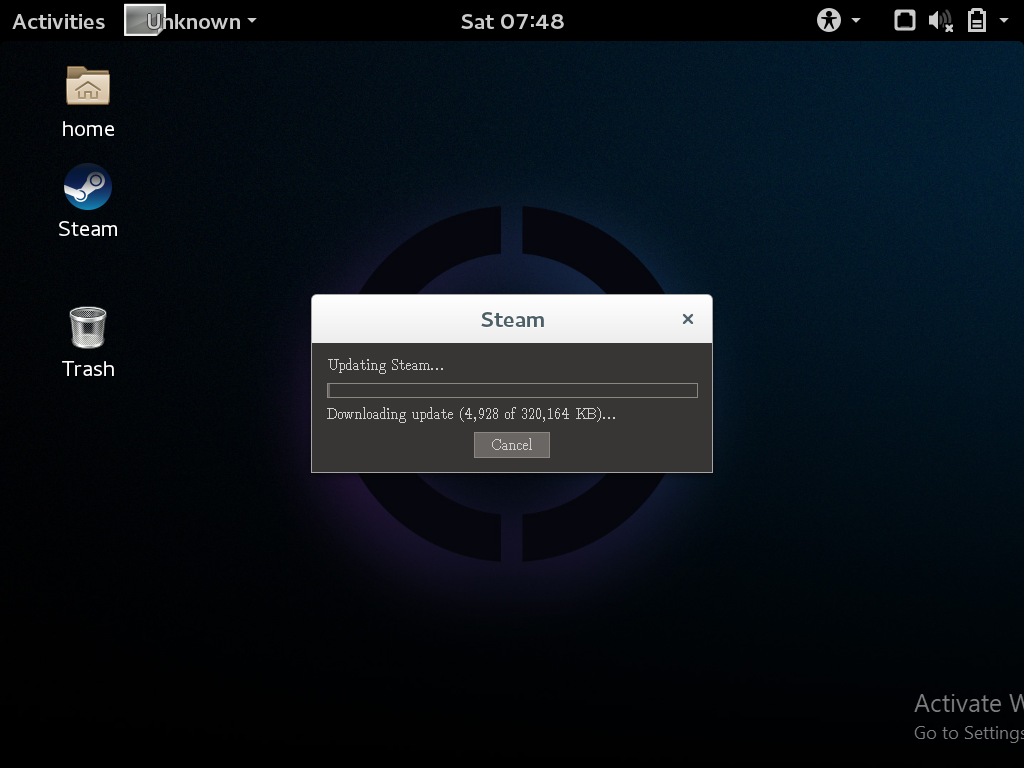 automatically begin downloading any updates
 Step 5. When it is done downloading, it will automatically install any updates it downloads.
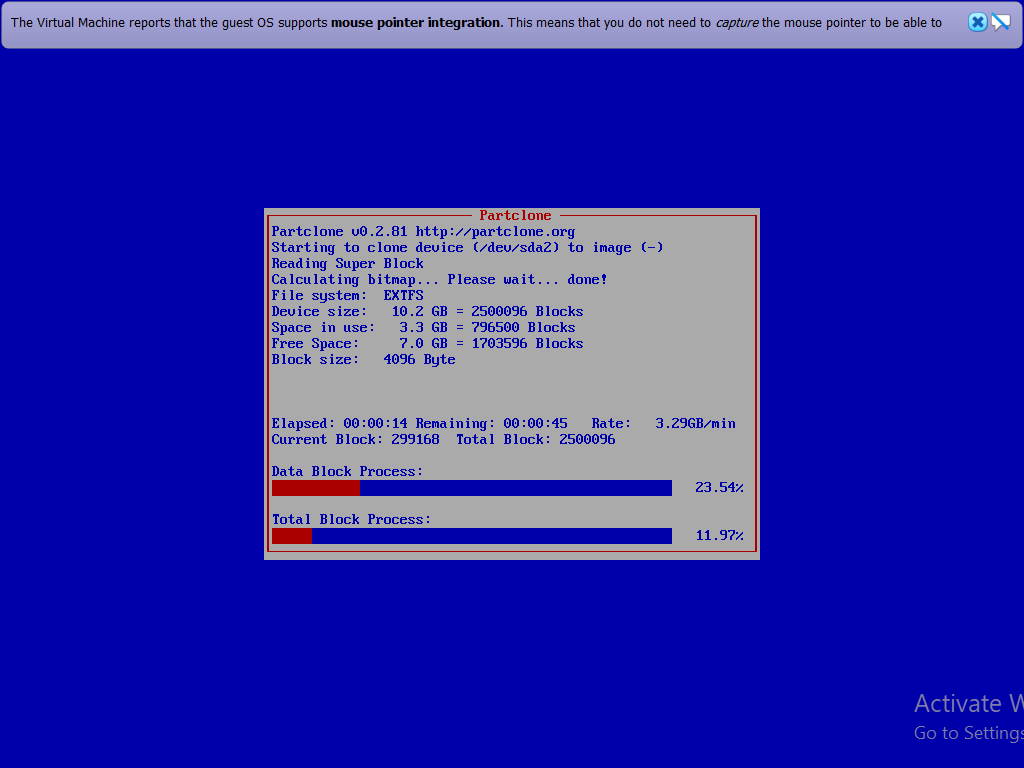 it will automatically install any updates it downloads
 Step 6. Eventually, you will be given the option to reboot and click on the OK.
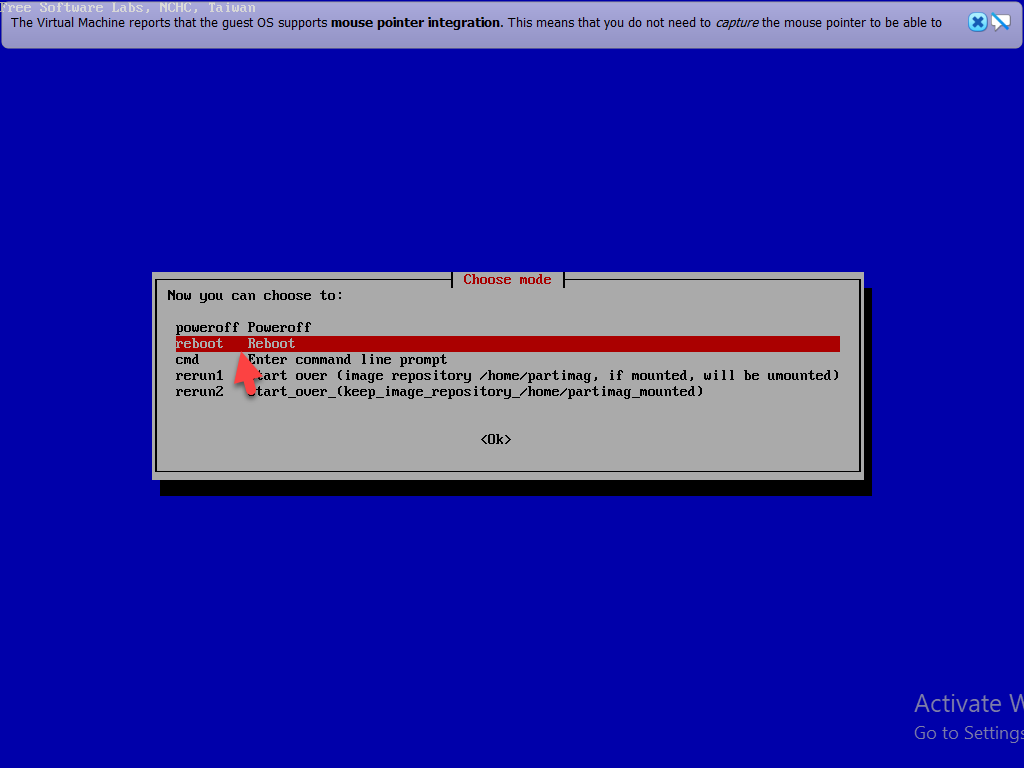 Click On The Ok
 Step 7. Select your language and click on the Next.
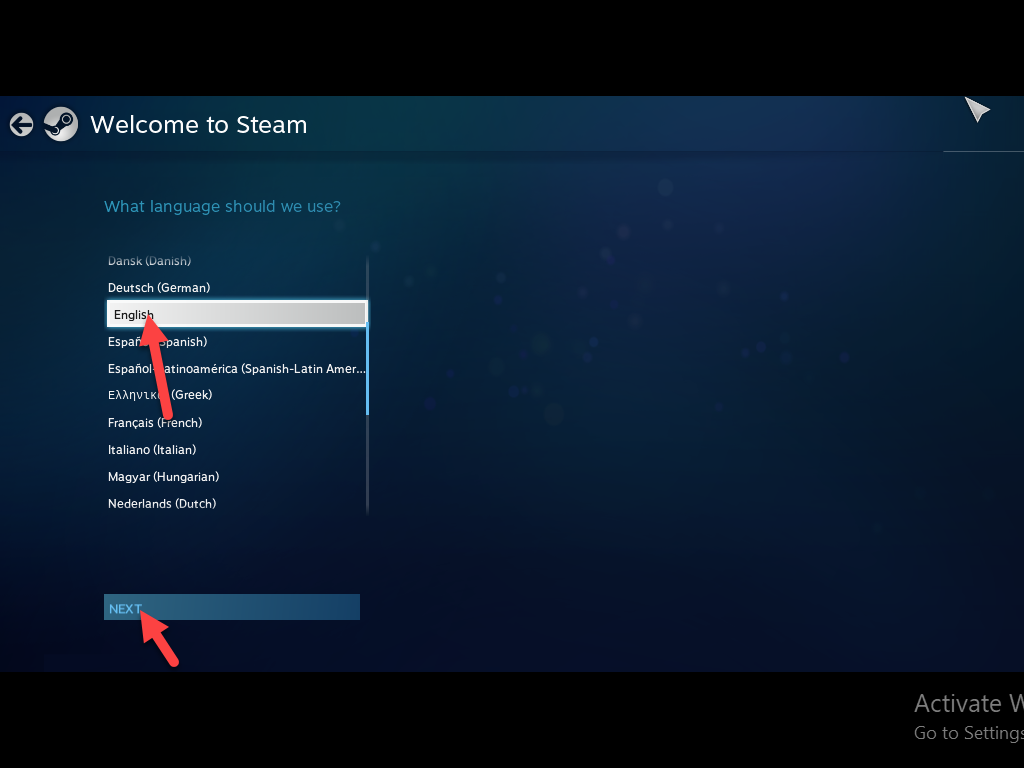 Click On The Next
 Step 8. Click on the I Agree.
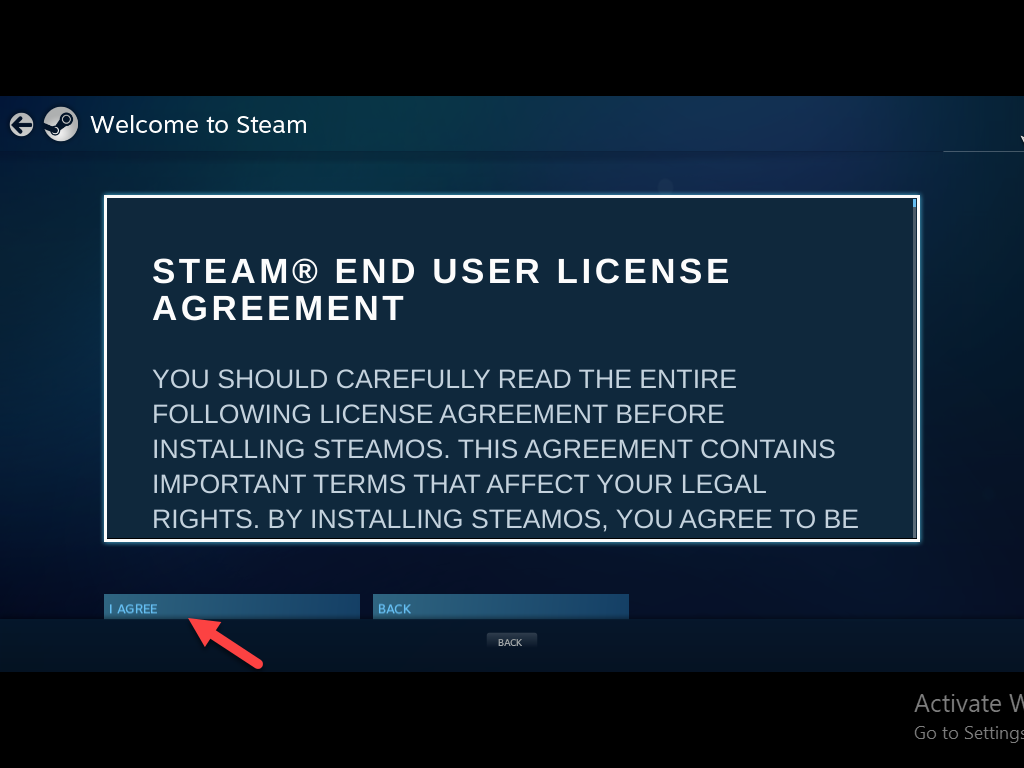 Click On The I Agree
 Step 9. Click on the Run Stream Now.
 Click on the Run Stream Now
 Step 10. Now, Stream is downloaded in VirtualBox.
 Stream is downloaded in VirtualBox
 Bottom Line:
It was all about How to Install SteamOS in VirtualBox – Step by Step. I hope this article is very helpful for you to add a follow button. From this article, you will get something good. This is the right place where you can easily solve your problem. After following these steps I hope you will not face any kind of problem. If you faced any kind of problem and if you have any type of suggestions then do comment.
Related Link:
Share This Article
In this article, I am going to show you How to Install SteamOS in VirtualBox – Step by Step. SteamOS is the primary operating system for the Steam Machine gaming platform and Steam Deck hybrid video game console by Valve. The initial versions of SteamOS, versions 1.0 and 2.0, were based on the Debian distribution of Linux. If you are a gamer and playing games on a daily basis then you will probably know about SteamOS which is a great operating system for Gaming.
SteamOS is the latest and new operating system that is especially used for dedicated gaming computers. Most of the gamers really want to use and test SteamOS that how it looks like and how it functions. If you don’t want to buy an extra system from SteamOS then you can easily use it on your current computer. You don’t need to install it in place of your physical system, because if you have VirtualBox you won’t need to buy extra things. VirtualBox works similarly to your current system.
Believe me, you will like SteamOS in VirtualBox as hell. Because you will have all the functions and features of SteamOS in VirtualBox. If you want to install SteamOS in VirtualBox then you need to follow all the steps down below
Download Required Files
Steps to Install SteamOS in VirtualBox
Step 1. Open your computer and then open then VirtualBox and click on the New.
Click On The New Step 2. Now, in name type, SteamOS and select a type from the Linux and install the version in Debian (64 bit) and click on the Next.
Click On The Next Step 3. Select the amount of RAM you want to allocate to the virtual machine and then click on the Next.
Click On The Next Step 4. Select the Create a virtual hard drive now and click on the Create.
Click On The Create Step 5. Select the VDI and then click on the Next.
Click On The Next Step 6. Select the Dynamically allocated and click on the Next.
Click On The Next Step 7. Select your file location and select the amount of disk size you want and then click on the Create.
Click On The Create Edit your VM
Step 1. When it is created then click on the Setting.
Click On The Setting Step 2. Go to the System tab and deselect the Floppy and click on the Enable EFI (special OSes only) checkbox.
Click on the Enable EFI (special OSes only Step 3. Now Go to the Display tab and change the video memory settings to 128 MB Click On the Enable 3D Acceleration.
Click On the Enable 3D Acceleration Step 4. Go to the Storage tab and click on the empty and then click on the CD icon and click on the Choose/create a Virtual optical Disk.
Click on the Choose/create a Virtual optical Disk. Step 5. Now, Select the SteamOSDVD.iso file and click on the Open.
Click On The Open Step 6. Go to the Network tab and change the network adapter to Bridged Adapter.
Select the Bridged Adapter Install Steam OS
Step 1. Now, when all thing is done then click on the Start.
Click On The Start Step 2. Select the Automated install “WILL ERASE DISK and press enter.
Select the Automated install “WILL ERASE DISK Step 3. Wait for installing it take some minute.
Wait for installing Step 4. First login steam and then automatically begin downloading any updates that are available.
automatically begin downloading any updates Step 5. When it is done downloading, it will automatically install any updates it downloads.
it will automatically install any updates it downloads Step 6. Eventually, you will be given the option to reboot and click on the OK.
Click On The Ok Step 7. Select your language and click on the Next.
Click On The Next Step 8. Click on the I Agree.
Click On The I Agree Step 9. Click on the Run Stream Now.
Click on the Run Stream Now Step 10. Now, Stream is downloaded in VirtualBox.
Stream is downloaded in VirtualBox Bottom Line:
It was all about How to Install SteamOS in VirtualBox – Step by Step. I hope this article is very helpful for you to add a follow button. From this article, you will get something good. This is the right place where you can easily solve your problem. After following these steps I hope you will not face any kind of problem. If you faced any kind of problem and if you have any type of suggestions then do comment.
Related Link: