How to Install VirtualBox Extension Pack and Enable USB 3.0
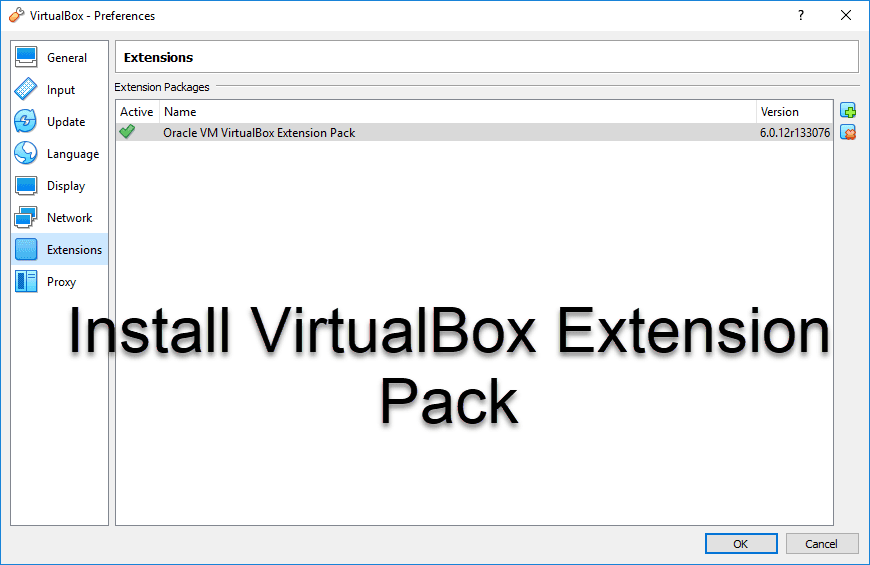

In this article, I am going to guide you on How to Install VirtualBox Extension Pack and Enable USB 3.0. As you might know, there many virtual machines available on the Internet. But as my experience, VirtualBox is one of the best virtualization software in today’s market. Therefore, it allows you in order to try and install any operating system such as Linux, macOS Mojave, macOS Catalina, and many more you want. However, you might don’t know about the Extension Pack of the VirtualBox.
So, Extension is like a tool and combination of drivers that work in order to increase the functionalities and will add some useful features of VirtualBox. Especially, it will also enable and allow you in order to use USB 2.0 and USB 3.0 with your virtual machine. This means that you can use devices attached to these ports and open them on the virtual machine created. Therefore, the following steps will help you to install the VirtualBox Extension Pack on Windows.
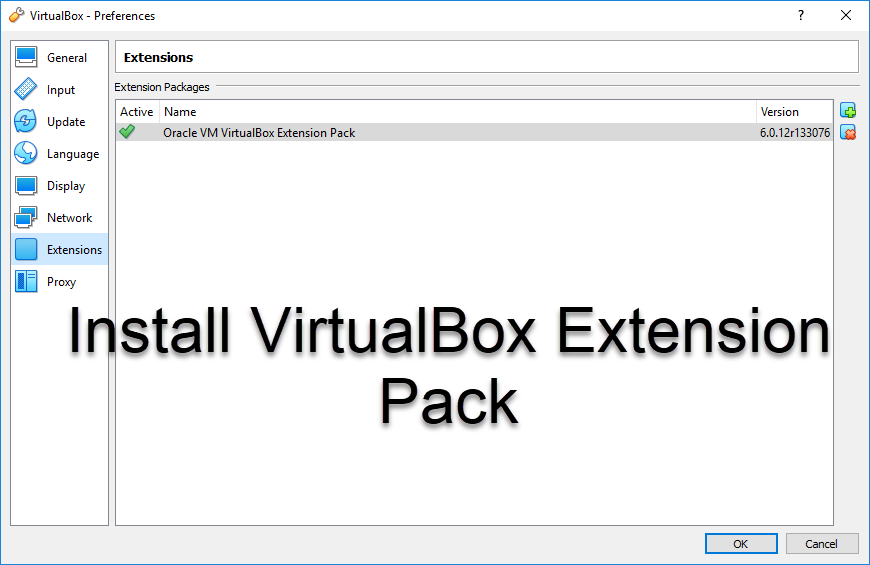 How to Install VirtualBox Extension Pack and Enable USB 3.0
Install VirtualBox Extension Pack
First of all, you have to download the VirtualBox Extension Pack. You can only find the genuine VirtualBox Extension Pack on the VirtualBox download web page. Simple access the page and click on the latest version of the VirtualBox Extension Pack. So, click on the link below in order to install the Extension Pack.
Step 1. When you successfully downloaded Extension Pack from the above link. Then launch your VirtualBox from your PC.
Step 2. Once it launches, then you need to click on the Preferences in order to access the Setting of your VirtualBox.
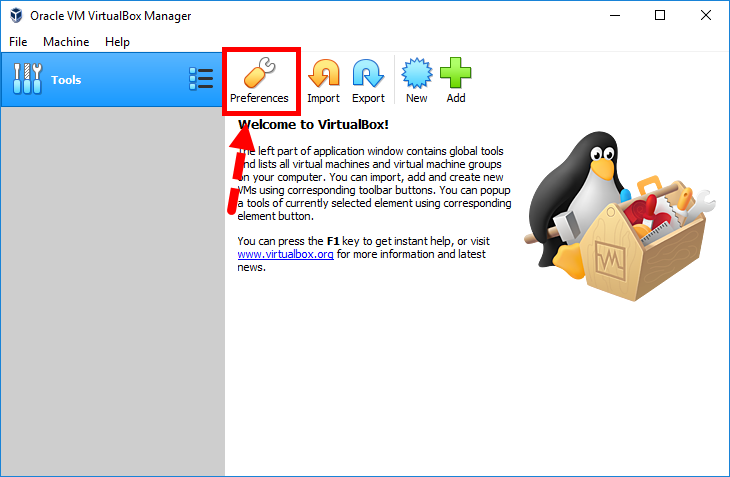 Preferences
Step 3. After that, you will see many options on the left side of the preferences window, so you need to click on the Extensions under the Network option.
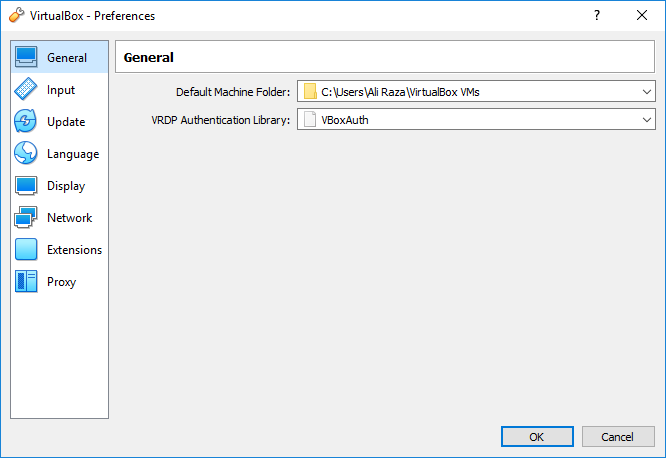 Extensions
Step 4. Next, you need to click on the plus icon from the right side of the screen. Then a new window will pop up, there you have to find the location and select the downloaded extension pack, and click on the Open when done.
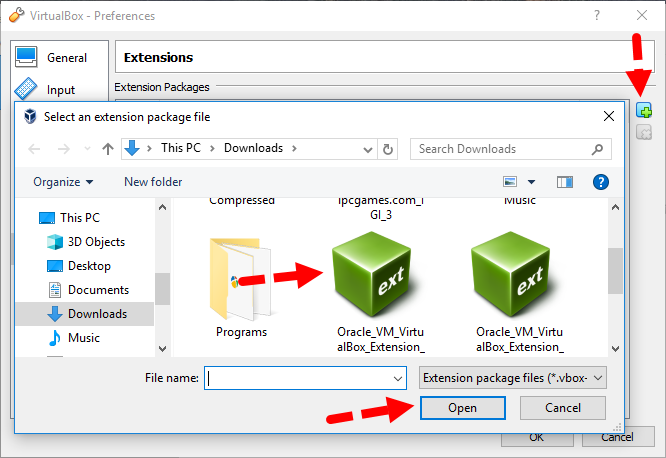 Add Extension Pack
Step 5. You have selected the extension pack, a new thing will pop up and ask permission to install the extension pack. So, if you really want to install it then make sure to click on the Install.
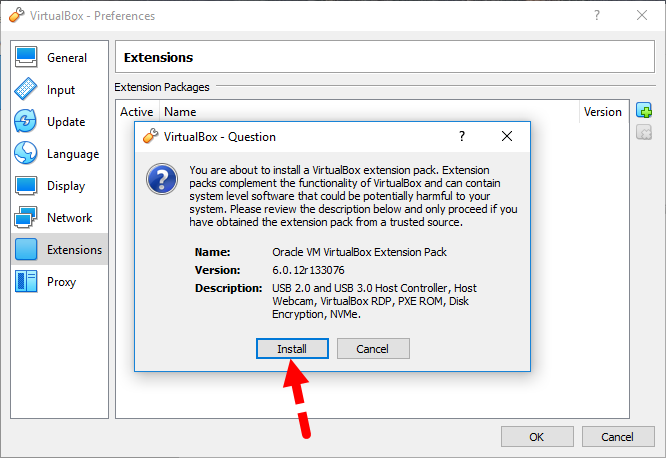 Install Extension Pack
Step 6. Then, you need to agree with the VirtualBox license, you have to scroll down up to the last and click on the I Agree.
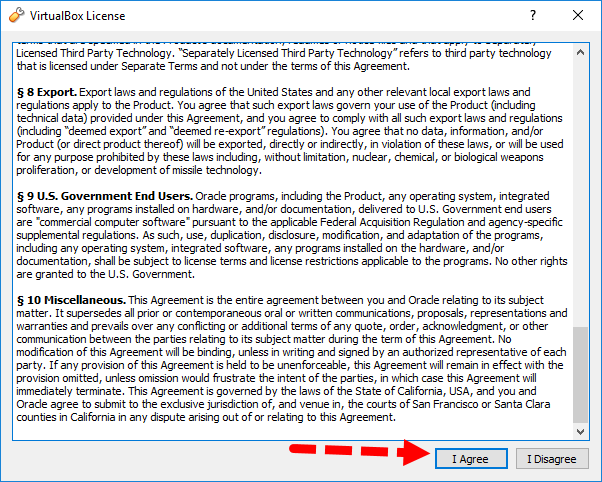 I Agree
Step 7. Installing VirtualBox Extension Pack will be started automatically. So, you have to wait for some seconds.
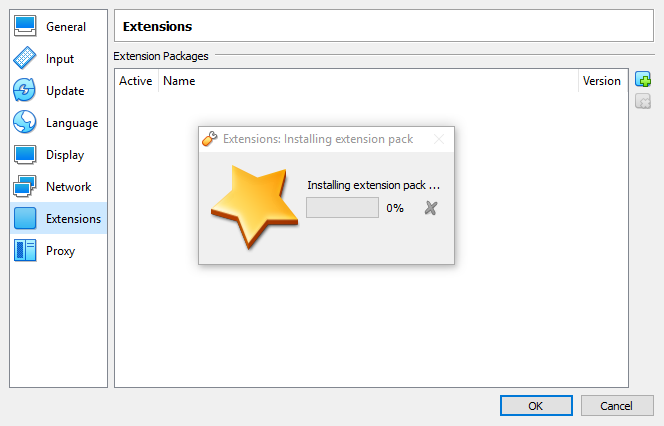 Installing Extension Pack
Enable USB 3.0 to Fix the problems on macOS
Open the Oracle VM VirtualBox Manager and select the virtual machine for which you would like to enable the USB support or Mouse, Keyboard. At the top of the list of virtual machines, click on “Settings”. Two panes will be shown.
On the left pane, click on the button next to USB to select it. On the right panel, click on the USB 3.0 controller.
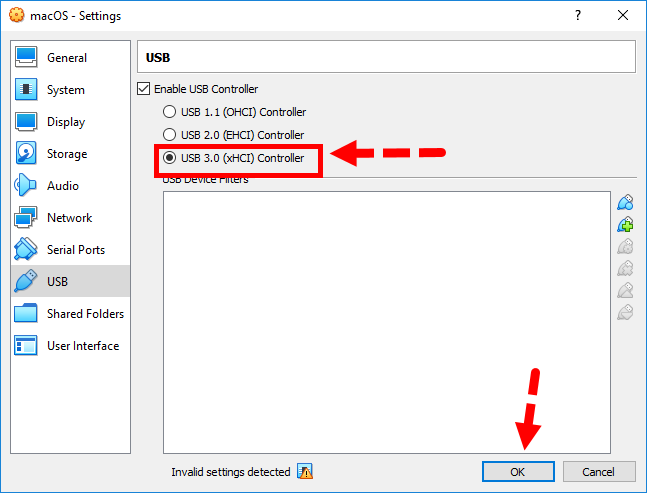 Enable USB 3.0
Final Words
That’s all about How to Install VirtualBox Extension Pack and Enable USB 3.0. The VirtualBox Extension Pack is a good addition to any virtual machine regardless of the operating system running it. I hope you found these steps useful for your VirtualBox. If you faced any kind of problem or question then feel free to comment below.
Tagged
Share This Article
In this article, I am going to guide you on How to Install VirtualBox Extension Pack and Enable USB 3.0. As you might know, there many virtual machines available on the Internet. But as my experience, VirtualBox is one of the best virtualization software in today’s market. Therefore, it allows you in order to try and install any operating system such as Linux, macOS Mojave, macOS Catalina, and many more you want. However, you might don’t know about the Extension Pack of the VirtualBox.
So, Extension is like a tool and combination of drivers that work in order to increase the functionalities and will add some useful features of VirtualBox. Especially, it will also enable and allow you in order to use USB 2.0 and USB 3.0 with your virtual machine. This means that you can use devices attached to these ports and open them on the virtual machine created. Therefore, the following steps will help you to install the VirtualBox Extension Pack on Windows.
 How to Install VirtualBox Extension Pack and Enable USB 3.0
Install VirtualBox Extension Pack
First of all, you have to download the VirtualBox Extension Pack. You can only find the genuine VirtualBox Extension Pack on the VirtualBox download web page. Simple access the page and click on the latest version of the VirtualBox Extension Pack. So, click on the link below in order to install the Extension Pack.
Step 1. When you successfully downloaded Extension Pack from the above link. Then launch your VirtualBox from your PC.
Step 2. Once it launches, then you need to click on the Preferences in order to access the Setting of your VirtualBox.
 Preferences
Step 3. After that, you will see many options on the left side of the preferences window, so you need to click on the Extensions under the Network option.
 Extensions
Step 4. Next, you need to click on the plus icon from the right side of the screen. Then a new window will pop up, there you have to find the location and select the downloaded extension pack, and click on the Open when done.
 Add Extension Pack
Step 5. You have selected the extension pack, a new thing will pop up and ask permission to install the extension pack. So, if you really want to install it then make sure to click on the Install.
 Install Extension Pack
Step 6. Then, you need to agree with the VirtualBox license, you have to scroll down up to the last and click on the I Agree.
 I Agree
Step 7. Installing VirtualBox Extension Pack will be started automatically. So, you have to wait for some seconds.
 Installing Extension Pack
Enable USB 3.0 to Fix the problems on macOS
Open the Oracle VM VirtualBox Manager and select the virtual machine for which you would like to enable the USB support or Mouse, Keyboard. At the top of the list of virtual machines, click on “Settings”. Two panes will be shown.
On the left pane, click on the button next to USB to select it. On the right panel, click on the USB 3.0 controller.
 Enable USB 3.0
Final Words
That’s all about How to Install VirtualBox Extension Pack and Enable USB 3.0. The VirtualBox Extension Pack is a good addition to any virtual machine regardless of the operating system running it. I hope you found these steps useful for your VirtualBox. If you faced any kind of problem or question then feel free to comment below.


