How to Create macOS Big Sur ISO Image File?

If you want to install any operating system on the computer then you must have the ISO Image file of the operating system. Therefore, In this article, I am going guide on How to Create macOS Big Sur ISO Image File. macOS Big Sir is a recent and latest operating system of Apple. So, it has tons of amazing features and functionalities in which all the users are curious in order to use it. Most of the time ISO Image File is used for installing macOS Big Sur on VirtualBox or VMware. If you want to try macOS Big Sur on Virtual Machine then we have an in-depth guide on how to install macOS Big Sur on VMware. However, you can also install macOS Big Sur on physical Mac.
Related Guides:
- How to Install macOS Big Sur on VMware on Windows PC
- Install macOS Big Sur on VirtualBox on Windows PC
How to Create macOS Big Sur ISO Image File?
Step 1. You have two different methods for downloading macOS Big Sur from Apple. If you are developer or if you have a developer account then you can easily download from developer.apple.com. So, sign in with your developer account and make sure to click on the Install Profile. However, if you don’t have a developer account then visit betaprofiles.com and download macOS Big Sur Beta Profile.
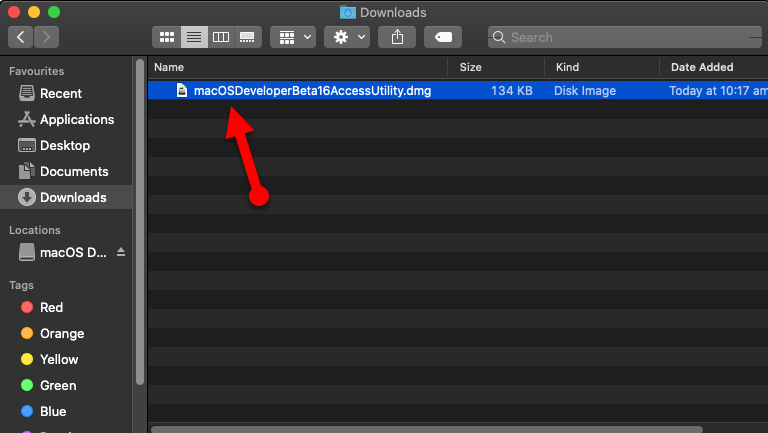 Download macOS Big Sur
 Step 2. When you have downloaded the macOS Beta Access Utility. So, right-click on that and click Open > Continue > Agree > Install > Enter the Password > Install Software > Close.
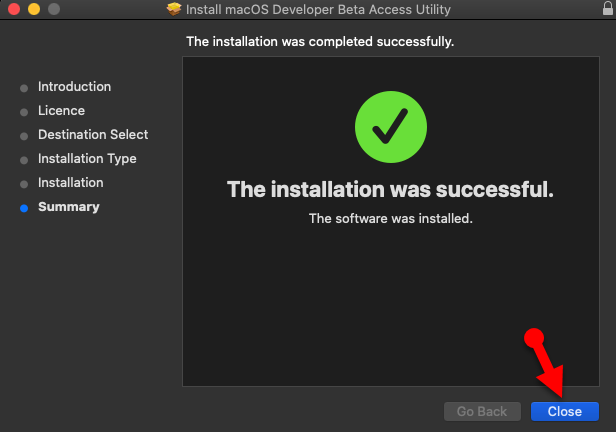 Install it
 Step 3. So, the Software update window will be opened, from there you can start the downloading process of macOS Big Sur. Therefore, you have to click on the Upgrade Now and wait for the downloading so that it should be completed. Most of the time the downloading process will take 25 – 30 minutes, it depends upon your internet speed.
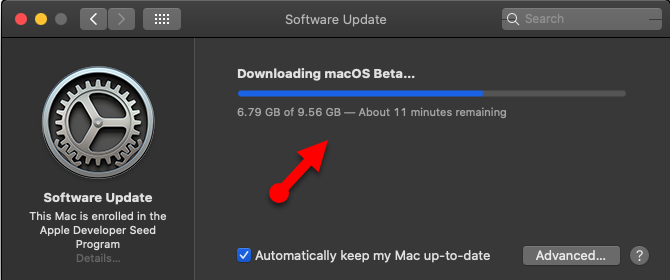 macOS Big Sur Downloading
 Step 4. When the downloading process is finished. you have to quit the installer window. So, make sure to press Command + Q.
Step 5. Now, you have to open the Terminal then copy and paste the following command in order to create an empty disk image. Also, enter you password if asked for it.
| sudo hdiutil create -o /tmp/BigSur -size 10250m -volname BigSur -layout SPUD -fs HFS+J |
Step 6. Next up, you have to mount the disk to /Volumes/BigSur. Therefore, copy and paste the following command in Terminal.
| hdiutil attach /tmp/BigSur.dmg -noverify -mountpoint /Volumes/BigSur |
Step 7. Make the disk bootable with macOS Big Sur with the help of following commands.
| sudo /Applications/Install\ macOS\ Beta.app/Contents/Resources/createinstallmedia –volume /Volumes/BigSur –nointeraction |
Step 8. You have to unmount the disk which is formatted.
| hdiutil eject -force /Volumes/Install\ macOS\ Beta |
Step 9. It is time to convert and rename the disk image to ISO file. Therefore, use the following command in Terminal.
| hdiutil convert /tmp/BigSur.dmg -format UDTO -o ~/Desktop/BigSur.cdr mv ~/Desktop/BigSur.cdr ~/Desktop/BigSur.iso sudo rm -rf /tmp/BigSur* |
When you add all the commands correctly. So, you will see the windows in which you have the macOS Big Sur ISO file on your desktop.
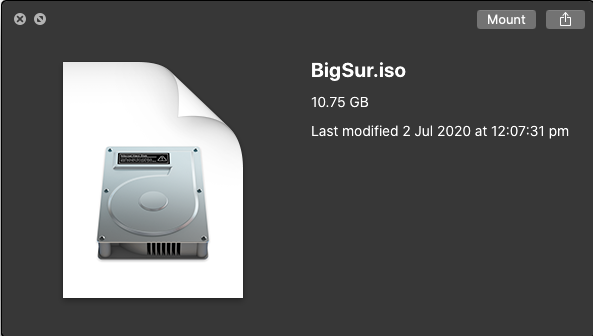 macOS Big Sur ISO Image File
 Download macOS Big Sur ISO Image File
However, if it is a difficult task to create an ISO file for you. Or if you don’t have the material for creating macOS Big Sur ISO Image File then don’t worry at all. Because we have an article for it in which you download macOS Big Sur ISO Image with direct link. Make sure to check out the below link.
Bottom Line:
It was step by step guide on How to Create macOS Big Sur ISO Image File. Now, you can create your own ISO file for the virtual machine completely safe. So, if something is missing here then please let us know by commenting. Therefore, I hope you have found our article helpful for creating the macOS Big Sur ISO Image file. If you have noticed any kind of problem or issue then don’t hesitate to leave comments in the comment section down below.
Share This Article
If you want to install any operating system on the computer then you must have the ISO Image file of the operating system. Therefore, In this article, I am going guide on How to Create macOS Big Sur ISO Image File. macOS Big Sir is a recent and latest operating system of Apple. So, it has tons of amazing features and functionalities in which all the users are curious in order to use it. Most of the time ISO Image File is used for installing macOS Big Sur on VirtualBox or VMware. If you want to try macOS Big Sur on Virtual Machine then we have an in-depth guide on how to install macOS Big Sur on VMware. However, you can also install macOS Big Sur on physical Mac.
Related Guides:
- How to Install macOS Big Sur on VMware on Windows PC
- Install macOS Big Sur on VirtualBox on Windows PC
How to Create macOS Big Sur ISO Image File?
Step 1. You have two different methods for downloading macOS Big Sur from Apple. If you are developer or if you have a developer account then you can easily download from developer.apple.com. So, sign in with your developer account and make sure to click on the Install Profile. However, if you don’t have a developer account then visit betaprofiles.com and download macOS Big Sur Beta Profile.
 Download macOS Big Sur
 Step 2. When you have downloaded the macOS Beta Access Utility. So, right-click on that and click Open > Continue > Agree > Install > Enter the Password > Install Software > Close.
 Install it
 Step 3. So, the Software update window will be opened, from there you can start the downloading process of macOS Big Sur. Therefore, you have to click on the Upgrade Now and wait for the downloading so that it should be completed. Most of the time the downloading process will take 25 – 30 minutes, it depends upon your internet speed.
 macOS Big Sur Downloading
 Step 4. When the downloading process is finished. you have to quit the installer window. So, make sure to press Command + Q.
Step 5. Now, you have to open the Terminal then copy and paste the following command in order to create an empty disk image. Also, enter you password if asked for it.
| sudo hdiutil create -o /tmp/BigSur -size 10250m -volname BigSur -layout SPUD -fs HFS+J |
Step 6. Next up, you have to mount the disk to /Volumes/BigSur. Therefore, copy and paste the following command in Terminal.
| hdiutil attach /tmp/BigSur.dmg -noverify -mountpoint /Volumes/BigSur |
Step 7. Make the disk bootable with macOS Big Sur with the help of following commands.
| sudo /Applications/Install\ macOS\ Beta.app/Contents/Resources/createinstallmedia –volume /Volumes/BigSur –nointeraction |
Step 8. You have to unmount the disk which is formatted.
| hdiutil eject -force /Volumes/Install\ macOS\ Beta |
Step 9. It is time to convert and rename the disk image to ISO file. Therefore, use the following command in Terminal.
| hdiutil convert /tmp/BigSur.dmg -format UDTO -o ~/Desktop/BigSur.cdr mv ~/Desktop/BigSur.cdr ~/Desktop/BigSur.iso sudo rm -rf /tmp/BigSur* |
When you add all the commands correctly. So, you will see the windows in which you have the macOS Big Sur ISO file on your desktop.
 macOS Big Sur ISO Image File
 Download macOS Big Sur ISO Image File
However, if it is a difficult task to create an ISO file for you. Or if you don’t have the material for creating macOS Big Sur ISO Image File then don’t worry at all. Because we have an article for it in which you download macOS Big Sur ISO Image with direct link. Make sure to check out the below link.
Bottom Line:
It was step by step guide on How to Create macOS Big Sur ISO Image File. Now, you can create your own ISO file for the virtual machine completely safe. So, if something is missing here then please let us know by commenting. Therefore, I hope you have found our article helpful for creating the macOS Big Sur ISO Image file. If you have noticed any kind of problem or issue then don’t hesitate to leave comments in the comment section down below.


