How to Fix macOS Mojave Screen Resolution on VirtualBox
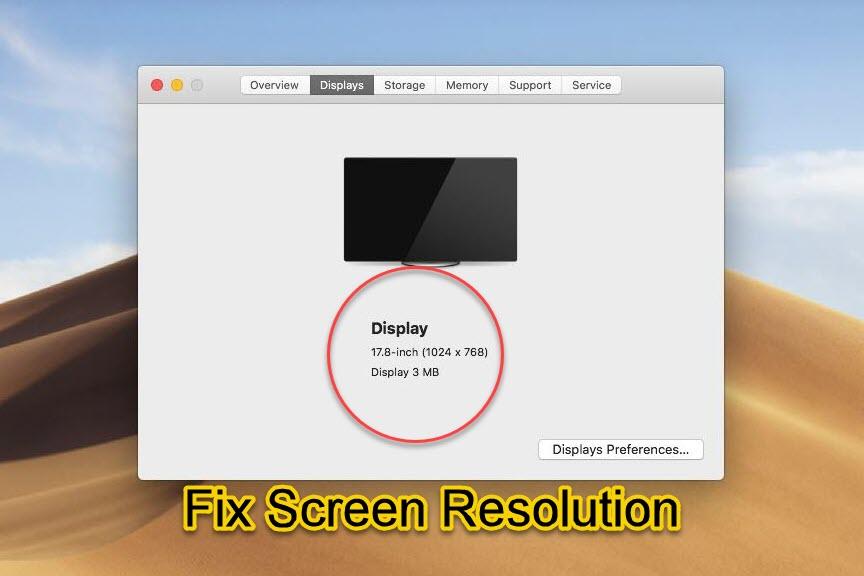

In this article, you will learn the easiest way How to Fix macOS Mojave Screen Resolution on VirtualBox. When you successfully installed the macOS Mojave on VirtualBox. When every feature is ready there. Then when turning on the machine and sign in to macOS Mojave then for sure you will notice the small screen resolution of macOS Mojave. By default, once you install macOS Mojave then you will have 1024×768 screen resolution. macOS Mojave, macOS High Sierra, and macOS Catalina it does not matter which one is it but the steps below will work for all of them. Follow step by step in order to fix the issue of screen resolution.
As I said by default, then screen resolution it will be 1024×768 and you may have the larger monitor then it will pretty small for you. So, it will look somehow strange because we can’t work properly with the small resolution. You cannot fix that alone we are here to cover it. And we found some tricks and easy method in order to fix that. Here’s the step which you can fix that.
Related:
- How to Fix macOS Mojave Screen Resolution on VMware on Windows
- How to Install macOS Mojave on Virtualbox on Windows PC.
- How to Fix Mouse & Keyboard Stuck on macOS Mojave on VirtualBox
If you want to fix the screen resolution, you have to download the below file. The rest step is below you need to follow. The file is consist of commands this code from the file you need to apply in order to fix screen resolution.
How to Fix macOS Mojave Screen Resolution on VirtualBox
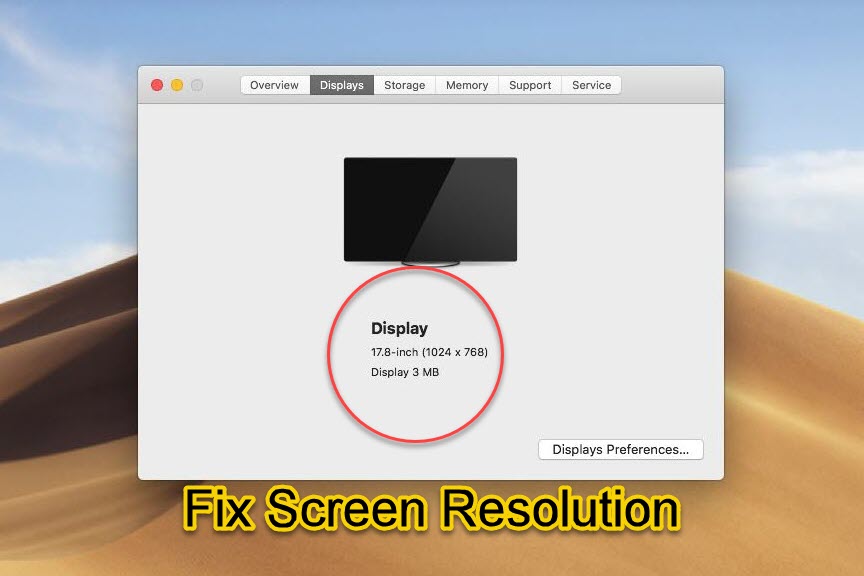 Fix macOS Mojave Screen Resolution on VirtualBox
 First of all, you have to shut down the macOS Mojave from VirtualBox otherwise this won’t work.
Remember: For applying this method your VirtualBox on your Windows PC should be the latest version.
Step 1. Download the VirtualBox code from the above link. Then open code.
Step 2. Replace and edit the code that is named as VM Name to your macOS Mojave virtual machine name, and make sure it is the same name with your VM Name.
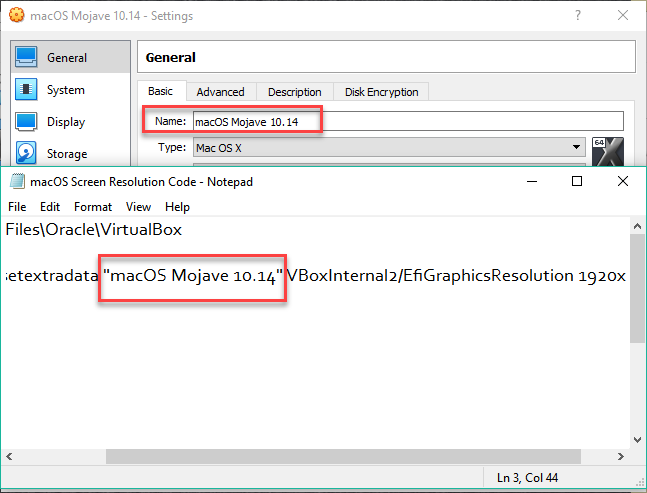 Edit the Codes
 Step 3. And also replace the resolution size with the size of your monitor or screen. With your wish or actual screen from the list for the screen resolutions, you can choose from. Once you edit Your Screen resolution with your favorite screen resolution, then you need to remove the quotation marks from beside.
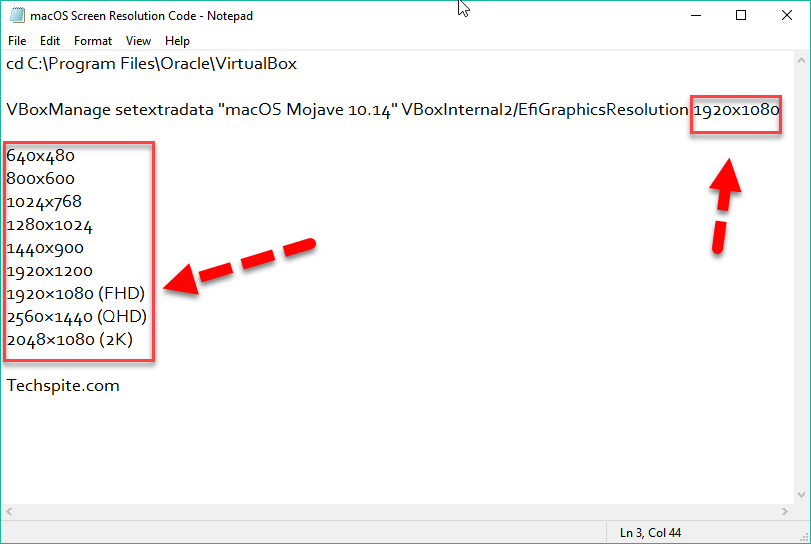 Select your screen resolution size
 Step 4.Open Command Prompt (CMD) by pressing from the keyboard Windows button + X and then click on the Command Prompt. Or simply search CMD then open that.
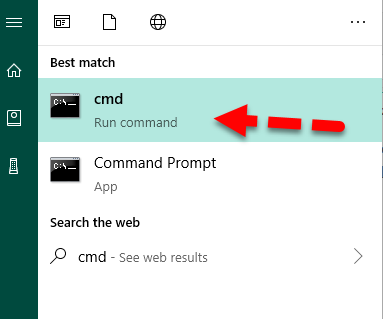 Run CMD
 Step 5. When CMD appears on your screen, you need to copy & paste the first line code on CMD.
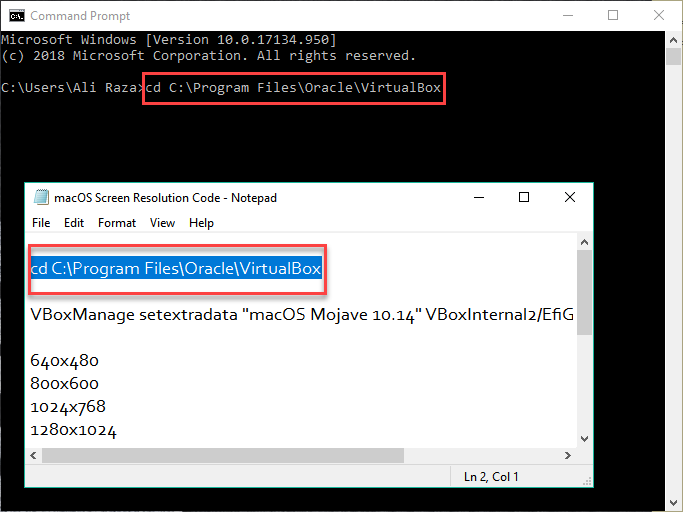 Cope & Paste the first line of Command
 Step 6. Next, copy & paste the fix screen resolution command to Command Prompt then hit enter.
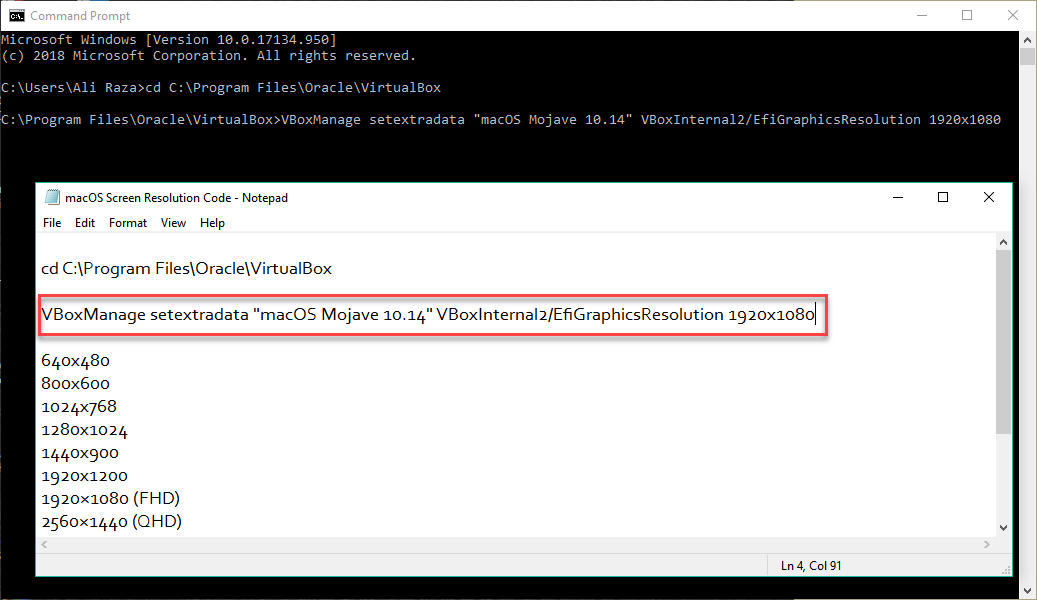 Enter Screen Resolution Command
 When you applied the both commands, then you are all set, you need to start the virtual machine then sign in into macOS Mojave with your password. And you will have option to have normal screen resolution. So, it was the method of how to fix it.
Conclusion:
That’s all about How to Fix macOS Mojave Screen Resolution on VirtualBox. So, it was the easiest and handy way. If again you faced any problem or any question then feel free to comment below. Don’t forget to give feedback and suggestion about this article.
Share This Article
In this article, you will learn the easiest way How to Fix macOS Mojave Screen Resolution on VirtualBox. When you successfully installed the macOS Mojave on VirtualBox. When every feature is ready there. Then when turning on the machine and sign in to macOS Mojave then for sure you will notice the small screen resolution of macOS Mojave. By default, once you install macOS Mojave then you will have 1024×768 screen resolution. macOS Mojave, macOS High Sierra, and macOS Catalina it does not matter which one is it but the steps below will work for all of them. Follow step by step in order to fix the issue of screen resolution.
As I said by default, then screen resolution it will be 1024×768 and you may have the larger monitor then it will pretty small for you. So, it will look somehow strange because we can’t work properly with the small resolution. You cannot fix that alone we are here to cover it. And we found some tricks and easy method in order to fix that. Here’s the step which you can fix that.
Related:
- How to Fix macOS Mojave Screen Resolution on VMware on Windows
- How to Install macOS Mojave on Virtualbox on Windows PC.
- How to Fix Mouse & Keyboard Stuck on macOS Mojave on VirtualBox
If you want to fix the screen resolution, you have to download the below file. The rest step is below you need to follow. The file is consist of commands this code from the file you need to apply in order to fix screen resolution.
How to Fix macOS Mojave Screen Resolution on VirtualBox
 Fix macOS Mojave Screen Resolution on VirtualBox
 First of all, you have to shut down the macOS Mojave from VirtualBox otherwise this won’t work.
Remember: For applying this method your VirtualBox on your Windows PC should be the latest version.
Step 1. Download the VirtualBox code from the above link. Then open code.
Step 2. Replace and edit the code that is named as VM Name to your macOS Mojave virtual machine name, and make sure it is the same name with your VM Name.
 Edit the Codes
 Step 3. And also replace the resolution size with the size of your monitor or screen. With your wish or actual screen from the list for the screen resolutions, you can choose from. Once you edit Your Screen resolution with your favorite screen resolution, then you need to remove the quotation marks from beside.
 Select your screen resolution size
 Step 4.Open Command Prompt (CMD) by pressing from the keyboard Windows button + X and then click on the Command Prompt. Or simply search CMD then open that.
 Run CMD
 Step 5. When CMD appears on your screen, you need to copy & paste the first line code on CMD.
 Cope & Paste the first line of Command
 Step 6. Next, copy & paste the fix screen resolution command to Command Prompt then hit enter.
 Enter Screen Resolution Command
 When you applied the both commands, then you are all set, you need to start the virtual machine then sign in into macOS Mojave with your password. And you will have option to have normal screen resolution. So, it was the method of how to fix it.
Conclusion:
That’s all about How to Fix macOS Mojave Screen Resolution on VirtualBox. So, it was the easiest and handy way. If again you faced any problem or any question then feel free to comment below. Don’t forget to give feedback and suggestion about this article.


