How to Install macOS Big Sur on Laptop


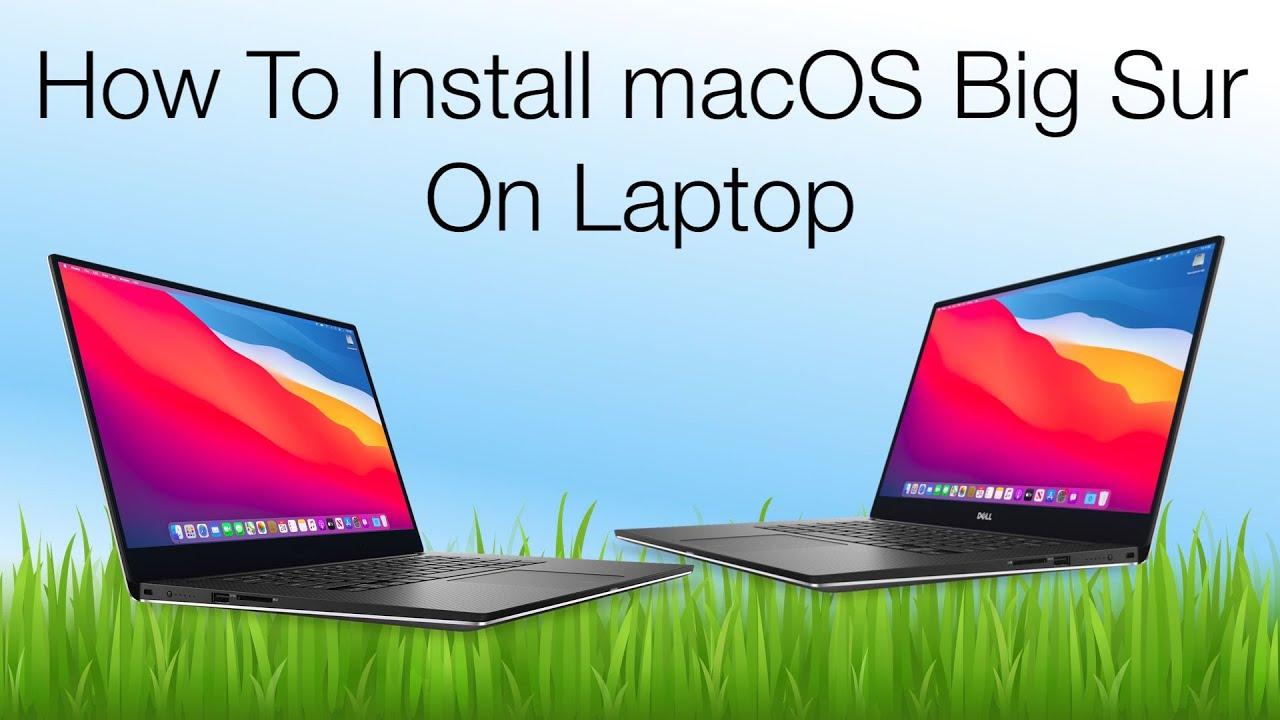
macOS Big Sur is the new and greatest operating system of Mac. Apple company always amazes us with the new operating system which will have a bunch of amazing features and functionalities. Most of the Apple users are saying that macOS Big Sur has been taken from iOS 14. It has gotten somehow the design of iOS 14, it is the first operating system that is like that.
The main thing about the new operating system macOS Big Sur is the starter of the macOS 11 series. In most cases, it is said that the macOS 10 series will not be upgraded anymore. Because macOS 11 Big Sur looks great in Mac and Laptop. It has tons of amazing features and functionalities. Therefore, 2020 was really the blessed year for Apple users because they have gotten iOS 14, iPadOS 14, watchOS 7, and macOS Big Sur which is the new operating system for Hackintosh.
If your Mac can’t support macOS Big Sur properly. If you are facing lake while using macOS Big Sur on Mac computer, then there is a bunch of virtualization software that completely allows you to use macOS Big Sur. Virtualization software also allows you to test other macOS series. Well, there are many virtualization software available on the market such as VMware Workstation, VirtualBox, Hyper-V, and many more. It will give you the ability to run different kinds of operating systems like Windows, Android, macOS, Linux, and many more.
If you want to install macOS Big Sur on virtualization software then we already have step by step guide about it. The installation process is never a difficult task but it is somehow lengthy. So, if you want it then click on the below links.
How to Install macOS Big Sur on Laptop
Detail of my Computer:
- LAPTOP : ASUS X510UA
- CPU : Intel Core i3 7100U (2.4GHz) LGA 1356
- RAM : 4 GB DDR4 2400MHz
- GRAPHICS : Intel HD Graphics 620
- WiFi and BT: Braodcom BCM94352Z A+E Key Type (Replaced)
- AUDIO : Conexant CX8050
- SSD : Samsung 860 EVO 250GB
- macOS VERSION : 10.14.5
- SMBIOS : 14,1
- SYSTEM DEFINITION : MacBook Pro (13-inch, 2017, Two Thunderbolt 3 ports)
Download macOS Big Sur
You must have the macOS Big Sur image. Because the installation process starts with macOS Big Sur Image. You can download it from Google but it might contain a virus or might be damaged. Therefore, it is a better option that you have to download it from the App Store on your Mac. Downloading from the App Store doesn’t need to be purchased.
Create the Bootable USB of macOS Big Sur
When you have to download the macOS Big Sur without any problem then you are good to go. Now, it is time to create a bootable USB of macOS Big Sur. Bootable USB will help a user in order to have a clean installation of any operating system.
So, for that, you must have a minimum of 16GB storage of USB Flash Drive. 16GB USB is required while creating a Bootable USB. Then, you have to attach the USB Flash Drive with your computer. Open the Disk utilities and make sure to erase the USB with APFS, also give a name to your USB Flash Drive. Your USB will be erased successfully.
Now, you have to launch the Terminal and type there sudo, then go to the Applications, make sure to right-click on the macOS Big Sur and select show content package. Open the directories (content, resources) find the create install media, drag it to Terminal. After that type –volume /Volumes/Your USB Name –nointeraction.
Copy EFI to USB Bootable of macOS Big Sur
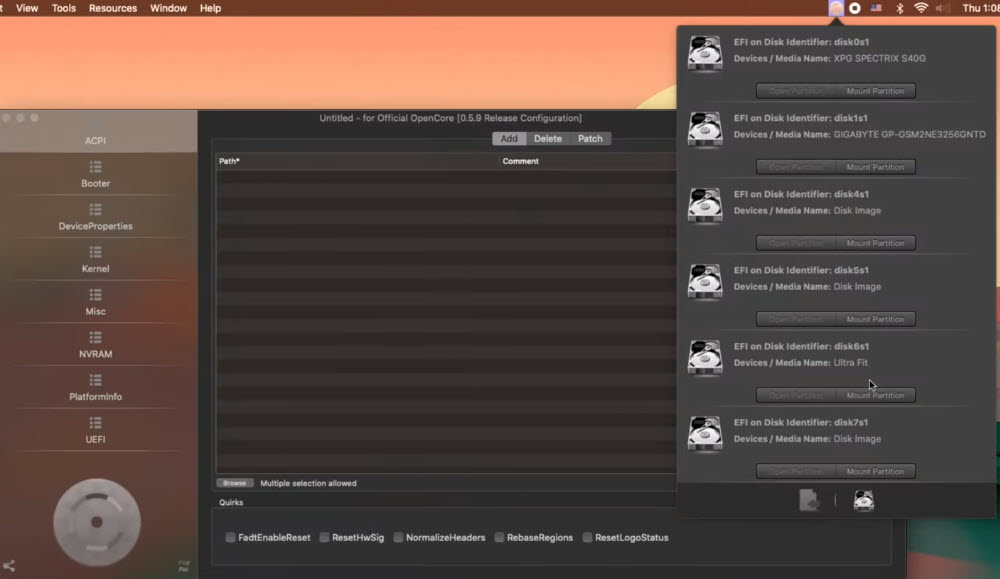
Once you have successfully created a bootable USB for macOS Big Sur. Now, it is time to copy EFI to the bootable USB. For that, you have download the Open Core Configurator. The downloading process of it will take some time which you have to wait until it is completed successfully.
When it has downloaded successfully on your computer. You have to open it by clicking on it. Then, mount the EFI. Now, the EFI which you have mounted will appear on your desktop, you have to copy and paste the EFI on it. Also, copy and paste the open core configurator in the Bootable USB too.
 Mount EFI
 Install macOS Big Sur
I hope each and everything went well and properly. You have to restart your computer and hold the boot key of the computer. Choose the USB which is macOS Big Sur in it. Once you reached the utility window, choose disk utility and erase the hard disk with APFS.
Once it is erased, you have to close the disk utility window and click on Install macOS. Your computer will restart several times, after that, you have to configure some simple settings of macOS Big Sur such as theme, language, location, Siri, account name, and many more. It is the same when you configure other macOS settings. Install macOS Big Sur on Laptop
Final Words
It was simple steps on How to Install macOS Big Sur on Laptop. I hope you have learned something new. If you faced any kind of issue then don’t hesitate to leave comments in the comment section down below.
Share This Article
macOS Big Sur is the new and greatest operating system of Mac. Apple company always amazes us with the new operating system which will have a bunch of amazing features and functionalities. Most of the Apple users are saying that macOS Big Sur has been taken from iOS 14. It has gotten somehow the design of iOS 14, it is the first operating system that is like that.
The main thing about the new operating system macOS Big Sur is the starter of the macOS 11 series. In most cases, it is said that the macOS 10 series will not be upgraded anymore. Because macOS 11 Big Sur looks great in Mac and Laptop. It has tons of amazing features and functionalities. Therefore, 2020 was really the blessed year for Apple users because they have gotten iOS 14, iPadOS 14, watchOS 7, and macOS Big Sur which is the new operating system for Hackintosh.
If your Mac can’t support macOS Big Sur properly. If you are facing lake while using macOS Big Sur on Mac computer, then there is a bunch of virtualization software that completely allows you to use macOS Big Sur. Virtualization software also allows you to test other macOS series. Well, there are many virtualization software available on the market such as VMware Workstation, VirtualBox, Hyper-V, and many more. It will give you the ability to run different kinds of operating systems like Windows, Android, macOS, Linux, and many more.
If you want to install macOS Big Sur on virtualization software then we already have step by step guide about it. The installation process is never a difficult task but it is somehow lengthy. So, if you want it then click on the below links.
How to Install macOS Big Sur on Laptop
Detail of my Computer:
- LAPTOP : ASUS X510UA
- CPU : Intel Core i3 7100U (2.4GHz) LGA 1356
- RAM : 4 GB DDR4 2400MHz
- GRAPHICS : Intel HD Graphics 620
- WiFi and BT: Braodcom BCM94352Z A+E Key Type (Replaced)
- AUDIO : Conexant CX8050
- SSD : Samsung 860 EVO 250GB
- macOS VERSION : 10.14.5
- SMBIOS : 14,1
- SYSTEM DEFINITION : MacBook Pro (13-inch, 2017, Two Thunderbolt 3 ports)
Download macOS Big Sur
You must have the macOS Big Sur image. Because the installation process starts with macOS Big Sur Image. You can download it from Google but it might contain a virus or might be damaged. Therefore, it is a better option that you have to download it from the App Store on your Mac. Downloading from the App Store doesn’t need to be purchased.
Create the Bootable USB of macOS Big Sur
When you have to download the macOS Big Sur without any problem then you are good to go. Now, it is time to create a bootable USB of macOS Big Sur. Bootable USB will help a user in order to have a clean installation of any operating system.
So, for that, you must have a minimum of 16GB storage of USB Flash Drive. 16GB USB is required while creating a Bootable USB. Then, you have to attach the USB Flash Drive with your computer. Open the Disk utilities and make sure to erase the USB with APFS, also give a name to your USB Flash Drive. Your USB will be erased successfully.
Now, you have to launch the Terminal and type there sudo, then go to the Applications, make sure to right-click on the macOS Big Sur and select show content package. Open the directories (content, resources) find the create install media, drag it to Terminal. After that type –volume /Volumes/Your USB Name –nointeraction.
Copy EFI to USB Bootable of macOS Big Sur
Once you have successfully created a bootable USB for macOS Big Sur. Now, it is time to copy EFI to the bootable USB. For that, you have download the Open Core Configurator. The downloading process of it will take some time which you have to wait until it is completed successfully.
When it has downloaded successfully on your computer. You have to open it by clicking on it. Then, mount the EFI. Now, the EFI which you have mounted will appear on your desktop, you have to copy and paste the EFI on it. Also, copy and paste the open core configurator in the Bootable USB too.
 Mount EFI
 Install macOS Big Sur
I hope each and everything went well and properly. You have to restart your computer and hold the boot key of the computer. Choose the USB which is macOS Big Sur in it. Once you reached the utility window, choose disk utility and erase the hard disk with APFS.
Once it is erased, you have to close the disk utility window and click on Install macOS. Your computer will restart several times, after that, you have to configure some simple settings of macOS Big Sur such as theme, language, location, Siri, account name, and many more. It is the same when you configure other macOS settings. Install macOS Big Sur on Laptop
Final Words
It was simple steps on How to Install macOS Big Sur on Laptop. I hope you have learned something new. If you faced any kind of issue then don’t hesitate to leave comments in the comment section down below.


