How to Install Linux Mint on VMware on Windows PC

The Linux Mint is a community-driven Linux distribution based on Ubuntu which itself is based on Debian and bundled with a variety of free and open-source applications and software. It can provide full out-of-the-box multimedia support for those who choose to include proprietary software such as multimedia codecs. Furthermore, it is one of the lightest operating systems and you can work on a low specification PC. It doesn’t have special features because it is really a simple operating system.
However, the virtual machine is one of the wonderful sources to try and install the different operating systems without disturbing the actual operating system. Virtual machines offer the best and easiest way to install operating systems especially Linux Mint. You will not face a single, because you are going to install on the virtual machine, not on a physical computer. We have already installed Linux Mint on VirtualBox and working extremely fine.
You might about virtual machines such as VirtualBox, VMware Workstation, Hyper-V, Parallels, and many more. But as we have experienced that VirtualBox and VMware is one of the best platform ever which give you the ability to install Linux Mint without any problem. Therefore, if you want to install Linux Mint on VMware then do follow the step by step guide down below.
How to Install Linux Mint on VMware on Windows PC
1: Create A New Virtual Machine for Linux Mint
Step 1: First open your VMware and then click on the Create A New Virtual Machine.
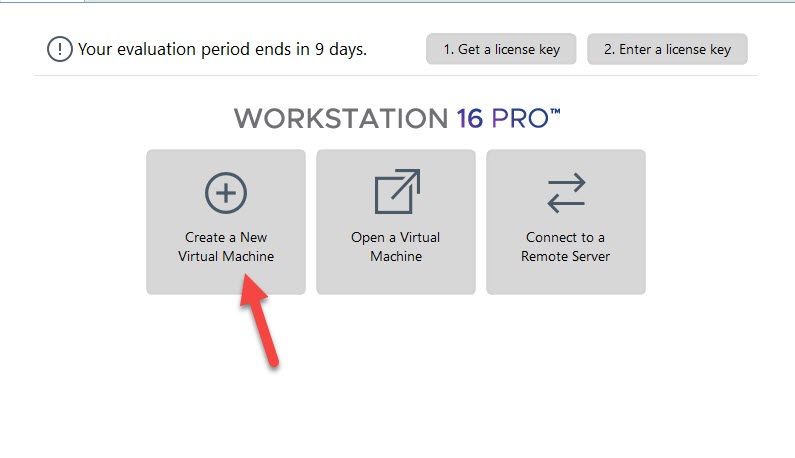 Click On The Create A New Virtual Machine
 Step 2: Select the Typical (recommended) and click on the Next.
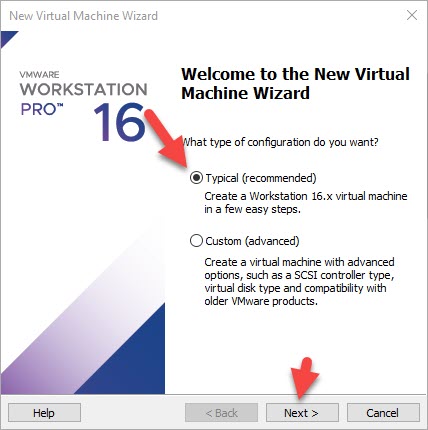 Select The Typical (recommended) And Click On The Next
 Step 3: Select the I Will install the operating system later and click on the Next.
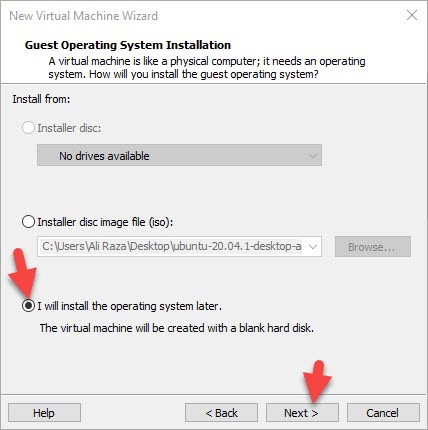 Click On The Next
 Step 4: Select the Linux and then click on the Next
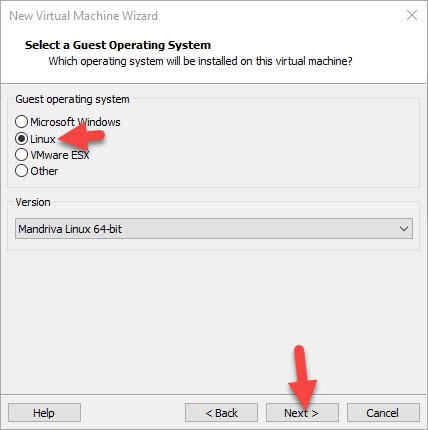 Select The Linux And Click On The Next
 Step 5: Write the virtual machine name and click on the Next.
 Write The Virtual Machine Name And Click On The Next
 Step 6: Select the Store virtual disk as a single file and click on the Next.
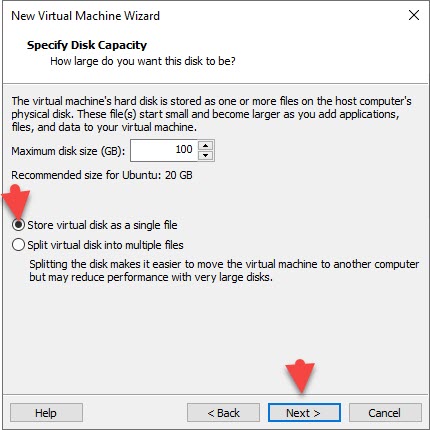 Select The Store Virtual Disk As A Single File And Click On The Next
 Step 7: Now, click on the Customize Hardware.
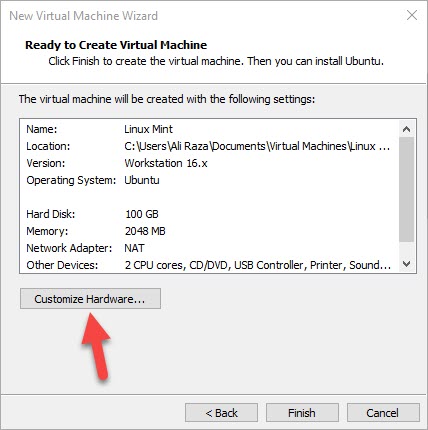 Click On The Customize Hardware
 Step 8: Go to Memory and then Increase The Memory
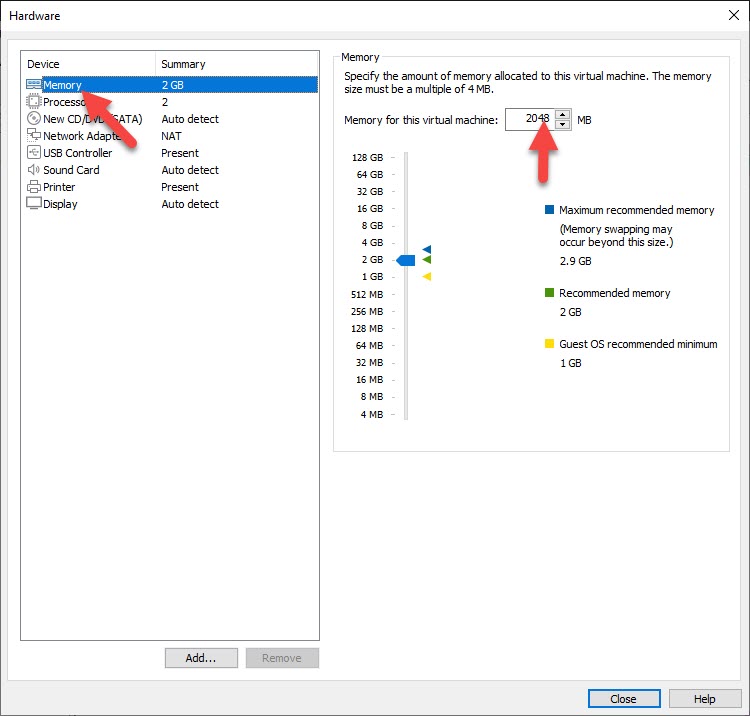 Increase The Memory
 Step 9: Go to Processors increase the number of processors.
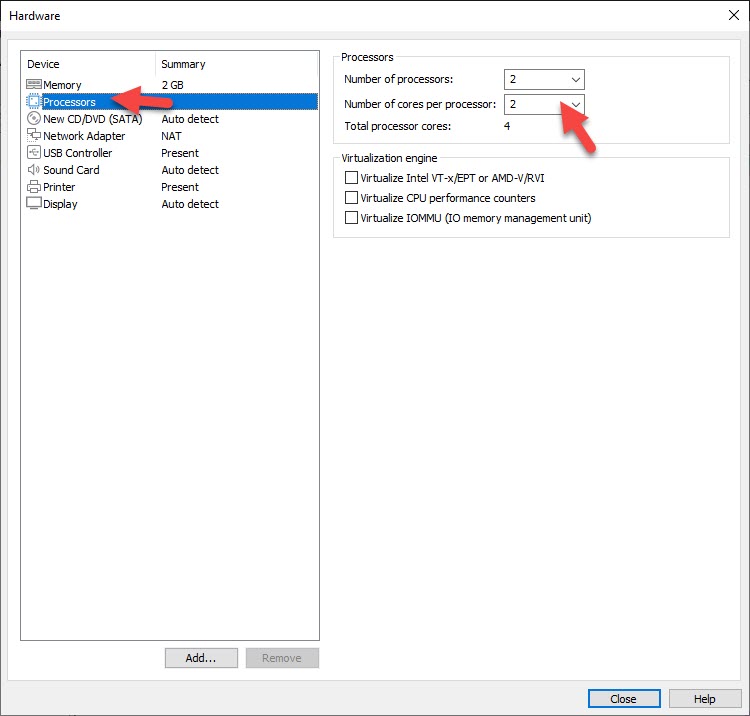 Increase The Number Of Processors
 Step 10: Go to New CD/DVD (SATA) and click on the Use an ISO image file.
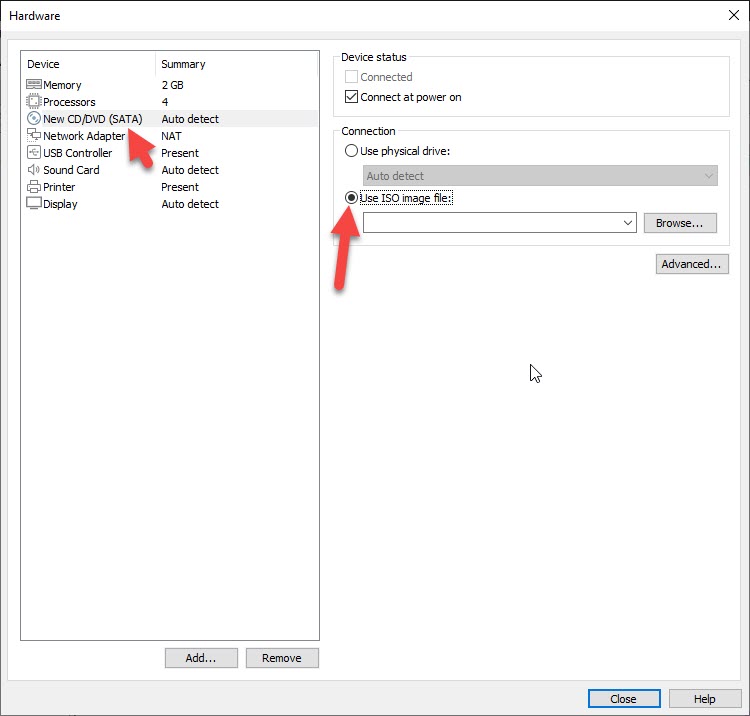 Click On The Use An ISO Image File
 Step 11: Lastly, click on the Close.
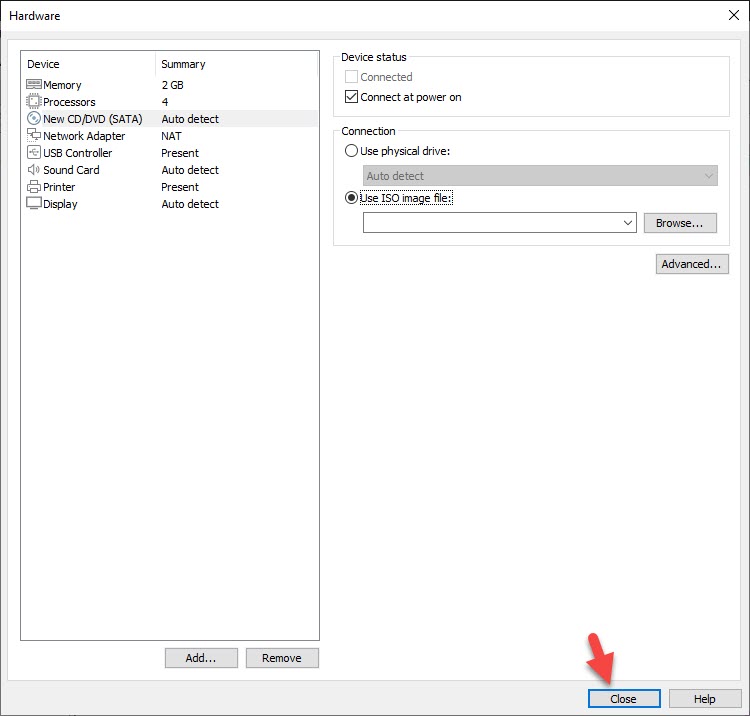 Click On The Close
 Step 12: Click on the Finish.
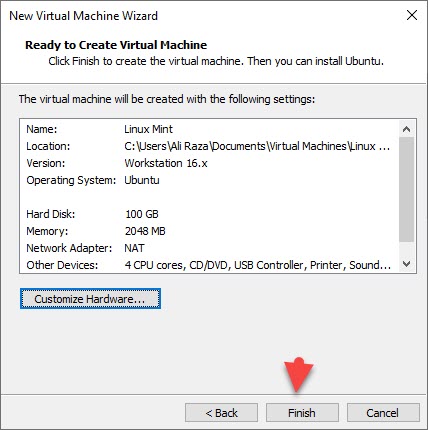 Click On The Finish
 2: Install Linux Mint on VMware
Step 1: Click on the Power on this virtual machine to start.
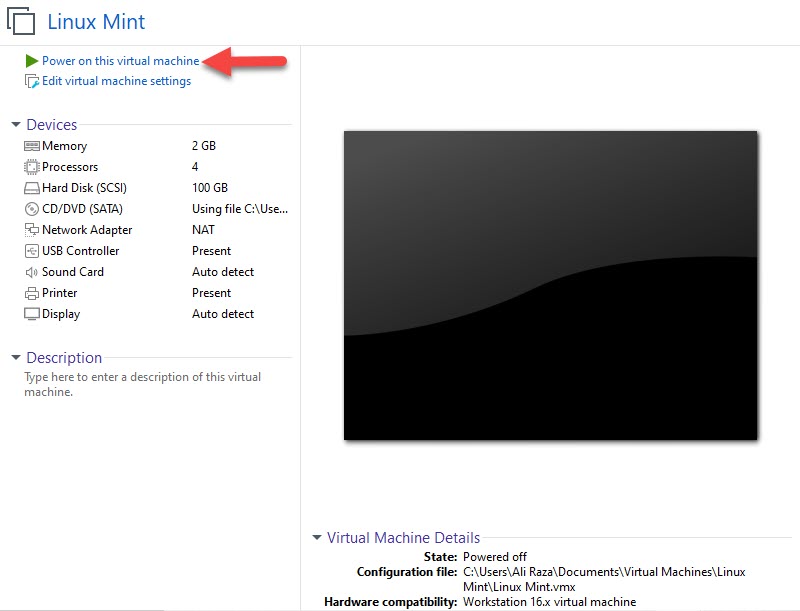 Click On The Power On This Virtual Machine To Start
 Step 2: Click on the Start Linux Mint.
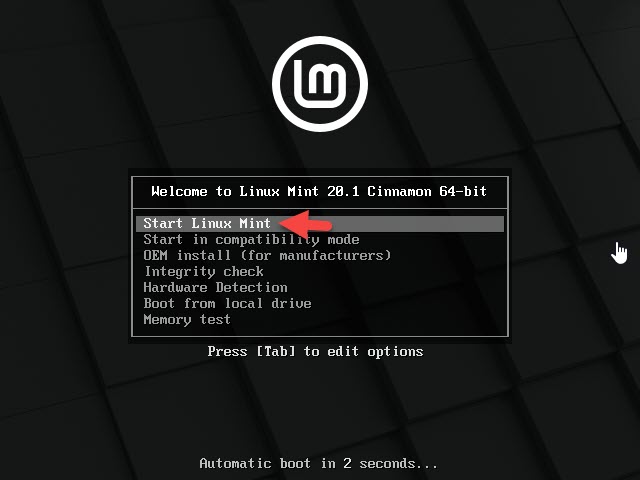 Click On The Start Linux Mint
 Step 3: So, Right-click on the Linux Mint and then click on the Open.
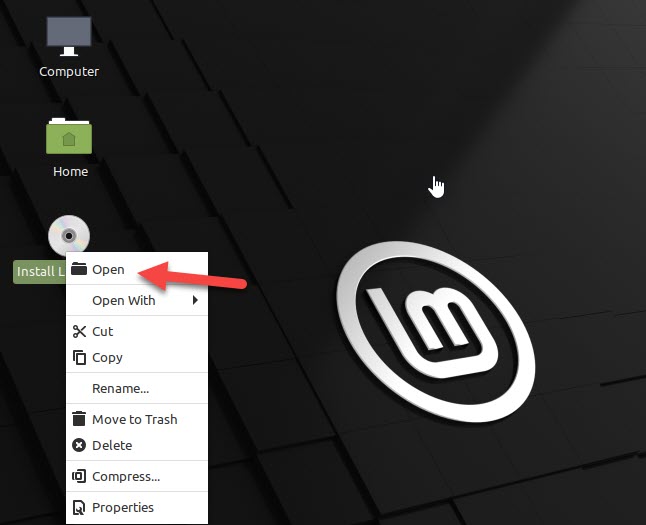 Right Click On The Linux Mint And Click On The Open
 Step 4: Select your language.
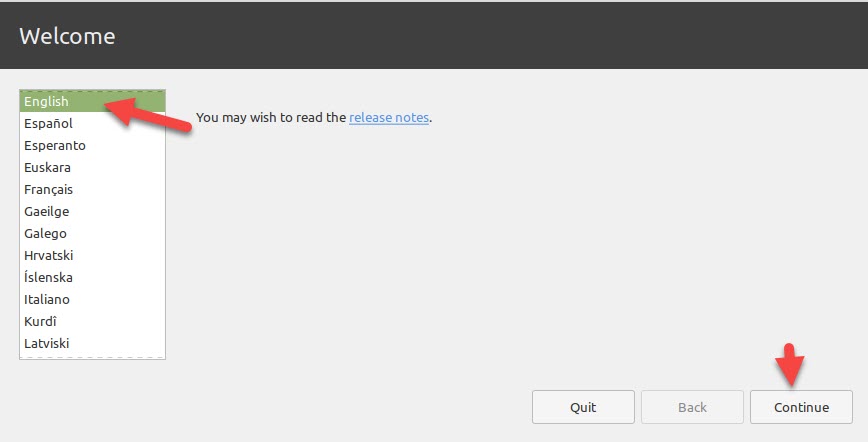 Select Your Language
 Step 5: Select your keyboard layout and click on the continue.
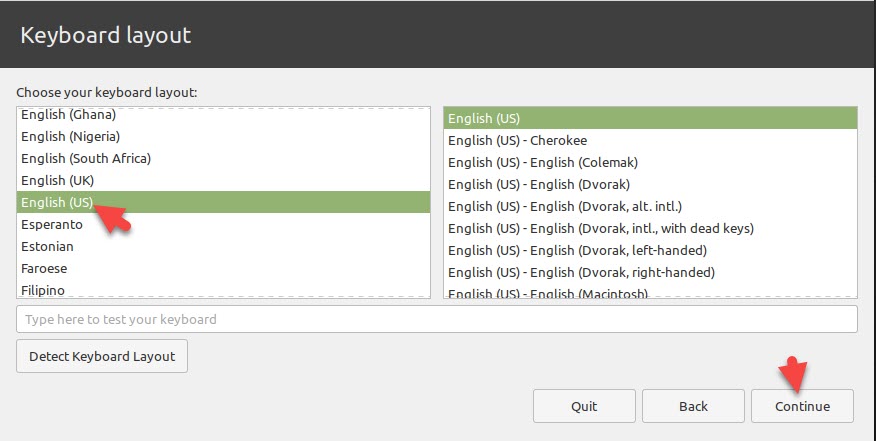 Select Your keyboard layout
 Step 6: Click on the Continue.
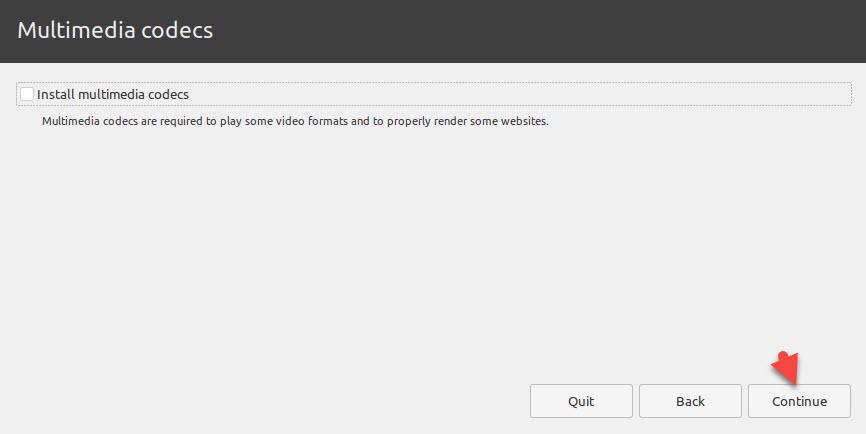 Click On The Continue
 Step 7: Select the Erase disk and install Linux Mint click on Install Now.
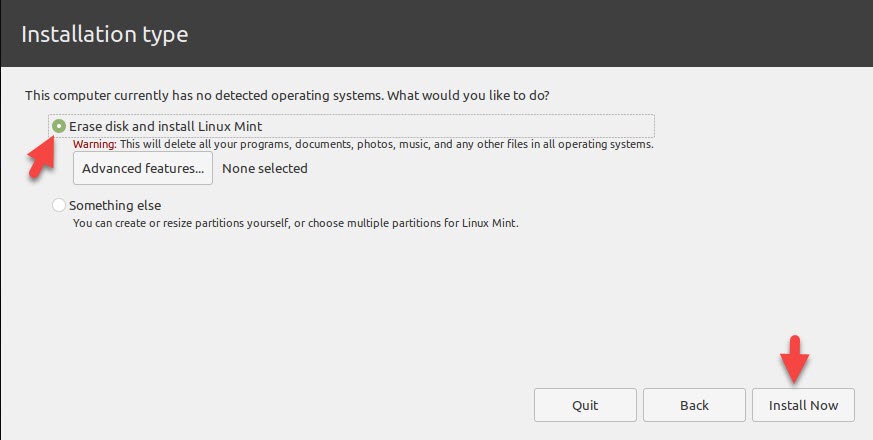 Click On The Install
 Step 8: Click on the continue.
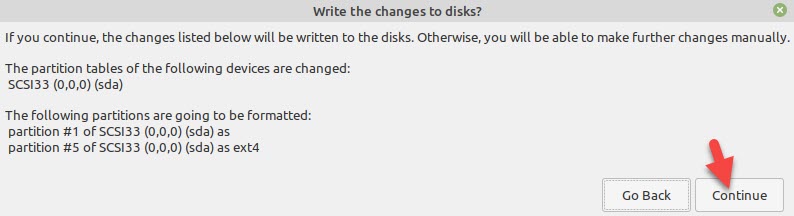 Click On The Continue
 Step 9: Now, Select your location.
 Select Your location
 Step 10: Write the details.
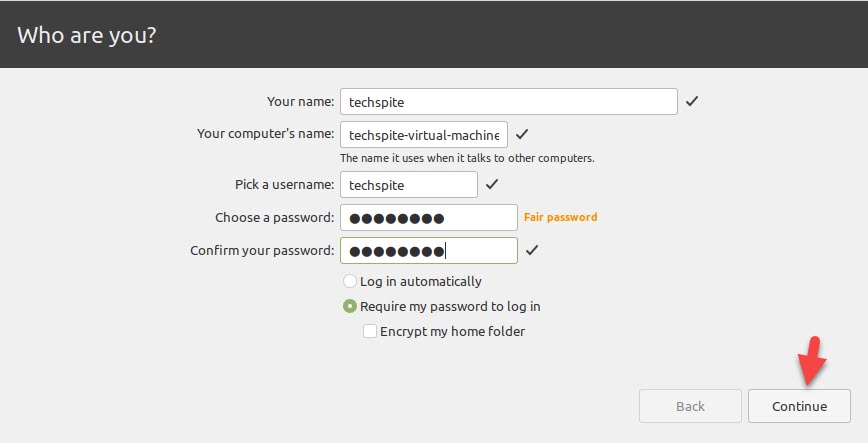 Write The Details.
 Step 11: Wait for the installation of the Linux Mint.
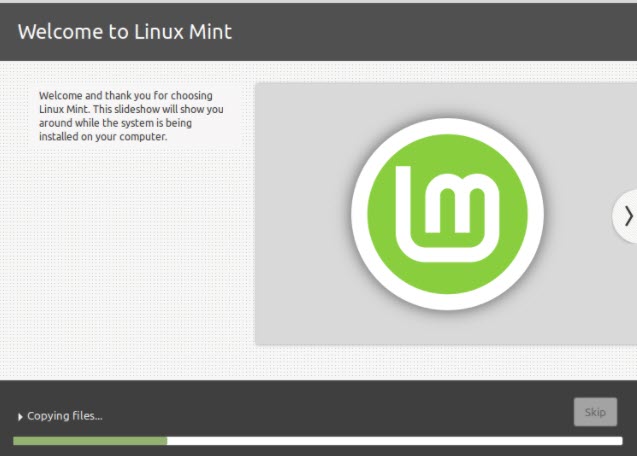 Wait for the Installation
 Step 12: Click on the Restart Now.
Step 13: Finally, Linux Mint successfully installed on VMware Workstation on Windows PC.
Related Posts:
- How to Block Adult Videos on YouTube App (4 Methods)
- How to Password Protect Photos on Android in 2021
Bottom Line
It is all about How to Install Linux Mint on VMware on Windows PC. However, if you are facing any kind of problem then don’t hesitate to leave comments in the comment section down below.
Share This Article
The Linux Mint is a community-driven Linux distribution based on Ubuntu which itself is based on Debian and bundled with a variety of free and open-source applications and software. It can provide full out-of-the-box multimedia support for those who choose to include proprietary software such as multimedia codecs. Furthermore, it is one of the lightest operating systems and you can work on a low specification PC. It doesn’t have special features because it is really a simple operating system.
However, the virtual machine is one of the wonderful sources to try and install the different operating systems without disturbing the actual operating system. Virtual machines offer the best and easiest way to install operating systems especially Linux Mint. You will not face a single, because you are going to install on the virtual machine, not on a physical computer. We have already installed Linux Mint on VirtualBox and working extremely fine.
You might about virtual machines such as VirtualBox, VMware Workstation, Hyper-V, Parallels, and many more. But as we have experienced that VirtualBox and VMware is one of the best platform ever which give you the ability to install Linux Mint without any problem. Therefore, if you want to install Linux Mint on VMware then do follow the step by step guide down below.
How to Install Linux Mint on VMware on Windows PC
1: Create A New Virtual Machine for Linux Mint
Step 1: First open your VMware and then click on the Create A New Virtual Machine.
Click On The Create A New Virtual Machine Step 2: Select the Typical (recommended) and click on the Next.
Select The Typical (recommended) And Click On The Next Step 3: Select the I Will install the operating system later and click on the Next.
Click On The Next Step 4: Select the Linux and then click on the Next
Select The Linux And Click On The Next Step 5: Write the virtual machine name and click on the Next.
Write The Virtual Machine Name And Click On The Next Step 6: Select the Store virtual disk as a single file and click on the Next.
Select The Store Virtual Disk As A Single File And Click On The Next Step 7: Now, click on the Customize Hardware.
Click On The Customize Hardware Step 8: Go to Memory and then Increase The Memory
Increase The Memory Step 9: Go to Processors increase the number of processors.
Increase The Number Of Processors Step 10: Go to New CD/DVD (SATA) and click on the Use an ISO image file.
Click On The Use An ISO Image File Step 11: Lastly, click on the Close.
Click On The Close Step 12: Click on the Finish.
Click On The Finish 2: Install Linux Mint on VMware
Step 1: Click on the Power on this virtual machine to start.
Click On The Power On This Virtual Machine To Start Step 2: Click on the Start Linux Mint.
Click On The Start Linux Mint Step 3: So, Right-click on the Linux Mint and then click on the Open.
Right Click On The Linux Mint And Click On The Open Step 4: Select your language.
Select Your Language Step 5: Select your keyboard layout and click on the continue.
Select Your keyboard layout Step 6: Click on the Continue.
Click On The Continue Step 7: Select the Erase disk and install Linux Mint click on Install Now.
Click On The Install Step 8: Click on the continue.
Click On The Continue Step 9: Now, Select your location.
Select Your location Step 10: Write the details.
Write The Details. Step 11: Wait for the installation of the Linux Mint.
Wait for the Installation Step 12: Click on the Restart Now.
Step 13: Finally, Linux Mint successfully installed on VMware Workstation on Windows PC.
Related Posts:
- How to Block Adult Videos on YouTube App (4 Methods)
- How to Password Protect Photos on Android in 2021
Bottom Line
It is all about How to Install Linux Mint on VMware on Windows PC. However, if you are facing any kind of problem then don’t hesitate to leave comments in the comment section down below.