How to Solve the Windows 11 Start Menu Not Working Issue?
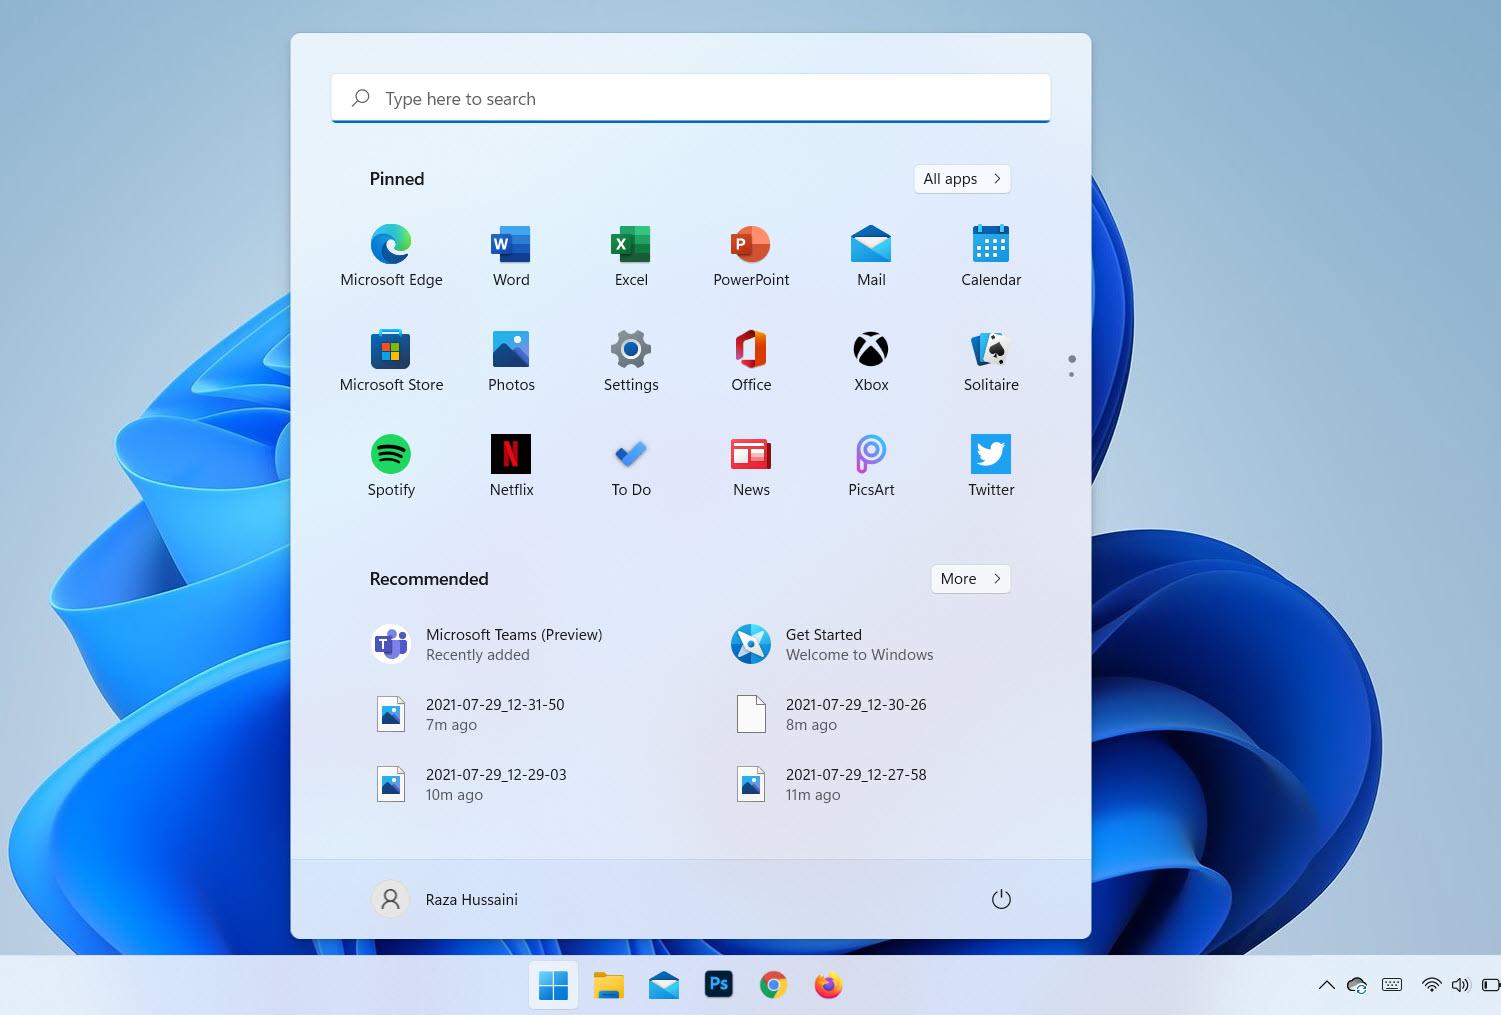

In this article, you will learn How to Solve the Windows 11 Start Menu Not Working Issue. Nowadays people are downloaded Windows 11 and even most of the people are using it also. When people have downloaded the new operating system then the big problem is that the Start menu is not working. If the Start menu is not working then you can not do anything. When the Start menu is not working then you will search on YouTube after that the video you are watching maybe it is not real. But don’t worry I am here to solve your problem. If you want to solve the Windows 11 Start menu not working then you need to read this article. So, without wasting any time let’s get has started.
Related Post: How to Disable Snap Layouts for Maximize Button in Windows 11
Method 1: Restart the Windows Explorer
Step 1. First of all, you need to press Crtl + ALT + Delete from your keyboard after that select the Task Manager to open the task manager.
Step 2. Now, scroll down until you can not find the Windows Explorer once you find that click on the Restart at the bottom left corner.
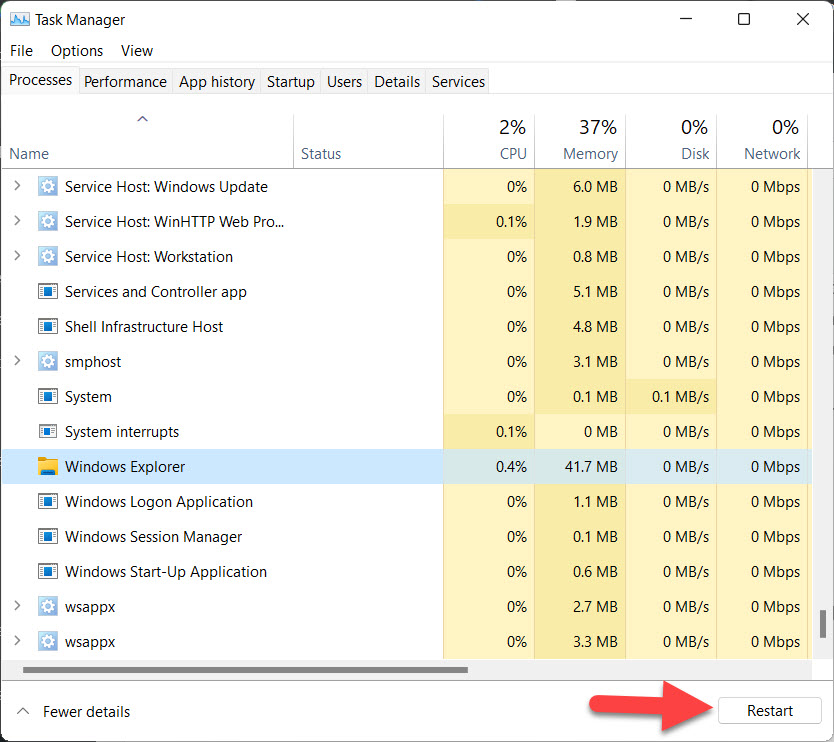 Click on the Restart
 When you restart the windows explorer then I hope that your Start menu starts working.
Method 2: Restart Your PC
Step 1. At first, press Crtl + ALT + Delete at once.
Step 2. Next, click on the Power button at the bottom left corner.
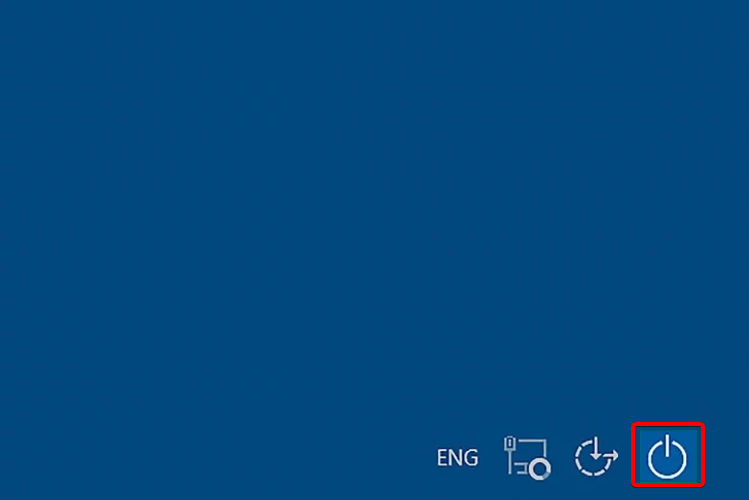 Click on the Power Button
Step 3. After that, you will get three options Sleep, Shut down, Restart you need to tap on the Restart.
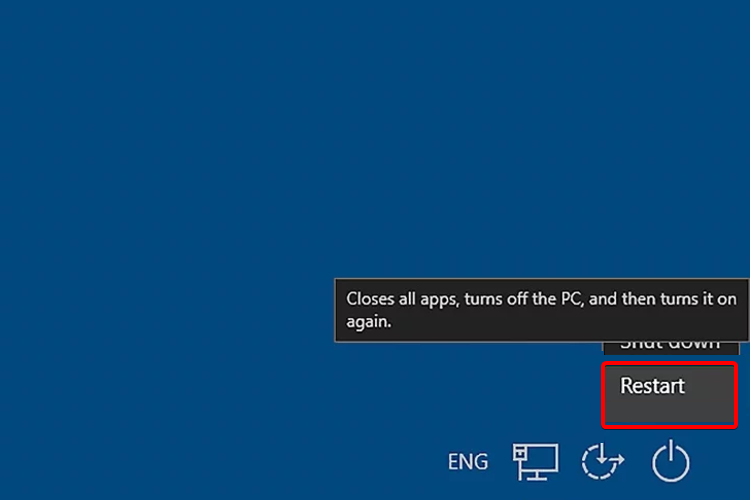 Tap on the Restart
 Method 3: Check For Windows Update
Step 1. Press Windows + I from the keyboard to open the settings on your PC.
Step 2. Head towards the Windows Update from the left side.
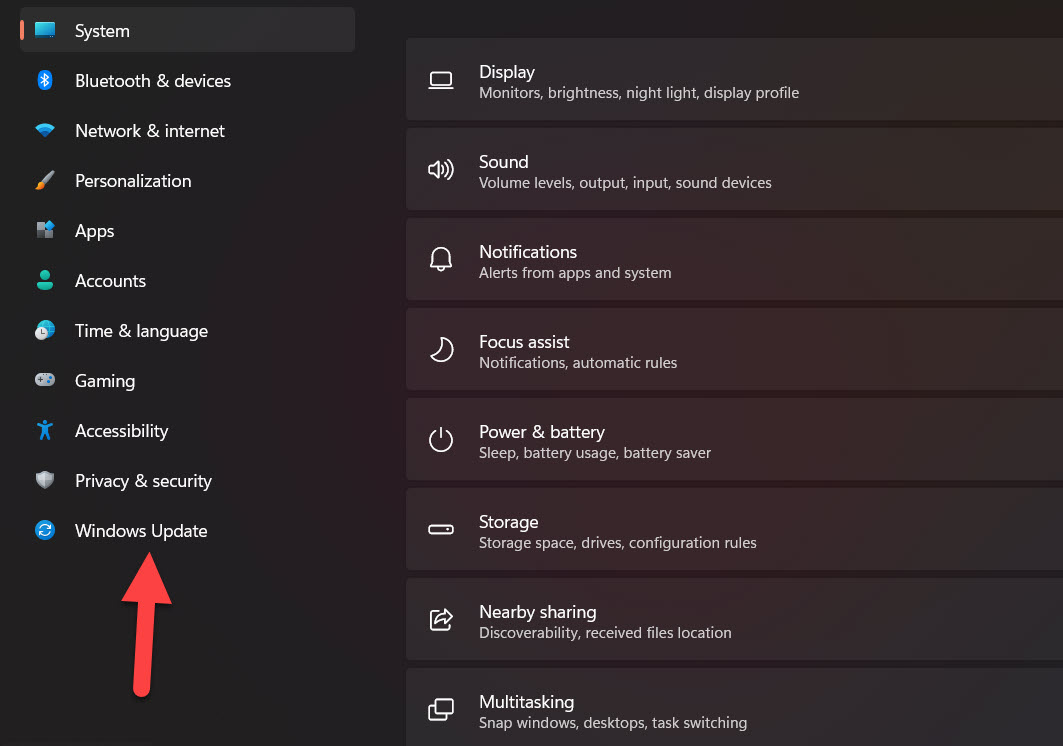 Windows Update
 Step 3. Now, click on the Check for Update.
Method 4: Sign in With Local Account
Step 1. Launch the Settings.
Step 2. Click on the Accounts from the left side.
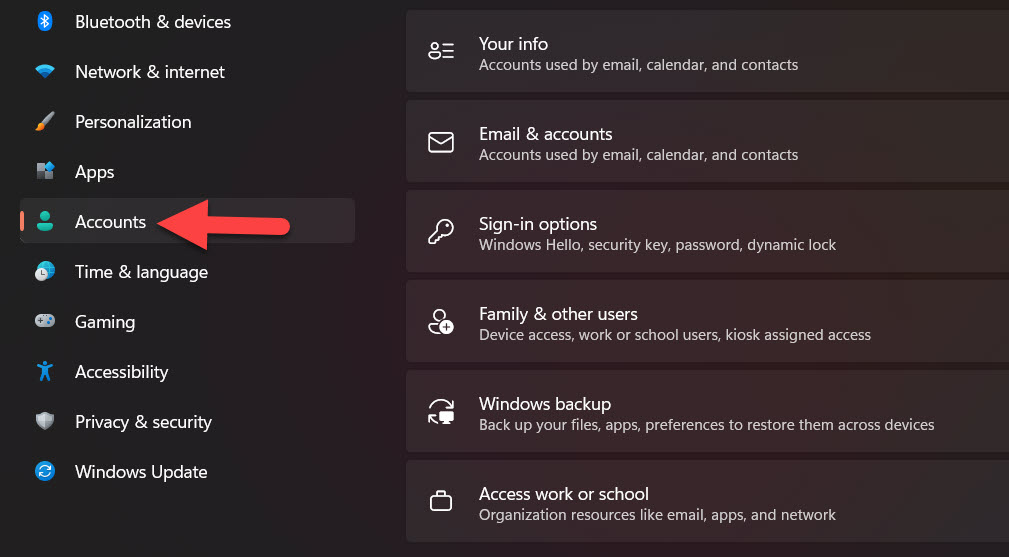 Click on the Accounts
 Step 3. Tap on the Your Info.
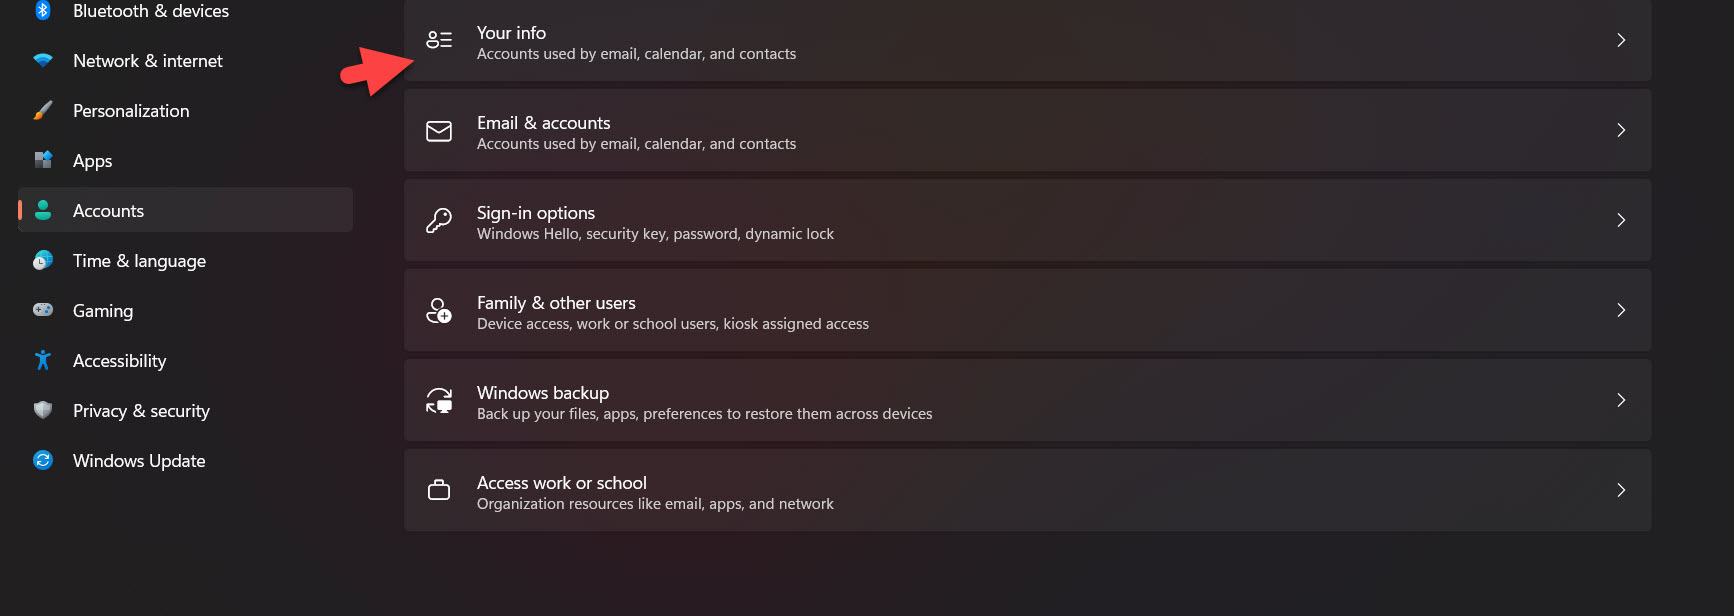 Tap on the Your Info
 Step 4. Now, scroll down until the section of related settings then click on the Accounts.
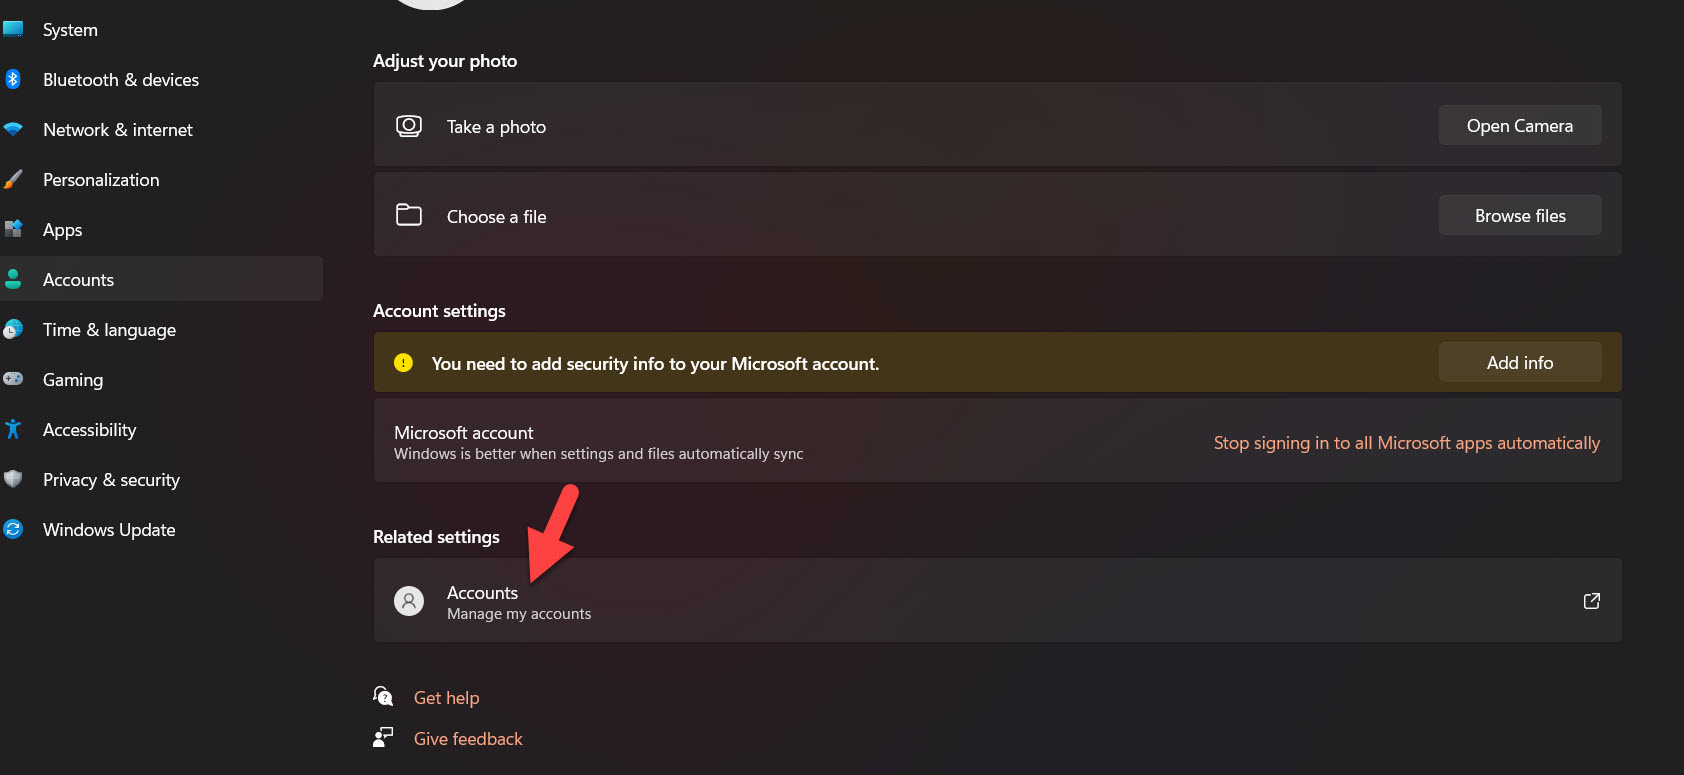 Click on the Accounts
 Step 5. At last, sign in it with your local account.
Method 5: Use Recovery Option
Step 1. First, open the Settings by pressing Win + I.
Step 2. However, go to the System after that tap on the Recovery.
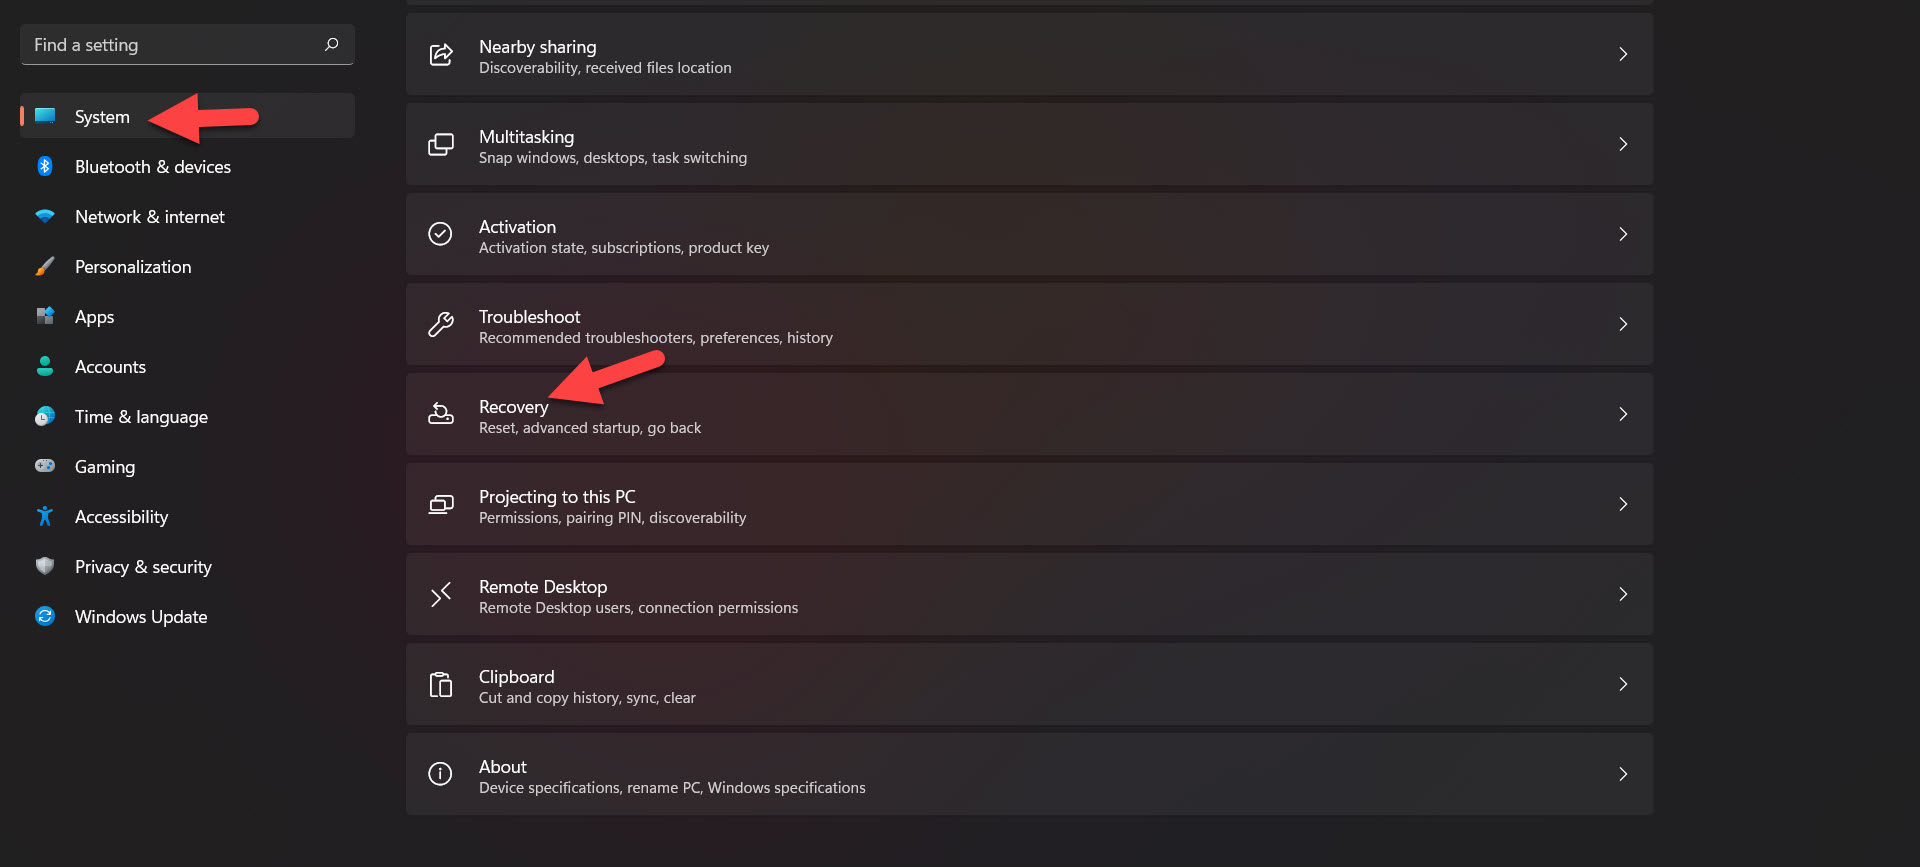 Tap on the Recovery
 Step 3. Click on the Reset PC.
 Click on the Reset PC
 If you click on the reset PC then your personal files will be deleted and before you reset your PC you need to take your personal file in USB.
Related Post: How to Move the Taskbar Icons to the Left in Windows 11
Bottom Line
It was all about How to Solve the Windows 11 Start Menu Not Working Issue. I hope this article is very helpful for you to solve the start menu not working. From this article, you will get something good. This is the right place where you can easily solve your problem. After following these steps I hope you will not face any kind of problem. If you faced any kind of problem and if you have any type of suggestions then do comment.
Tagged
Share This Article
In this article, you will learn How to Solve the Windows 11 Start Menu Not Working Issue. Nowadays people are downloaded Windows 11 and even most of the people are using it also. When people have downloaded the new operating system then the big problem is that the Start menu is not working. If the Start menu is not working then you can not do anything. When the Start menu is not working then you will search on YouTube after that the video you are watching maybe it is not real. But don’t worry I am here to solve your problem. If you want to solve the Windows 11 Start menu not working then you need to read this article. So, without wasting any time let’s get has started.
Related Post: How to Disable Snap Layouts for Maximize Button in Windows 11
Method 1: Restart the Windows Explorer
Step 1. First of all, you need to press Crtl + ALT + Delete from your keyboard after that select the Task Manager to open the task manager.
Step 2. Now, scroll down until you can not find the Windows Explorer once you find that click on the Restart at the bottom left corner.
 Click on the Restart
 When you restart the windows explorer then I hope that your Start menu starts working.
Method 2: Restart Your PC
Step 1. At first, press Crtl + ALT + Delete at once.
Step 2. Next, click on the Power button at the bottom left corner.
 Click on the Power Button
Step 3. After that, you will get three options Sleep, Shut down, Restart you need to tap on the Restart.
 Tap on the Restart
 Method 3: Check For Windows Update
Step 1. Press Windows + I from the keyboard to open the settings on your PC.
Step 2. Head towards the Windows Update from the left side.
 Windows Update
 Step 3. Now, click on the Check for Update.
Method 4: Sign in With Local Account
Step 1. Launch the Settings.
Step 2. Click on the Accounts from the left side.
 Click on the Accounts
 Step 3. Tap on the Your Info.
 Tap on the Your Info
 Step 4. Now, scroll down until the section of related settings then click on the Accounts.
 Click on the Accounts
 Step 5. At last, sign in it with your local account.
Method 5: Use Recovery Option
Step 1. First, open the Settings by pressing Win + I.
Step 2. However, go to the System after that tap on the Recovery.
 Tap on the Recovery
 Step 3. Click on the Reset PC.
 Click on the Reset PC
 If you click on the reset PC then your personal files will be deleted and before you reset your PC you need to take your personal file in USB.
Related Post: How to Move the Taskbar Icons to the Left in Windows 11
Bottom Line
It was all about How to Solve the Windows 11 Start Menu Not Working Issue. I hope this article is very helpful for you to solve the start menu not working. From this article, you will get something good. This is the right place where you can easily solve your problem. After following these steps I hope you will not face any kind of problem. If you faced any kind of problem and if you have any type of suggestions then do comment.


