5 Fastest Ways to Take Screenshots on Windows 10
A screenshot is a great tool for capturing the screen of computers. If you are computer enthusiastic or working on a computer on a daily basis then you will certainly need to take a screenshot of something. Taking a screenshot is part of my daily work and time by the time it is needed to take screenshots. I am pretty sure that you might also need to take screenshots sometimes. As a computer expert, you have to know a dozen ways of taking screenshots, whenever you want then you can quickly take the screenshot. It boosts productivity and creativity on Windows 10. Therefore, I will let you know about the 5 Fastest Ways to Take Screenshots on Windows 10.
If you are using a computer for the first time, it is really a difficult task to take screenshots because they don’t know the actual method. Well, I have tried and practiced many ways of taking screenshots. You will come to know about 5 fastest and easiest ways. However, you have to try any of those 5 ways which are easy for you. Let’s check it out!
Fastest Ways to Take Screenshots on Windows 10
1. Print Screen
After trying many ways. Finally, I have found one of the easiest ways to take a screenshot. Mostly, you are able to find this button on your computer keyboard. It is one of the easiest and straightforward ways in order to take a screenshot on Windows 10 or even Windows 8. You have to press PrtScn (Print Screen) button and open WordPad, then press C+V to paste your screenshot there. After that, you can save your screenshot from Wordpad.
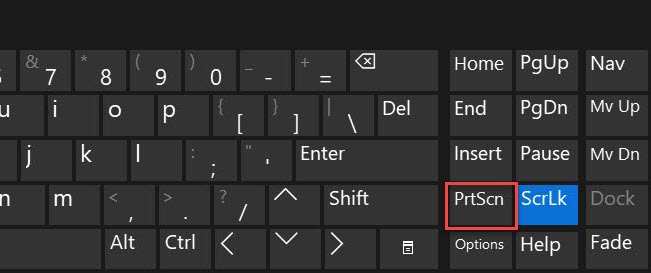 Print Screen
 2. Windows> Shift> S
You might have tried the above method which is very easy and simple. However, with this method, you can easily take a screenshot from any place you want. Sometimes we have to take screenshots from the exact places. You have to press Windows> Shift> S and paste on WordPad to save and edit it.
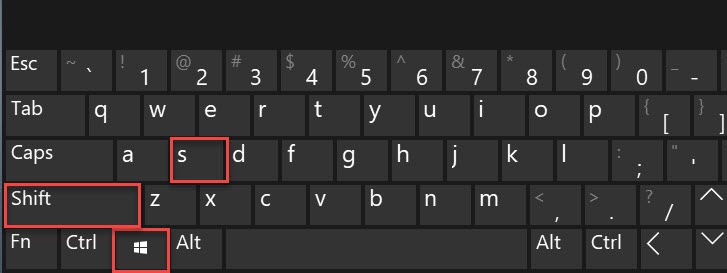 Windows + Shift + S
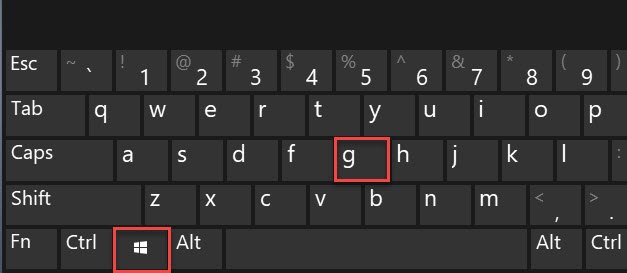
 3. Windows> G
This way is extremely useful and great for playing games. If while playing you want to take a screenshot from any place then this will be the best for you. It means that you can easily take a screenshot at the time of play any game. You have to press Windows + G to open the game bar option, there you can select to screenshot.
 Windows + G
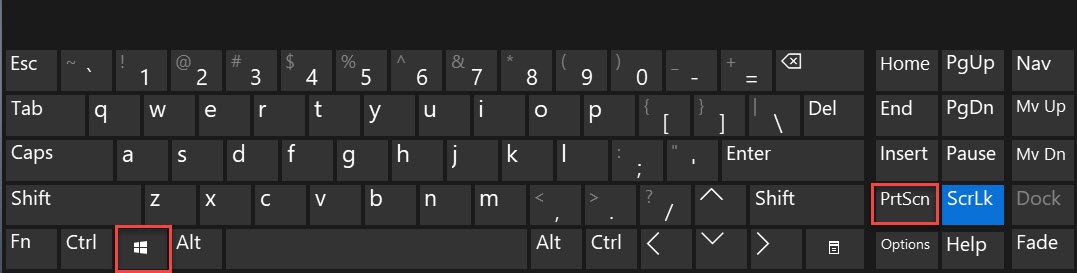
 4. Windows> Print Screen
This method is even better than all of them. You can use this method to take a screenshot and it will be automatically saved in the Picture folder on your computer. It will be really easy to find out the screenshot. Press Windows + Print Screen to take a screenshot from anywhere and you can see the screenshot on your Picture folder.
 Windows + Print Screen
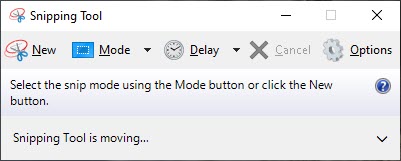
 5. Snipping Tool
The snipping tool is a very great and handy software which allows the user in order to take screenshots from any place. By default, the Snipping tool is available on every Windows operating system. You can use it to take screenshots from every place. Therefore, you have to press Windows Button> Type> Snipping Tool, and open it. Before saving the screenshot, you can also edit.
 Snipping Tool
 Related guides:
- How to Fix .EXE Files Not Opening In Windows 10
- How to Uninstall Microsoft Edge from Windows 10 in 2020
Bottom Line
It was all about 5 Fastest Ways to Take Screenshots on Windows 10. You can use all those ways to take a screenshot on Windows 10 without any third-party software. This guide will probably show you to take screenshots on Windows 10 in different ways. I have explained each and everything regarding taking a screenshot. However, I hope you have found this guide. If you have any kind of question or problem then don’t hesitate to leave comments in the comment section down below.
Tagged
Share This Article
A screenshot is a great tool for capturing the screen of computers. If you are computer enthusiastic or working on a computer on a daily basis then you will certainly need to take a screenshot of something. Taking a screenshot is part of my daily work and time by the time it is needed to take screenshots. I am pretty sure that you might also need to take screenshots sometimes. As a computer expert, you have to know a dozen ways of taking screenshots, whenever you want then you can quickly take the screenshot. It boosts productivity and creativity on Windows 10. Therefore, I will let you know about the 5 Fastest Ways to Take Screenshots on Windows 10.
If you are using a computer for the first time, it is really a difficult task to take screenshots because they don’t know the actual method. Well, I have tried and practiced many ways of taking screenshots. You will come to know about 5 fastest and easiest ways. However, you have to try any of those 5 ways which are easy for you. Let’s check it out!
Fastest Ways to Take Screenshots on Windows 10
1. Print Screen
After trying many ways. Finally, I have found one of the easiest ways to take a screenshot. Mostly, you are able to find this button on your computer keyboard. It is one of the easiest and straightforward ways in order to take a screenshot on Windows 10 or even Windows 8. You have to press PrtScn (Print Screen) button and open WordPad, then press C+V to paste your screenshot there. After that, you can save your screenshot from Wordpad.
Print Screen 2. Windows> Shift> S
You might have tried the above method which is very easy and simple. However, with this method, you can easily take a screenshot from any place you want. Sometimes we have to take screenshots from the exact places. You have to press Windows> Shift> S and paste on WordPad to save and edit it.
Windows + Shift + S 3. Windows> G
This way is extremely useful and great for playing games. If while playing you want to take a screenshot from any place then this will be the best for you. It means that you can easily take a screenshot at the time of play any game. You have to press Windows + G to open the game bar option, there you can select to screenshot.
Windows + G 4. Windows> Print Screen
This method is even better than all of them. You can use this method to take a screenshot and it will be automatically saved in the Picture folder on your computer. It will be really easy to find out the screenshot. Press Windows + Print Screen to take a screenshot from anywhere and you can see the screenshot on your Picture folder.
Windows + Print Screen 5. Snipping Tool
The snipping tool is a very great and handy software which allows the user in order to take screenshots from any place. By default, the Snipping tool is available on every Windows operating system. You can use it to take screenshots from every place. Therefore, you have to press Windows Button> Type> Snipping Tool, and open it. Before saving the screenshot, you can also edit.
Snipping Tool Related guides:
- How to Fix .EXE Files Not Opening In Windows 10
- How to Uninstall Microsoft Edge from Windows 10 in 2020
Bottom Line
It was all about 5 Fastest Ways to Take Screenshots on Windows 10. You can use all those ways to take a screenshot on Windows 10 without any third-party software. This guide will probably show you to take screenshots on Windows 10 in different ways. I have explained each and everything regarding taking a screenshot. However, I hope you have found this guide. If you have any kind of question or problem then don’t hesitate to leave comments in the comment section down below.