How to Write Urdu, Arabic, Persian in Adobe Illustrator CC 2015
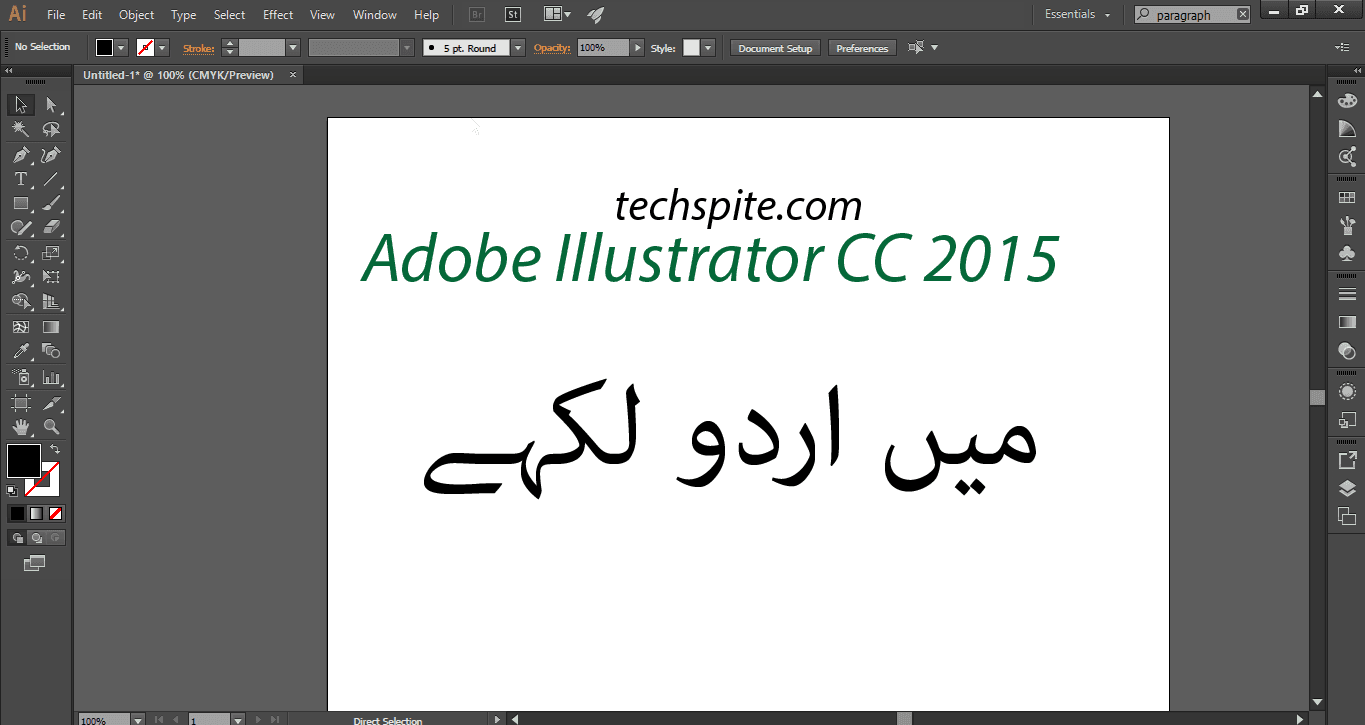
In this article, I am going to guide on How to Write Urdu, Arabic, Persian in Adobe Illustrator CC 2015. Most of the people are facing the problem and especially Middle Eastern and South Asian countries because their writing scripts are changed and they don’t know how to write Urdu, Arabic, Persian. In Illustrator it is disabled by default to write in it. We will enable and we will guide step by step How to Write Urdu, Arabic, Persian in Adobe Illustrator CC 2015. And you just need to follow the steps which I am going to guide you below. Before wasting the time let’s get started.
How to Write Urdu in Ms Word? Microsoft Office All Versions Windows 10
How to Find Saved WiFi Passwords in Windows 10?
How to Write Urdu, Arabic, Persian in Adobe Illustrator CC 2015
Step 1. In the first step, you are going to open the Adobe Illustrator. Then go to the Edit menu then click on the last option which is Preference then click on the type.
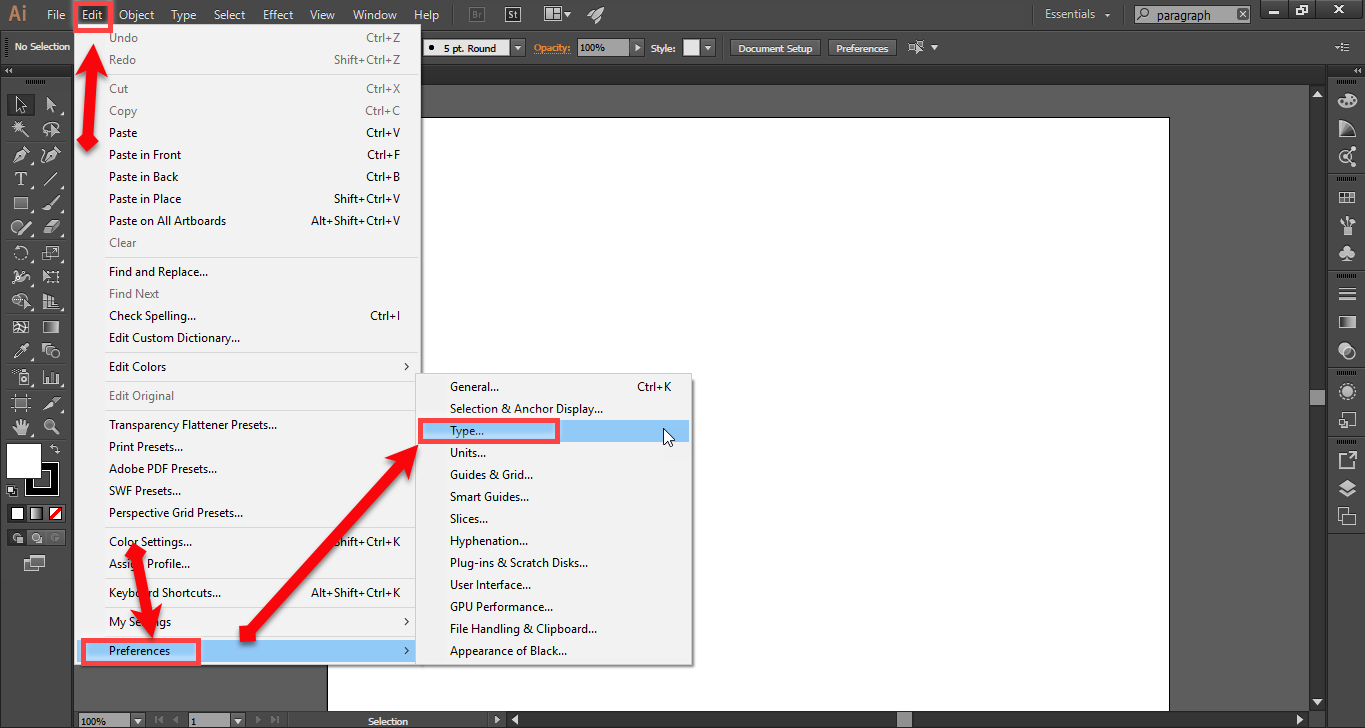 Type
Type Step 2. Then a new window will be open, now you should choose the language option select Show Indic Options then click ok.
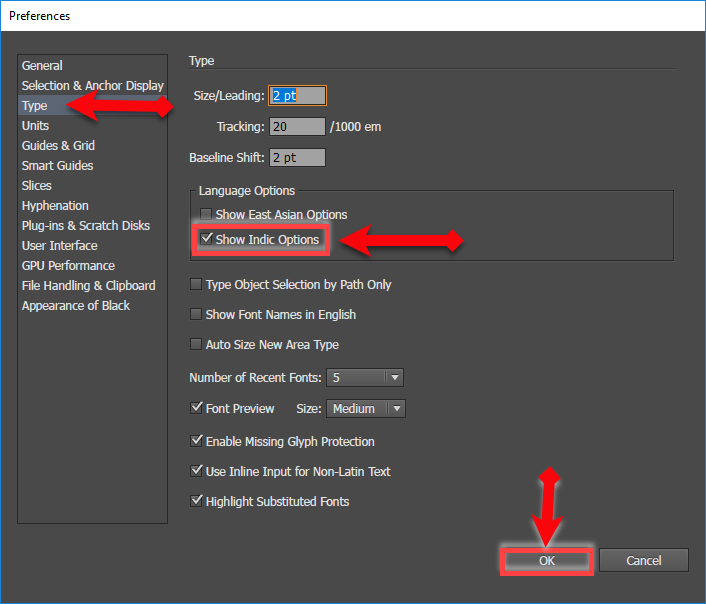 language option
 Step 3. Then go to the window menu, then select type option, after that select the paragraph option.
 Window
 Step 4. In the last step, you will see a paragraph dialogue box, click on the four line icon then select the Middle Eastern & South Asian Every-line Composer.
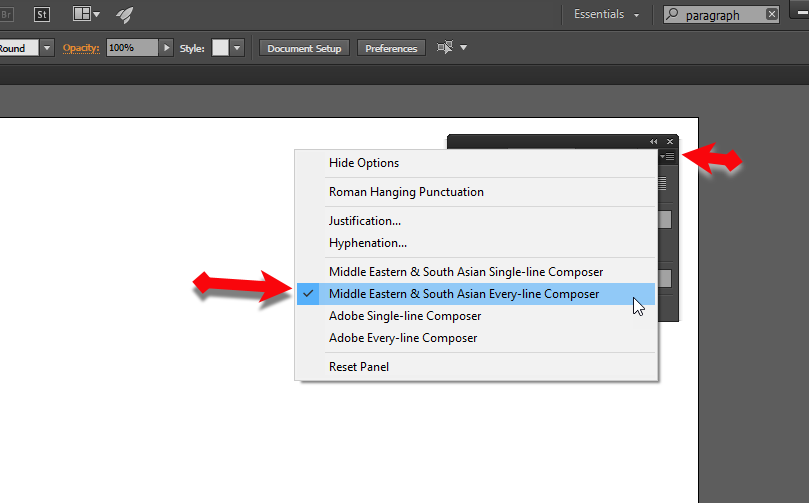 paragraph
 You have done it! now it each and everything is ready to write Urdu, Arabic, Persian. Make sure that your keyboard is also in Urdu. Now write whatever you want and whatever you are going to design you can easily do it. I am pretty sure that this method or steps will work for you and without any problems.
How to Change Windows 10 System Language
How To Add an Extra Hard Drive in Windows
Conclusion:
It as all about the problem you had. Hope it was useful for you and if you have any question or any problem you face then feel free to comment on your problem. Daily visit our website for the best tech learning point. Thanks for visiting my site.
Share This Article
In this article, I am going to guide on How to Write Urdu, Arabic, Persian in Adobe Illustrator CC 2015. Most of the people are facing the problem and especially Middle Eastern and South Asian countries because their writing scripts are changed and they don’t know how to write Urdu, Arabic, Persian. In Illustrator it is disabled by default to write in it. We will enable and we will guide step by step How to Write Urdu, Arabic, Persian in Adobe Illustrator CC 2015. And you just need to follow the steps which I am going to guide you below. Before wasting the time let’s get started.
How to Write Urdu in Ms Word? Microsoft Office All Versions Windows 10
How to Find Saved WiFi Passwords in Windows 10?
How to Write Urdu, Arabic, Persian in Adobe Illustrator CC 2015
Step 1. In the first step, you are going to open the Adobe Illustrator. Then go to the Edit menu then click on the last option which is Preference then click on the type.
Type Step 2. Then a new window will be open, now you should choose the language option select Show Indic Options then click ok.
language option Step 3. Then go to the window menu, then select type option, after that select the paragraph option.
Window Step 4. In the last step, you will see a paragraph dialogue box, click on the four line icon then select the Middle Eastern & South Asian Every-line Composer.
paragraph You have done it! now it each and everything is ready to write Urdu, Arabic, Persian. Make sure that your keyboard is also in Urdu. Now write whatever you want and whatever you are going to design you can easily do it. I am pretty sure that this method or steps will work for you and without any problems.
How to Change Windows 10 System Language
How To Add an Extra Hard Drive in Windows
Conclusion:
It as all about the problem you had. Hope it was useful for you and if you have any question or any problem you face then feel free to comment on your problem. Daily visit our website for the best tech learning point. Thanks for visiting my site.