How to Remove Activate Windows 10 Watermark Permanently (New Method)
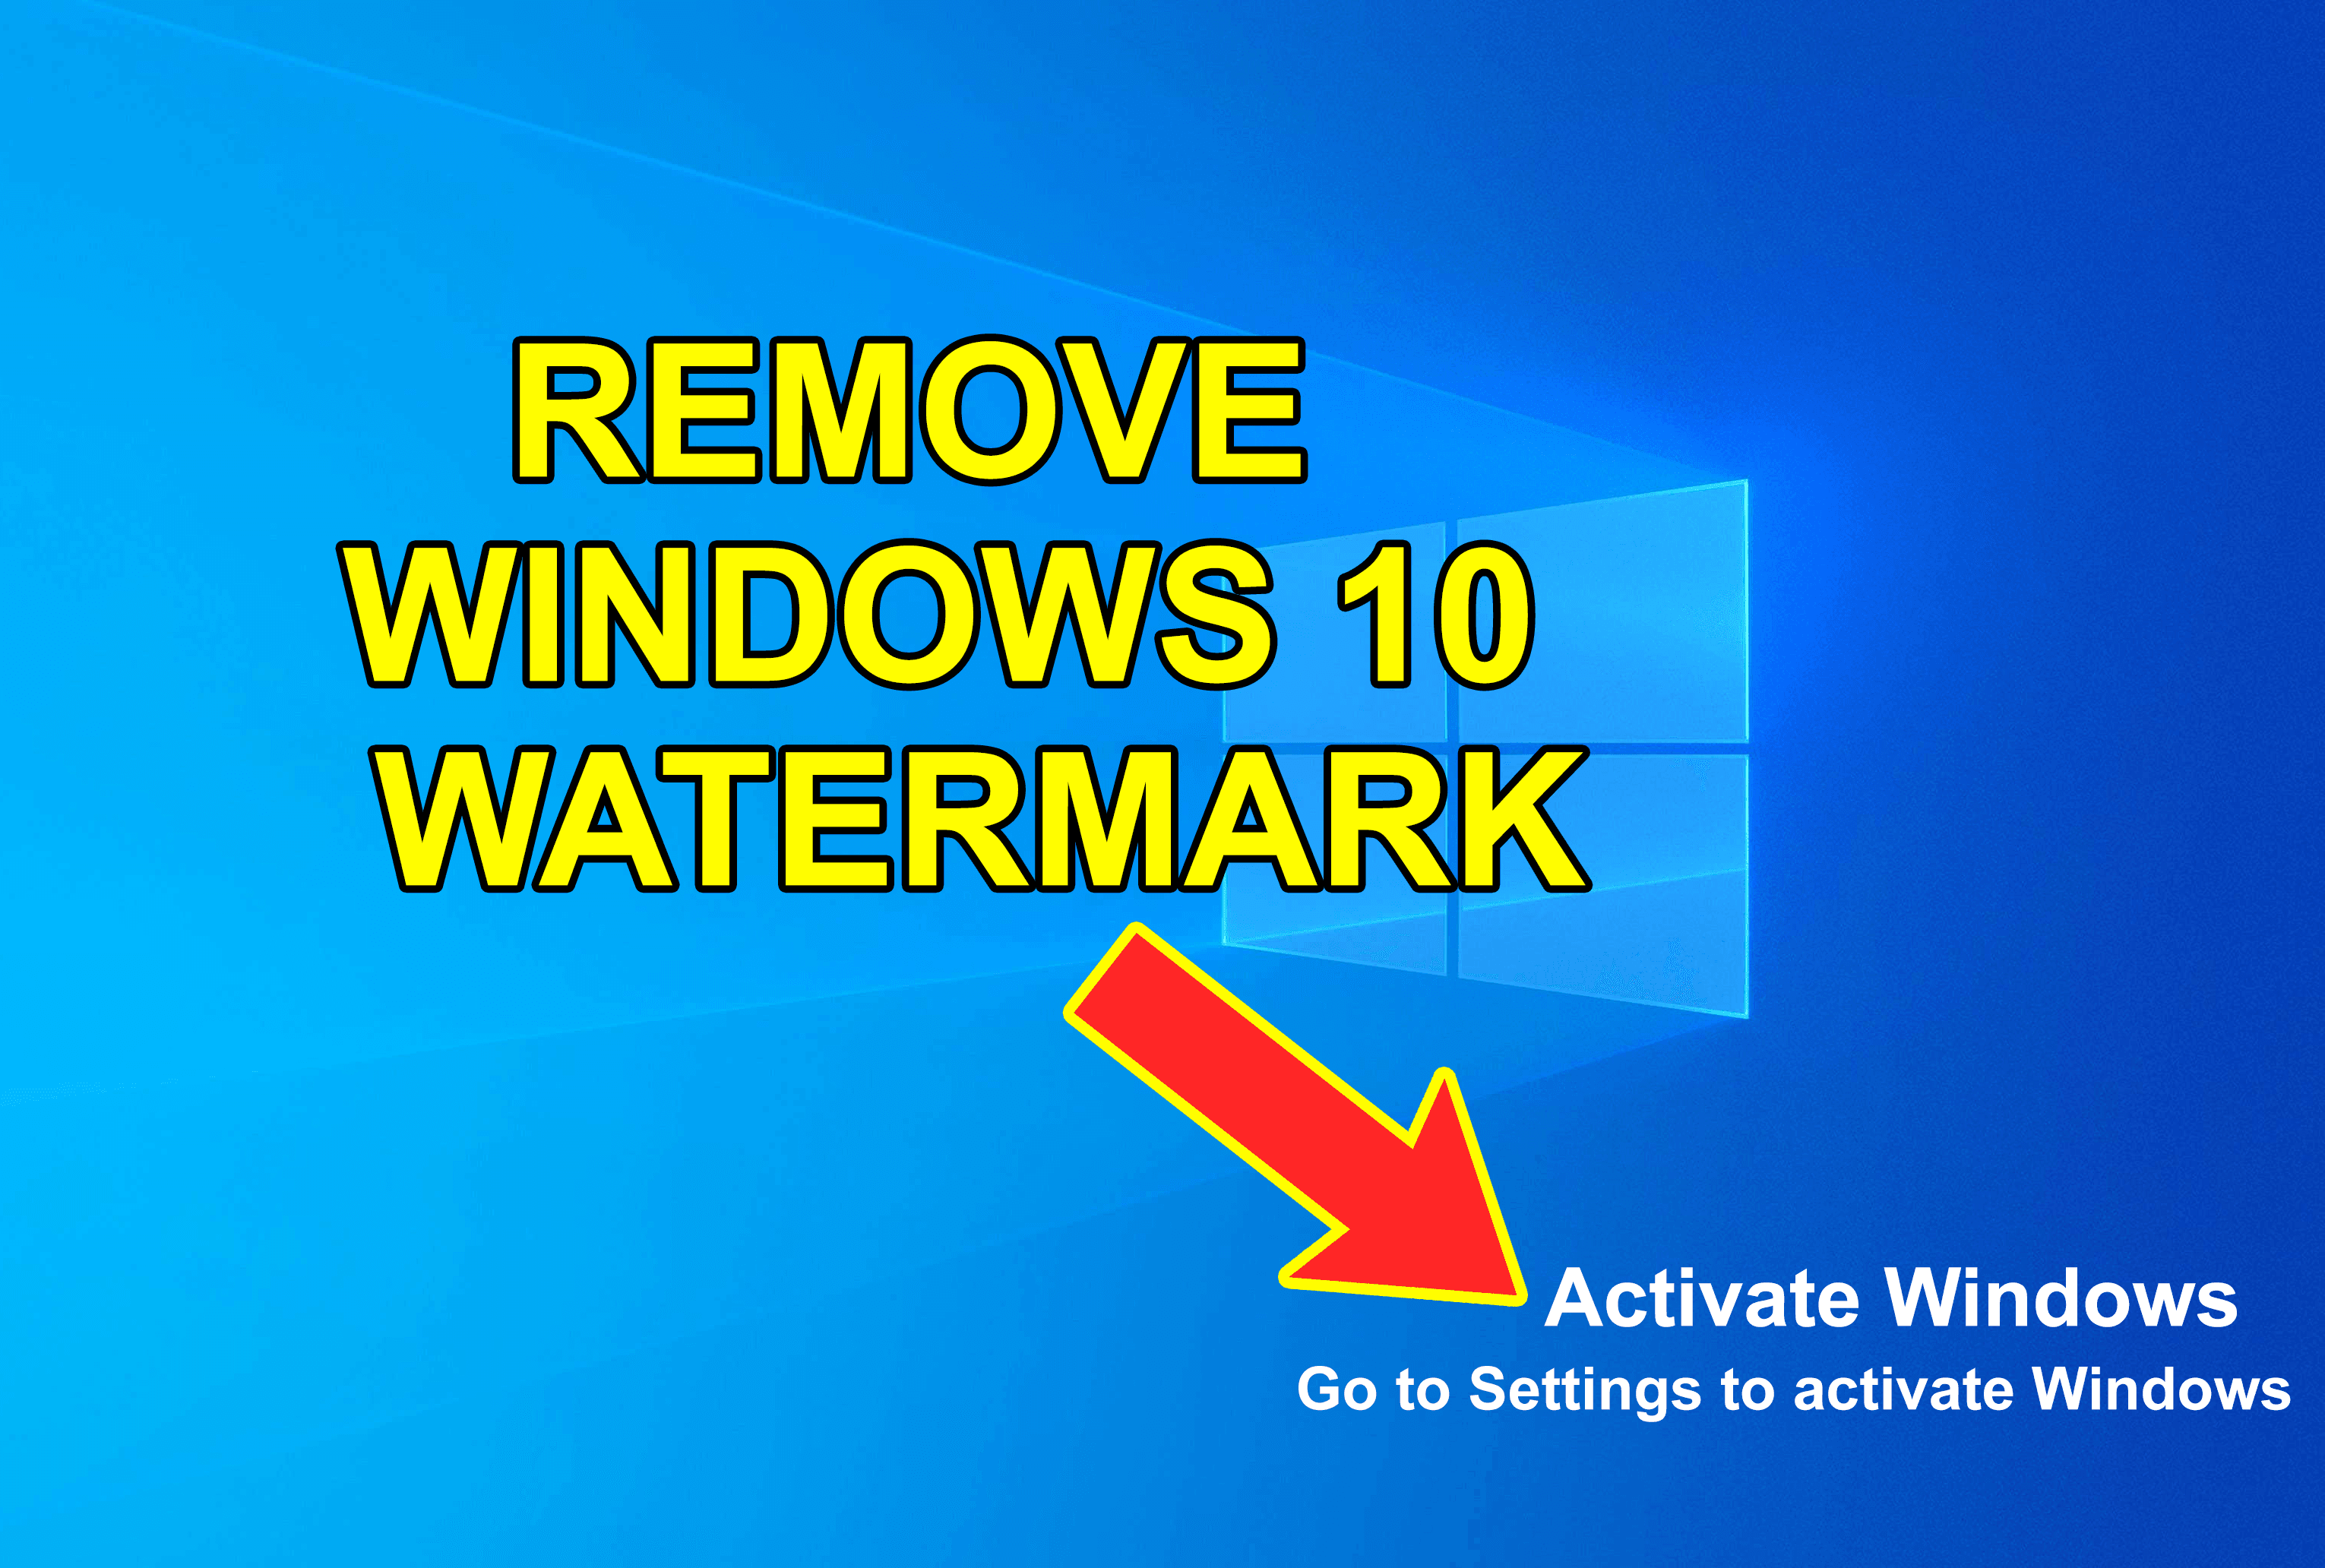
When you are using your PC then your PC wants to update. Once it wants to update your PC then it will have a watermark of update windows 10 on your desktop screen. Then you don’t want that watermark is set on your desktop screen. So, when you try to remove the watermark of windows 10 then you don’t the correct way to remove the watermark. Don’t worry I will solve your problems. If you want to remove activate windows 10 watermark then you need to read this article. So, without wasting any time let’s get has started. From this article, you will learn How to Remove Activate Windows 10 Watermark Permanently (New Method).
All these methods don’t need any third-party software to remove the windows 10 watermark. Just be patient and do follow the steps down below.
Related Post: How to Sticky Ads on WordPress Sites to Boost Revenue
Method 1: Remove Activate Windows 10 Watermark Permanently
Step 1. At first, press Windows + R to open the dialogue box.
Step 2. Once the dialogue is open the type Regedit after that click on the Ok.
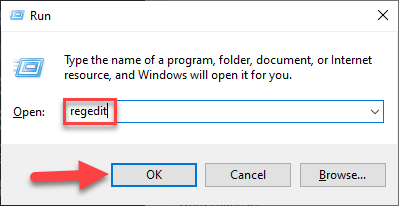 Click on the Ok
 Step 3. When the regedit is open then click on the HKEY_CURRENT_USER after that click on the Control Panel.
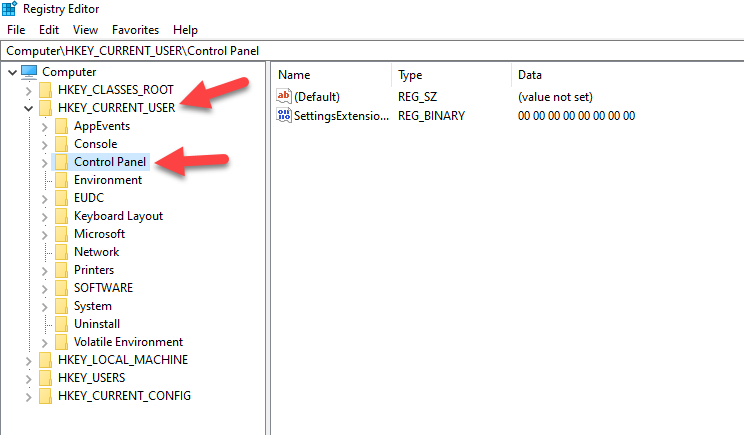 Click on the Control Panel
 Step 4. Now, you need to click on the Desktop.
 Click on the Desktop
 Step 5. Next, scroll down then find PaintDesktopVersion once you find that then simply double click on it.
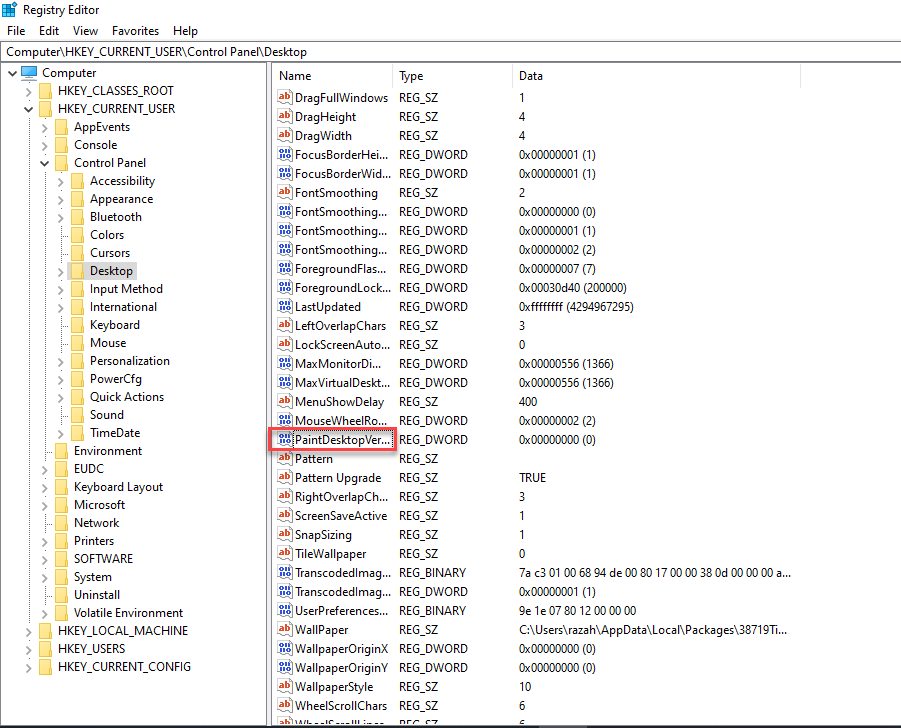 Click on the PaintDesktopVersion
 Step 6. However, change the value 0 then click on the Ok.
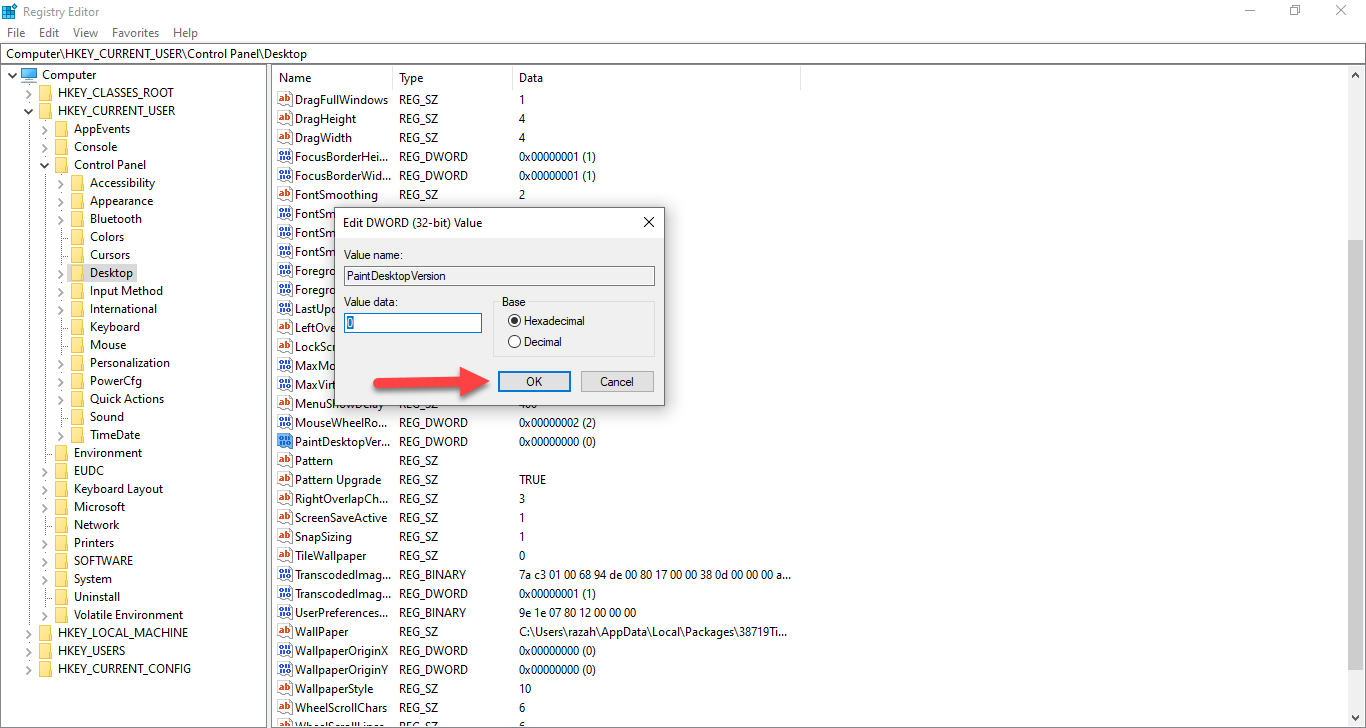 Click on the Ok
 Step 7. At last, you need to close the registry editor after that restart your PC.
Method 2: Remove Activate Windows 10 Watermark Using Notepad
Step 1. First of all, launch the Notepad from the Start Menu.
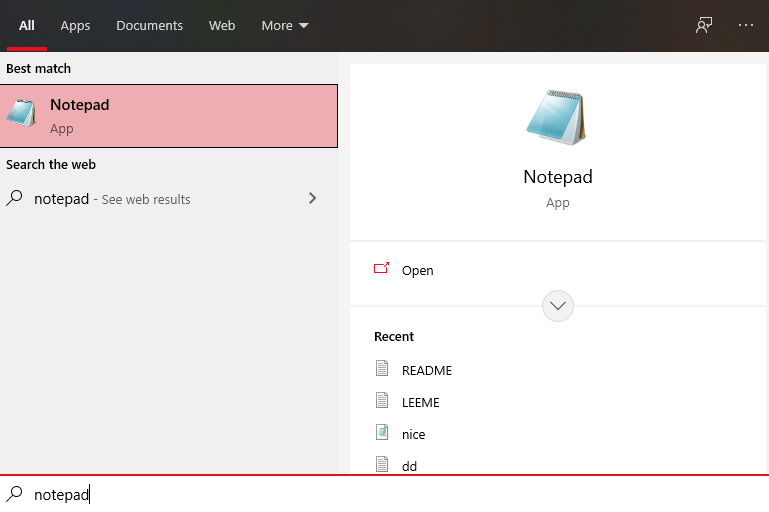 Launch the Notepad
 Step 2. When the notepad is open the copy and paste the code down below.
@echo off
taskkill /F /IM explorer.exe
explorer.exe
exit
 Paste the Code
 Step 3. Now, click on the File at the top left corner after that click on the Save As.
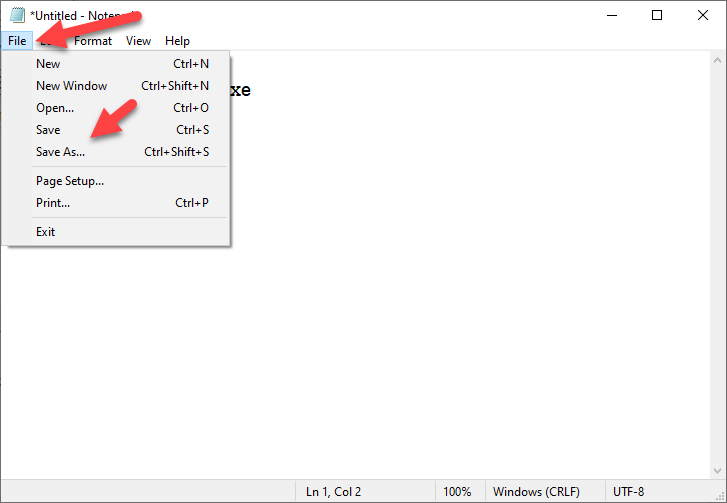 Click on the Save As
 Step 4. Next, set any name as you want but you need to add the extension with .bat after that click on the Save.
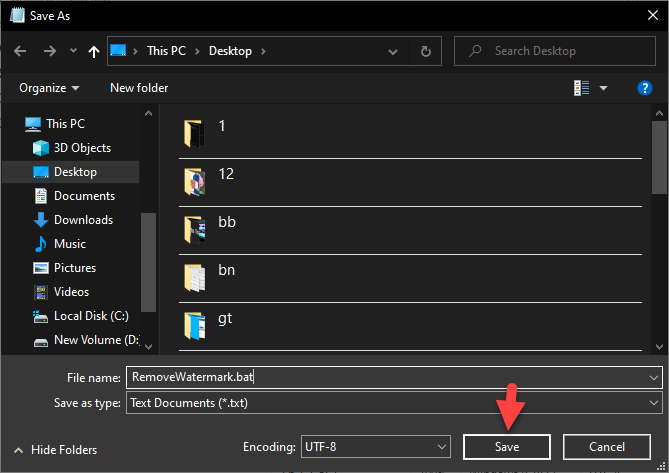 Click on the Save
 Step 5. Find the location where you save it then double click on it to run your PC.
Method 3. Remove Activate Windows 10 Watermark Using Task Scheduler
Step 1. Go to the Start Menu then type Task Scheduler after that click on the Open.
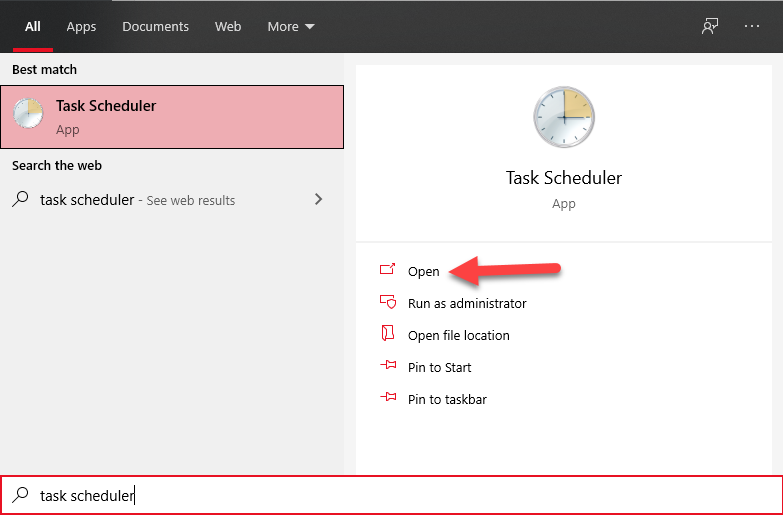 Click on the Open
 Step 2. On the section of actions click on the Create Basic Task.
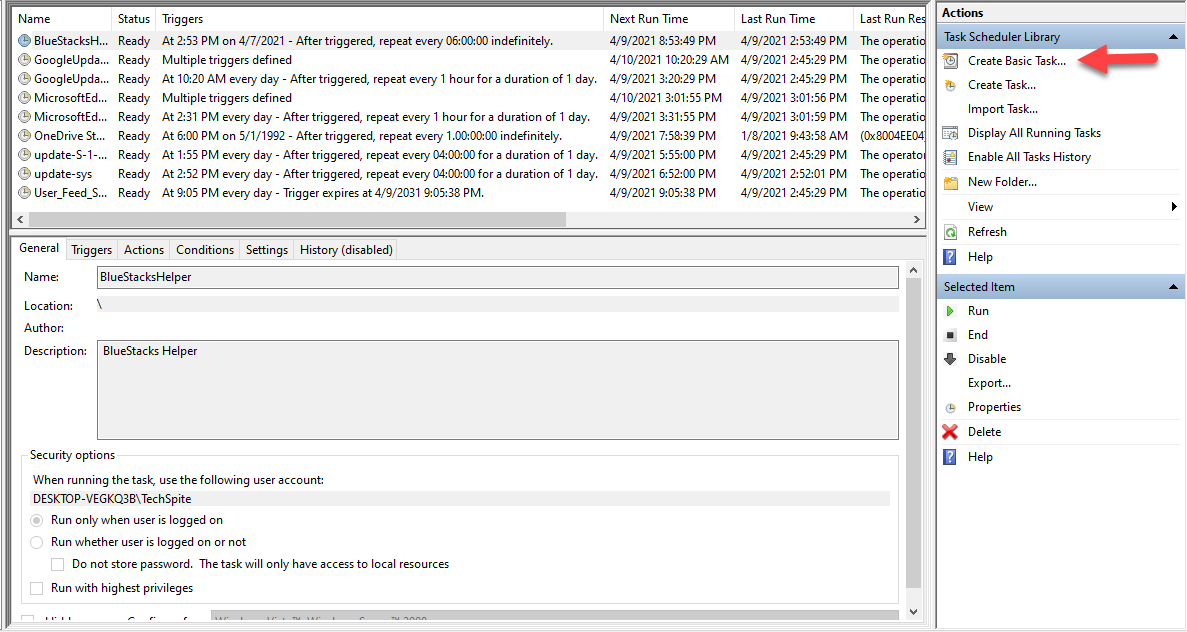 Click on the Create Basic Task
 Step 3. Set the name of the task then simply you need to click on the Next.
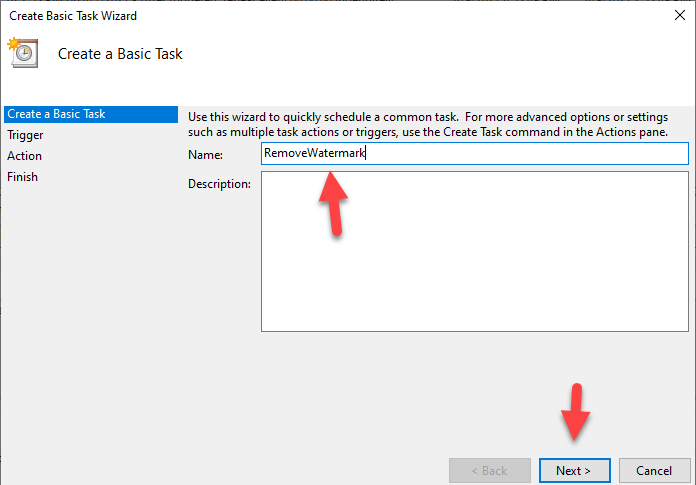 Click on the Next
 Step 4. Here check the When the Computer Start after that click on the Next.
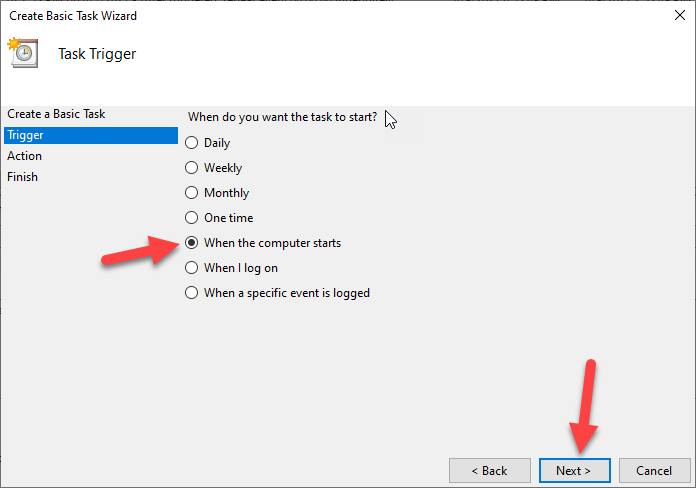 Click on the Next
 Step 5. Check the Start a Program then you need to click on the Next.
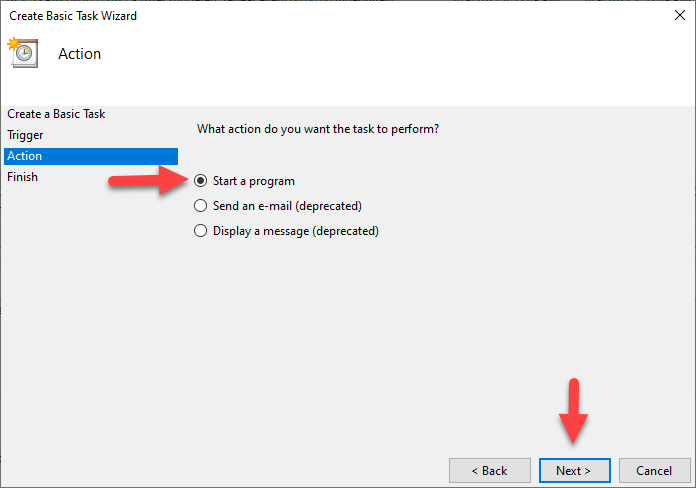 Click on the Next
 Step 6. Tap on the Browser to select the batch file after that click on the Next.
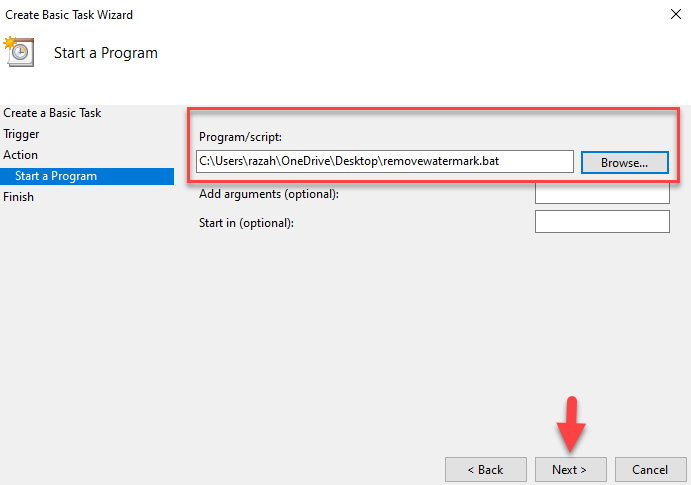 Click on the Next
 Step 7. At last, tap on the Finish.
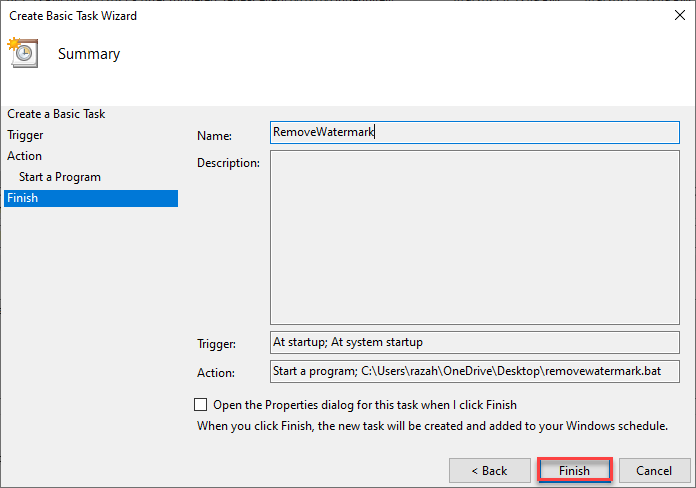 Click on the Finish
 Method 4: Remove Activate Windows 10 Watermark Using Regedit
Step 1. Tap on the Start Menu at the bottom left corner after that type Registry Editor then clicks on the Open.
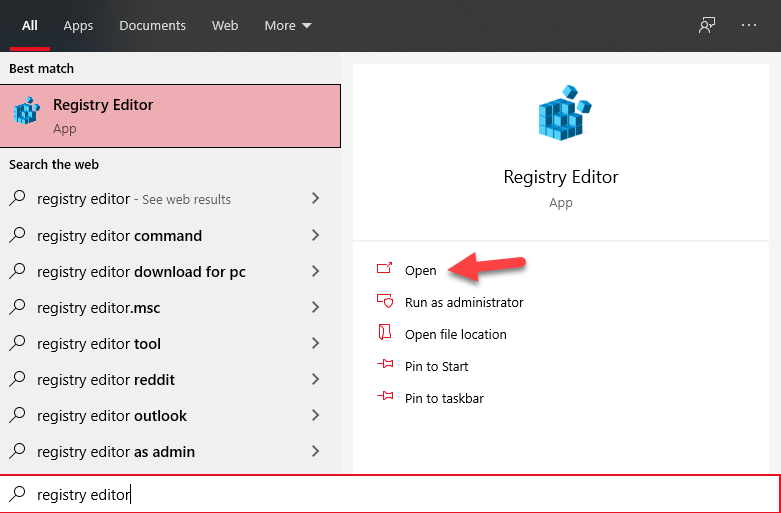 Click on the Open
 Step 2. Once the registry editor will open the go to Computer\HKEY_LOCAL_MACHINE\SYSTEM\CurrentControlSet\Services\svsvc.
Step 3. Now, find the Start after that simply double click on the start.
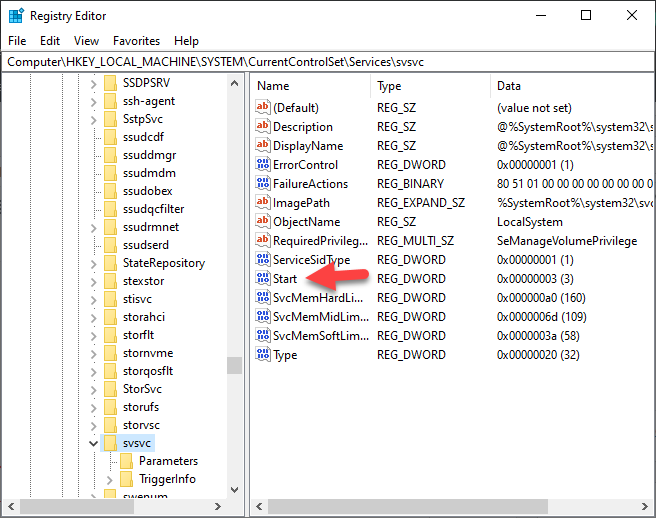 Double Click On the Start
 Step 4. Next, set the value at 4.
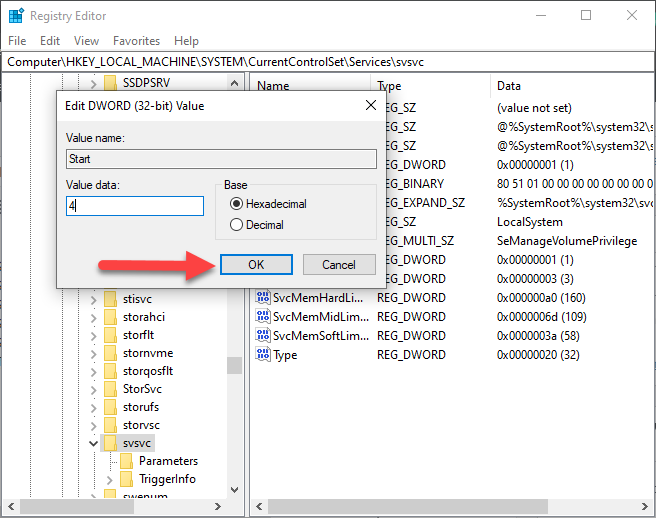
So, close all the window on your PC then restart you PC after that when you PC will open then you will not see any watermark of windows 10.
Method 5: Remove Activate Windows 10 Watermark Using Settings
Step 1. At first, right-click on the desktop screen
Step 2. After that tap on the Display Settings.
Step 3. Now, go to the Notifications & Actions from the left side of your screen then uncheck the Show me the Windows Welcome Experience After Updates and Occasionally When I Sign in to Highlight What’s New and Suggested after that uncheck the Get Tips, Tricks, and Suggestions As You Use Windows.

Step 4. At last, close the registry editor then you need to restart your PC then I hope you will not see the watermark of windows 10.
Related Post: Best Webcam Software for Windows 10 in 2021
Bottom Line
It was all about How to Remove Activate Windows 10 Watermark Permanently (New Method). I hope this article is very helpful for you to remove activate windows 10 watermark. From this article, you will get something special. Sp, after following these steps I hope you will not face any kind of problem. However, if you faced any kind of problem don’t hesitate to leave comments down below.
Related Post: How to Enable and Use Clipboard History on Windows 10
Share This Article
When you are using your PC then your PC wants to update. Once it wants to update your PC then it will have a watermark of update windows 10 on your desktop screen. Then you don’t want that watermark is set on your desktop screen. So, when you try to remove the watermark of windows 10 then you don’t the correct way to remove the watermark. Don’t worry I will solve your problems. If you want to remove activate windows 10 watermark then you need to read this article. So, without wasting any time let’s get has started. From this article, you will learn How to Remove Activate Windows 10 Watermark Permanently (New Method).
All these methods don’t need any third-party software to remove the windows 10 watermark. Just be patient and do follow the steps down below.
Related Post: How to Sticky Ads on WordPress Sites to Boost Revenue
Method 1: Remove Activate Windows 10 Watermark Permanently
Step 1. At first, press Windows + R to open the dialogue box.
Step 2. Once the dialogue is open the type Regedit after that click on the Ok.
Click on the Ok Step 3. When the regedit is open then click on the HKEY_CURRENT_USER after that click on the Control Panel.
Click on the Control Panel Step 4. Now, you need to click on the Desktop.
Click on the Desktop Step 5. Next, scroll down then find PaintDesktopVersion once you find that then simply double click on it.
Click on the PaintDesktopVersion Step 6. However, change the value 0 then click on the Ok.
Click on the Ok Step 7. At last, you need to close the registry editor after that restart your PC.
Method 2: Remove Activate Windows 10 Watermark Using Notepad
Step 1. First of all, launch the Notepad from the Start Menu.
Launch the Notepad Step 2. When the notepad is open the copy and paste the code down below.
@echo off
taskkill /F /IM explorer.exe
explorer.exe
exit
Paste the Code Step 3. Now, click on the File at the top left corner after that click on the Save As.
Click on the Save As Step 4. Next, set any name as you want but you need to add the extension with .bat after that click on the Save.
Click on the Save Step 5. Find the location where you save it then double click on it to run your PC.
Method 3. Remove Activate Windows 10 Watermark Using Task Scheduler
Step 1. Go to the Start Menu then type Task Scheduler after that click on the Open.
Click on the Open Step 2. On the section of actions click on the Create Basic Task.
Click on the Create Basic Task Step 3. Set the name of the task then simply you need to click on the Next.
Click on the Next Step 4. Here check the When the Computer Start after that click on the Next.
Click on the Next Step 5. Check the Start a Program then you need to click on the Next.
Click on the Next Step 6. Tap on the Browser to select the batch file after that click on the Next.
Click on the Next Step 7. At last, tap on the Finish.
Click on the Finish Method 4: Remove Activate Windows 10 Watermark Using Regedit
Step 1. Tap on the Start Menu at the bottom left corner after that type Registry Editor then clicks on the Open.
Click on the Open Step 2. Once the registry editor will open the go to Computer\HKEY_LOCAL_MACHINE\SYSTEM\CurrentControlSet\Services\svsvc.
Step 3. Now, find the Start after that simply double click on the start.
Double Click On the Start Step 4. Next, set the value at 4.
So, close all the window on your PC then restart you PC after that when you PC will open then you will not see any watermark of windows 10.
Method 5: Remove Activate Windows 10 Watermark Using Settings
Step 1. At first, right-click on the desktop screen
Step 2. After that tap on the Display Settings.
Step 3. Now, go to the Notifications & Actions from the left side of your screen then uncheck the Show me the Windows Welcome Experience After Updates and Occasionally When I Sign in to Highlight What’s New and Suggested after that uncheck the Get Tips, Tricks, and Suggestions As You Use Windows.
Step 4. At last, close the registry editor then you need to restart your PC then I hope you will not see the watermark of windows 10.
Related Post: Best Webcam Software for Windows 10 in 2021
Bottom Line
It was all about How to Remove Activate Windows 10 Watermark Permanently (New Method). I hope this article is very helpful for you to remove activate windows 10 watermark. From this article, you will get something special. Sp, after following these steps I hope you will not face any kind of problem. However, if you faced any kind of problem don’t hesitate to leave comments down below.
Related Post: How to Enable and Use Clipboard History on Windows 10