How to Install Kali Linux on VirtualBox on Windows 10

Welcome! in this article, I am going to guide you How to Install Kali Linux on VirtualBox on Windows 10. So to install Kali Linux operating system on VirtualBox need skill which some user of the computer doesn’t know How to Install Kali Linux on VirtualBox on Windows 10. Then no worries I am here today to guide this to enjoy using Kali Linux on your Windows operating system.
What is Kali Linux?
It is a Debian delivered Linux and it is designed for digital forensics and it is maintained by Offensive Security.
How to Install Kali Linux on VirtualBox on Windows 10
First, you need to download and install the required file for installing Kali Linux on VirtualBox on Windows 10.
Required File for installing Kali Linux:
1. Kali Linux Download. 2. Download VirtualBox.
How to create a virtual machine?
First, you need to download and install Virtualbox then follow the steps below to create a virtual machine in Virtualbox.
Step 1: Once the downloading and installing is done then double-click to open VirtualBox.
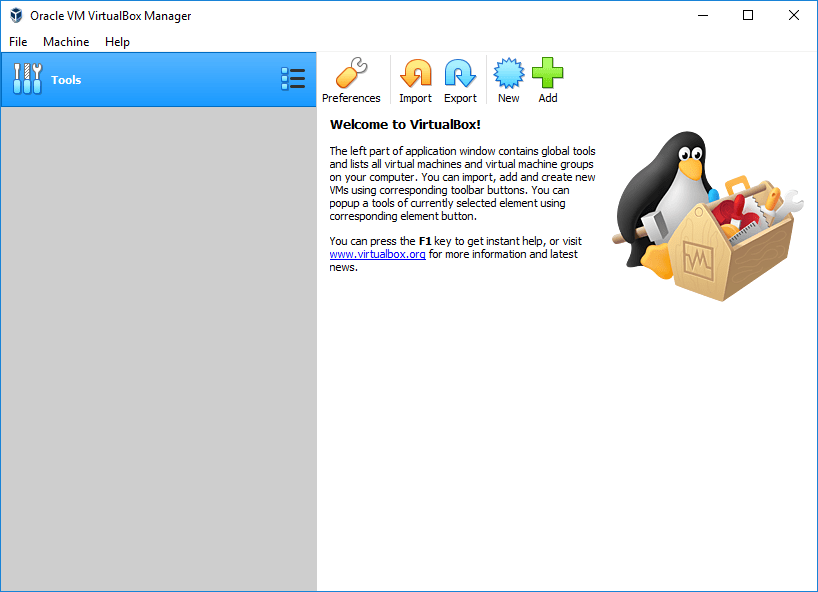 VirtualBox
 Step 2: After that click on the New which is present at the top right.
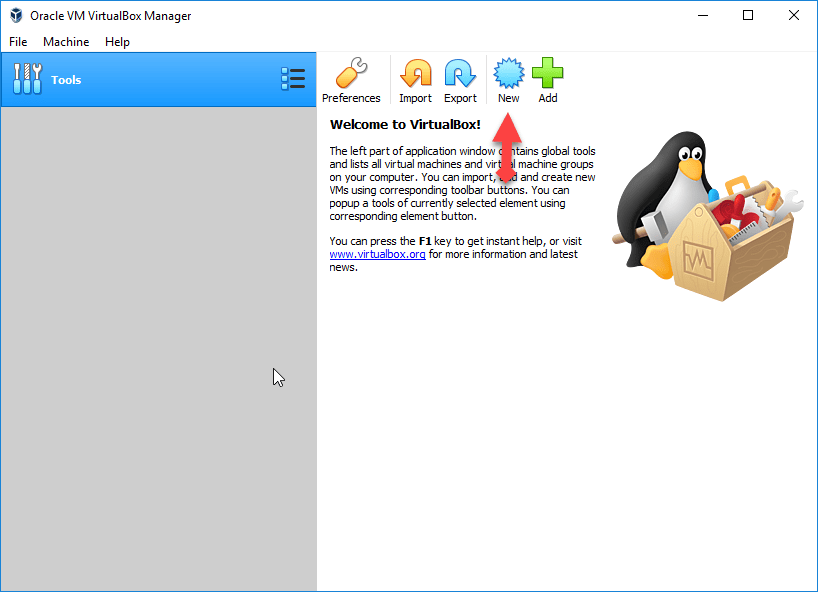 Click New
 Step 3: So, now fill in the blanks. At first Blank Name, you need to write Kali Linux, machine folder: you have to select your location file, Type: Linux, and version: Linux 2.6 / 3.x / 4.x (64bit). After doing this click next.
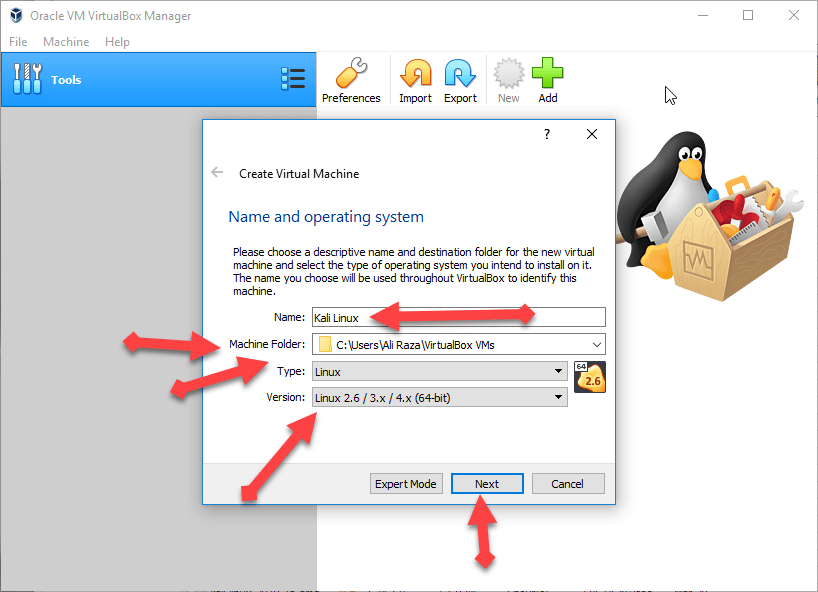 Fill in the blanks
 Step 4: You need to specify the memory up to 2GB or you can increase the memory for better performance.
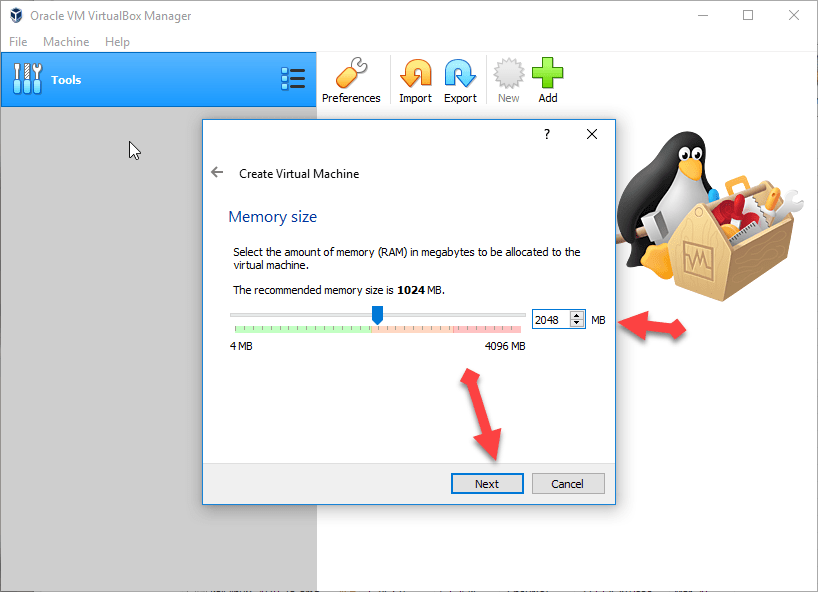 Specify the memory
 Step 5: A new window will be opened you will have three option then you should select the second one ( Create a virtual disk now ).
 second option
 Step 6: Then you will again have three options you need to choose the default one VDI (VirtualBox Disk Image).
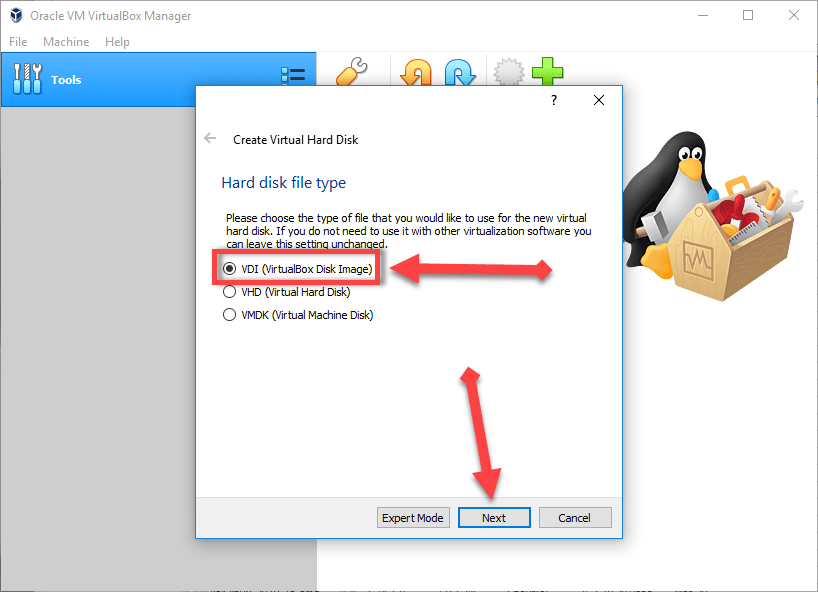 VDI (VirtualBox Disk Image)
 How to Install Kali Linux on VirtualBox on Windows 10
Step 7: Now, choose Dynamical allocated which is the default for Linux.
Step 8: In this step, choose the amount of your hard disk for Linux. So you should choose 15Gb plus.
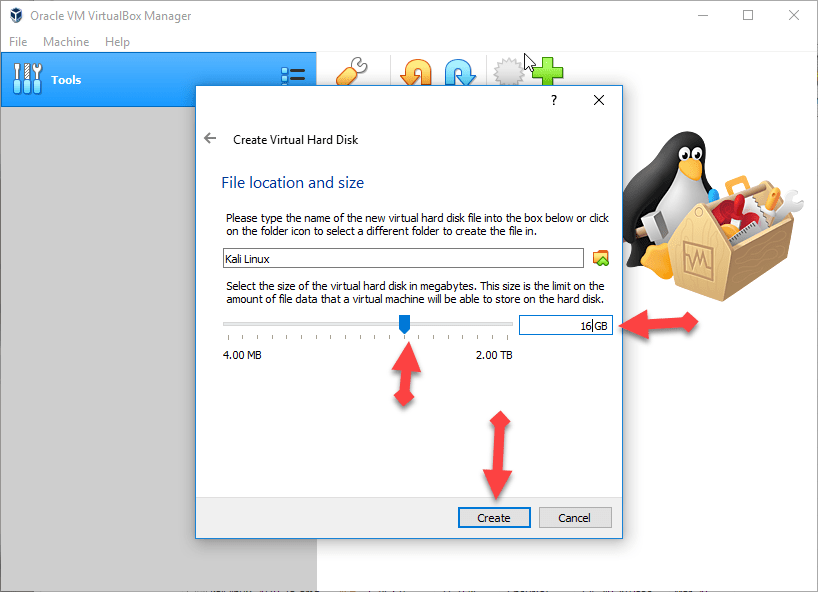 choose the amount hard disk
 You have done great! successfully created a virtual machine.
Step 9: If the creating of the virtual machine then you need to click on the Setting for better performance to work.
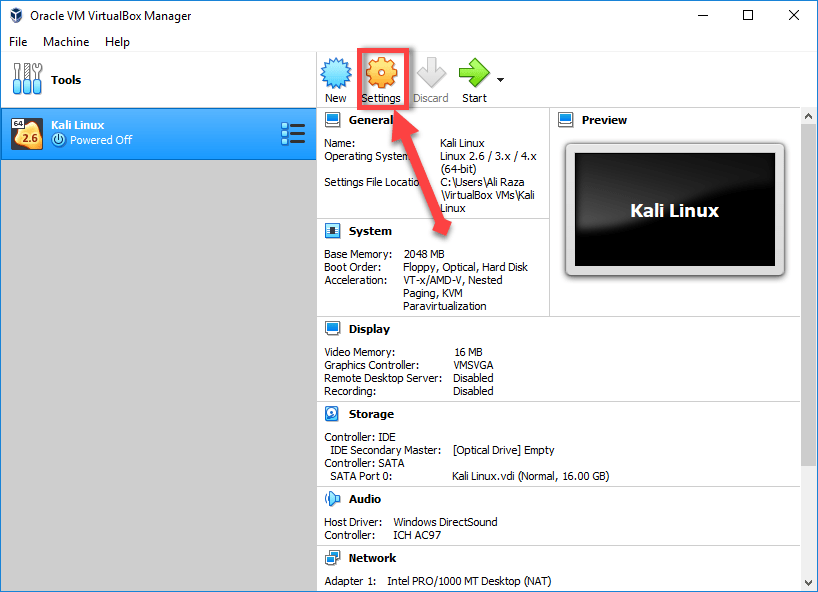 Setting
 Step 10: Then click on the Display tab then increase the Video Memory for high-quality.
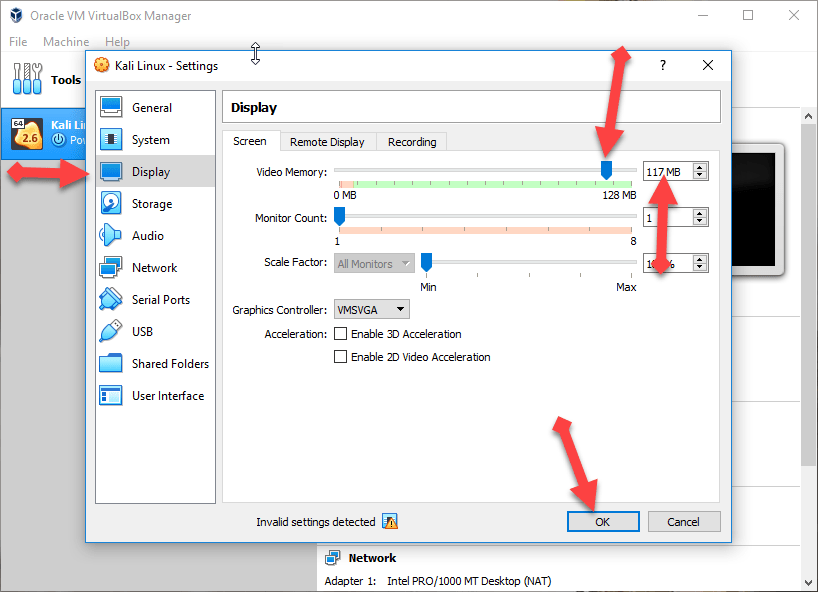 Increase video memory
 Step 11: Now go to the Storage tab, click on the Empty option, then click on the CD icon, and choose the Kali Linux iso file which you have download from the given link above. Then click on the Ok option.
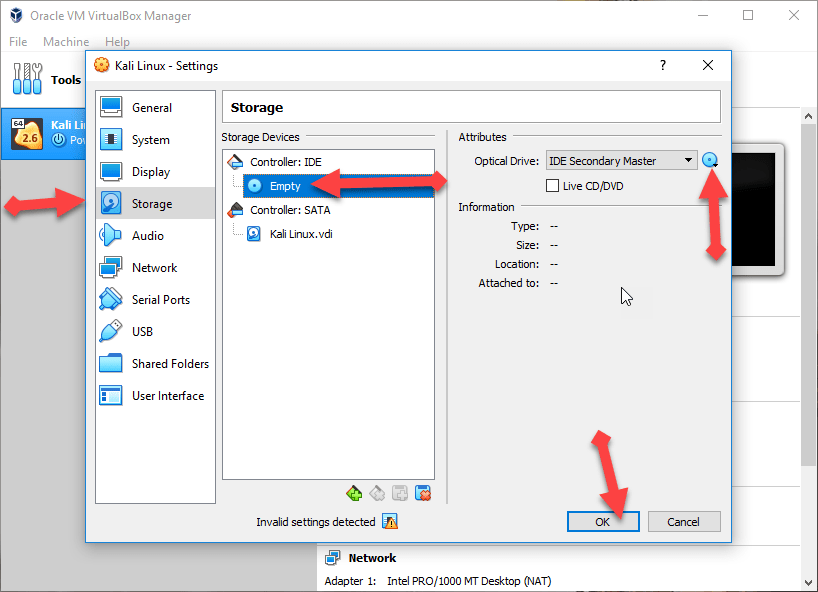 Storage option
 How to Install Kali Linux on VirtualBox?
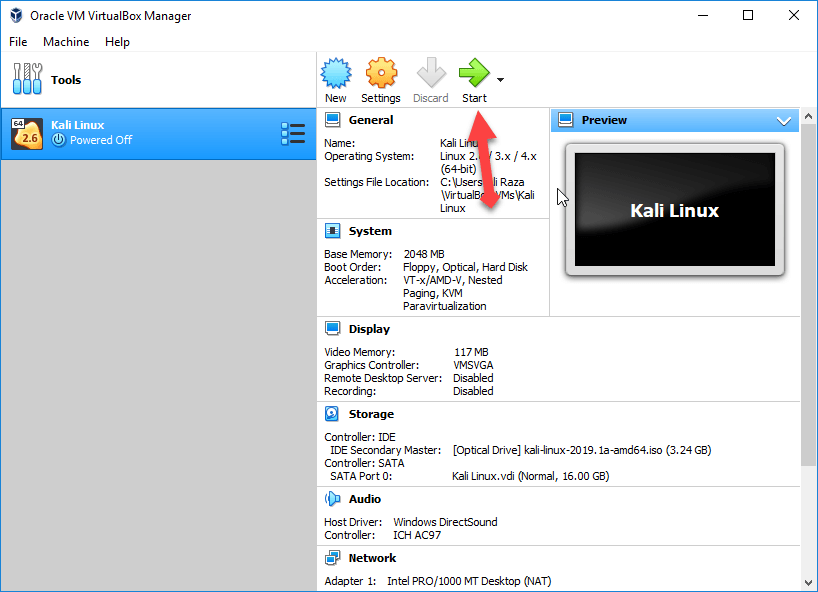 Click on the start
 Step 2: Then a new window will be opened then you will have lots of the options you need to click on the Graphical install.
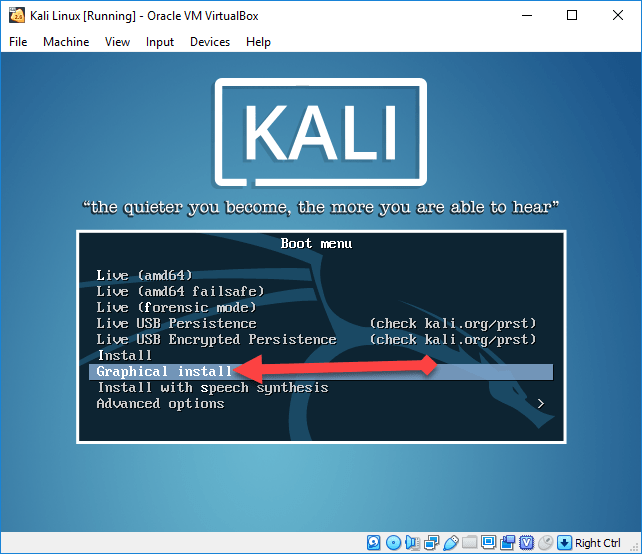 Graphical Install
 Step 3: Now you should choose your language and keyboard language then press enter to be continued.
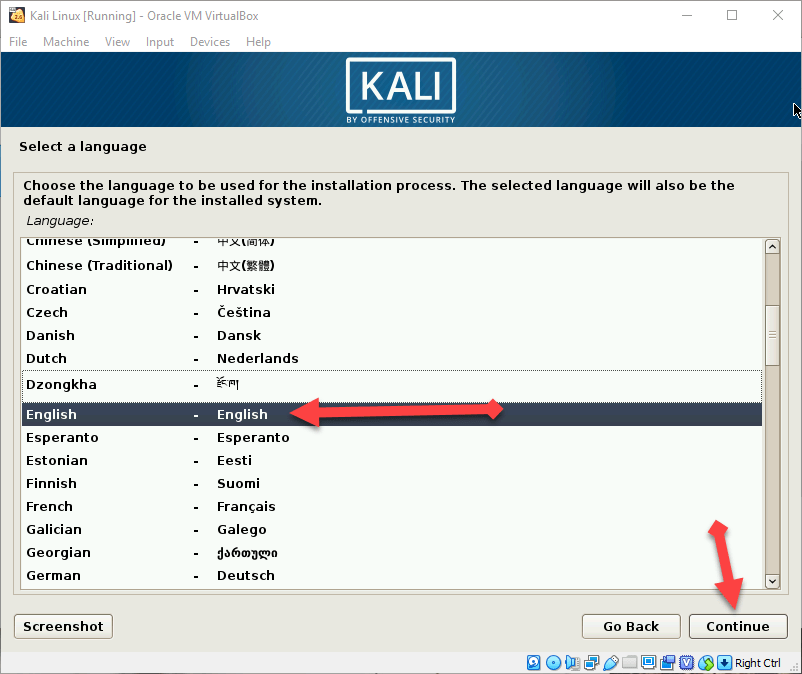 Select your language
 Step 4: In this step, you need to select your country. And it will be selected your time zone automatically.
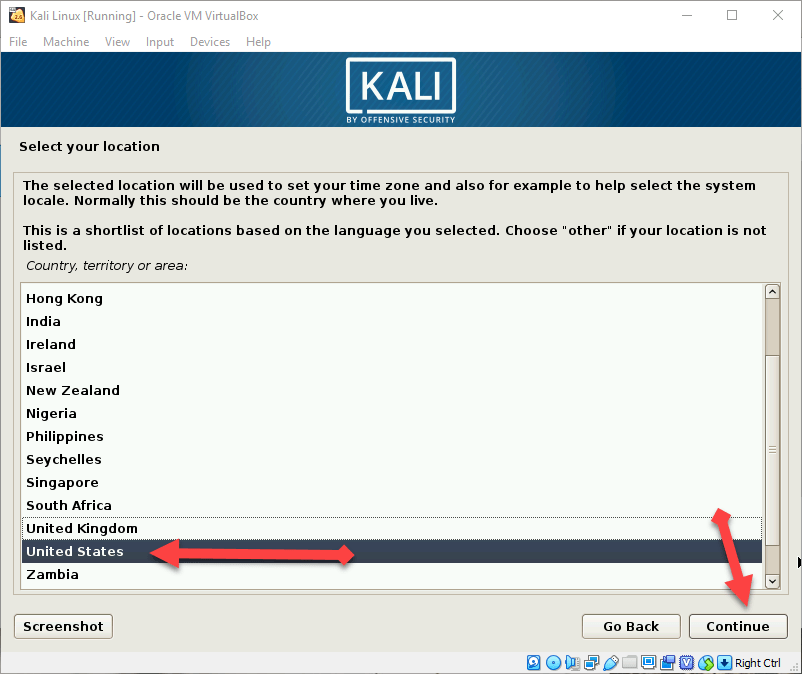 Select your country
 Step 5: Now choose the hostman which will be only single word. Hostman means the person who control the operating system.
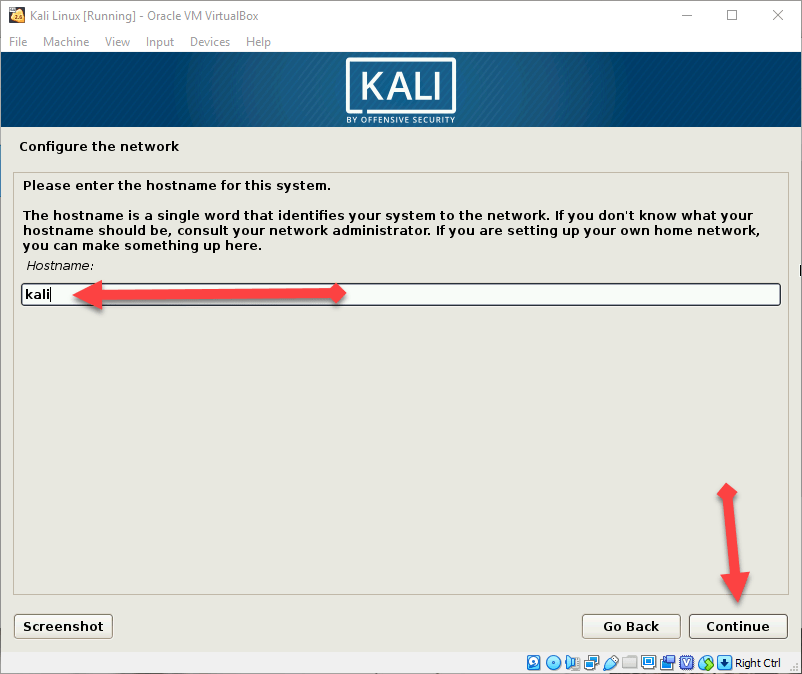 Hostman name
 Step 6: After that type the domain name so I will simply type techspite.com you can type whatever you want.
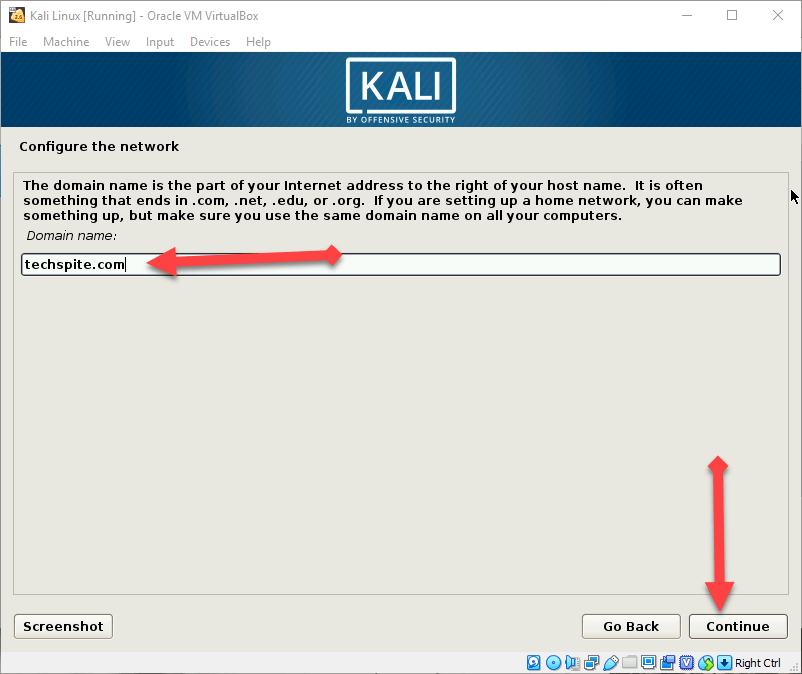 Domain name
 Step 7: Type a strong password for root user.
 Strong password
 Step 8: Now configure the clock which you can choose as you want. I will simply select the Eastern.
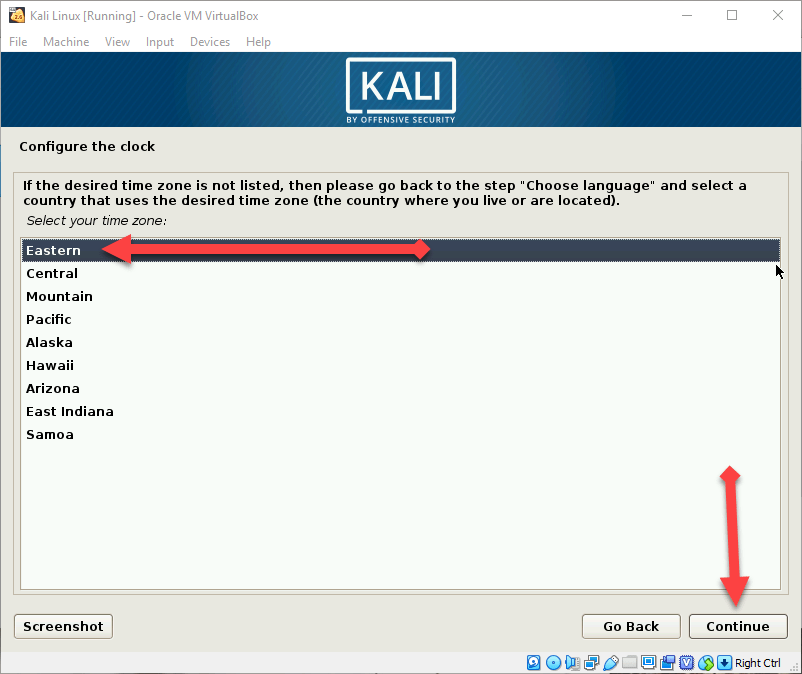 Configure the clock
 Step 9: Now, select the partition disk you need to click on the Manual.
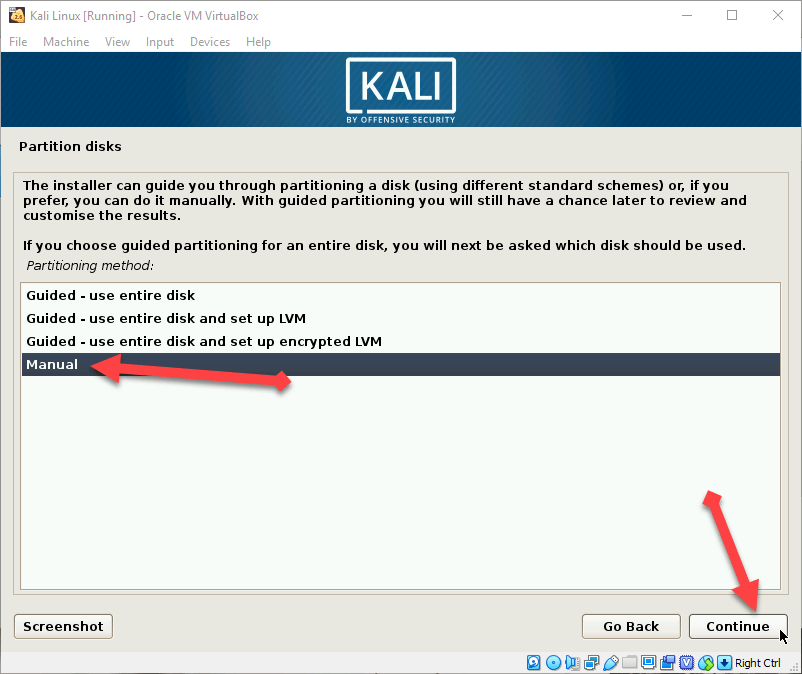 Partition disk
 Step 10: A new window will be opened then you will see five options you have to click on the third option which is ” SCS12 (0,0,0) (sda) -17.2 GB ATA VBOX HARDDISK”.
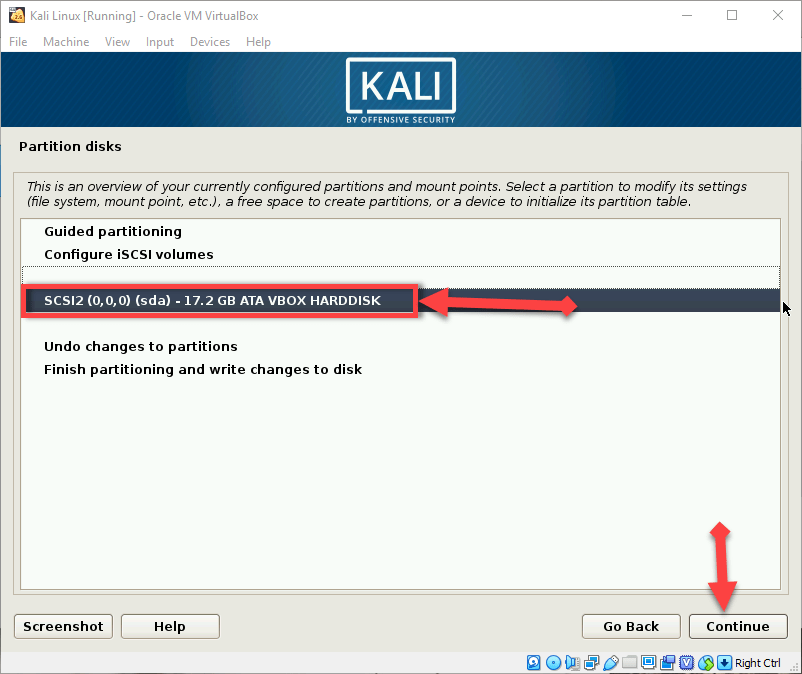 SCS12 (0,0,0) (sda) -17.2 GB ATA VBOX HARDDISK
 How to Install Kali Linux on VirtualBox on Windows 10
Step 11: Now, click on the Yes option.
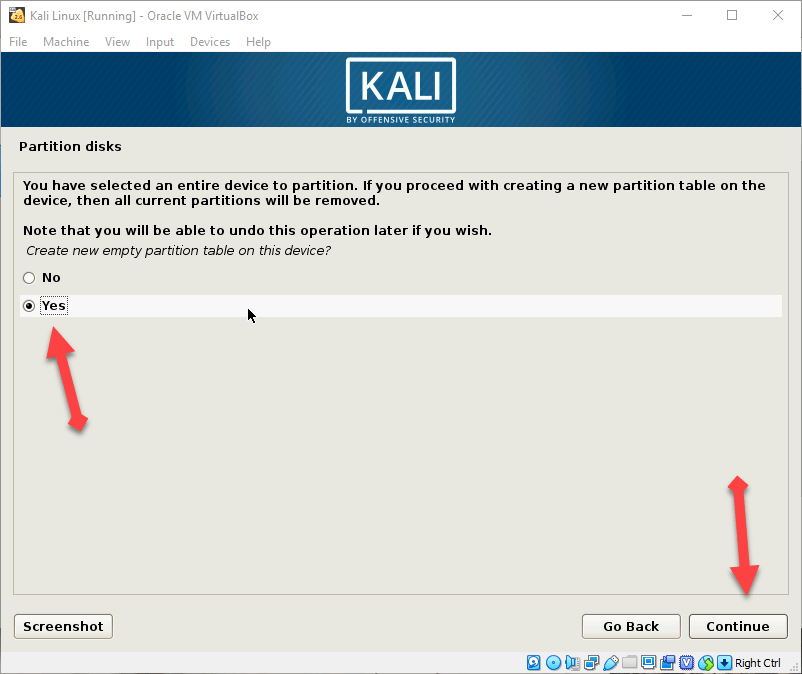 Click yes
 Step 12: In this step, you need to click Free Space.
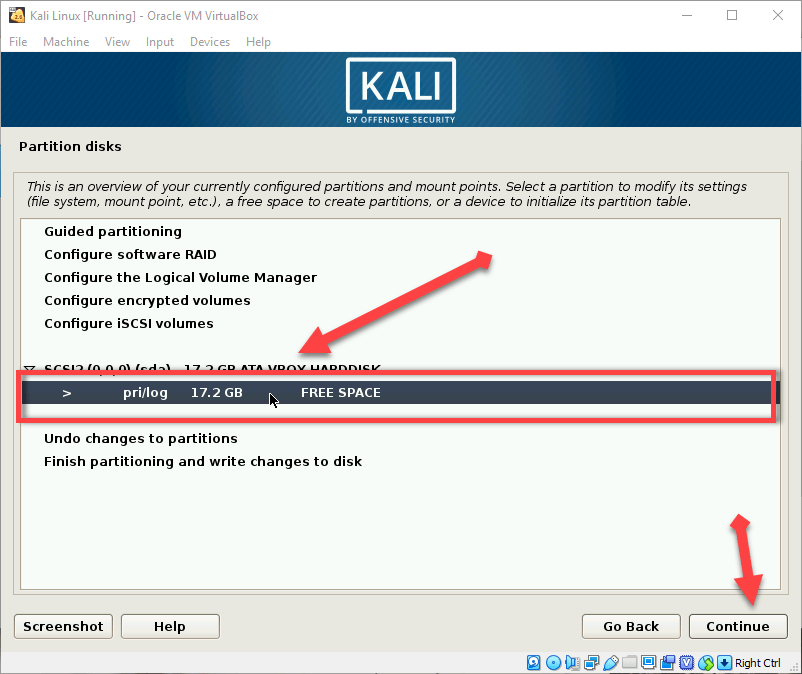 Click Free Space
 Step 13: Click on the Create a new partition.
 Create a new partition
 Step 14: Therefore, select the size of the new New partition size. I will simply type 15Gb as a new partition size.
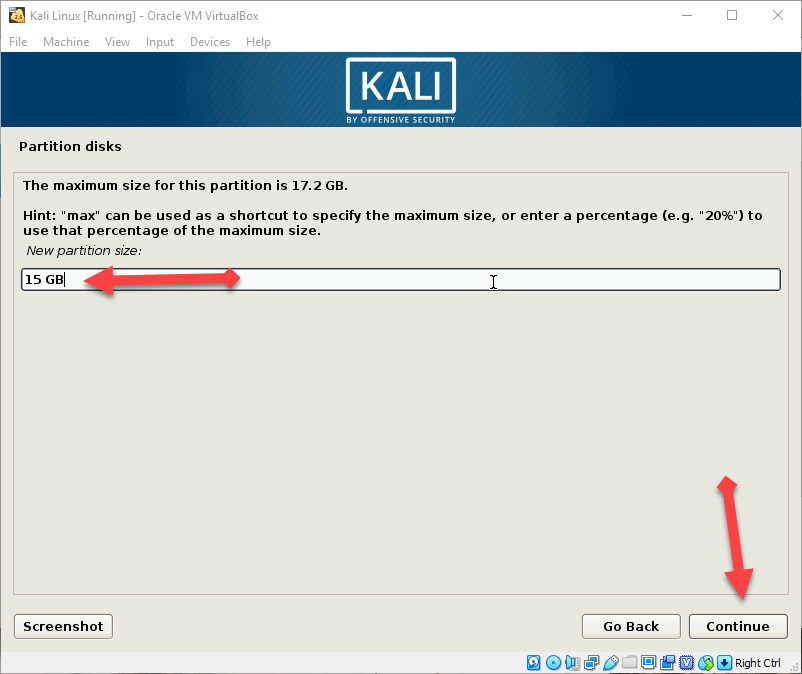 New partition size
 Step 15: A new window will be open after you select the partition of size then you will have two options you need to click on Primary then click on the continue.
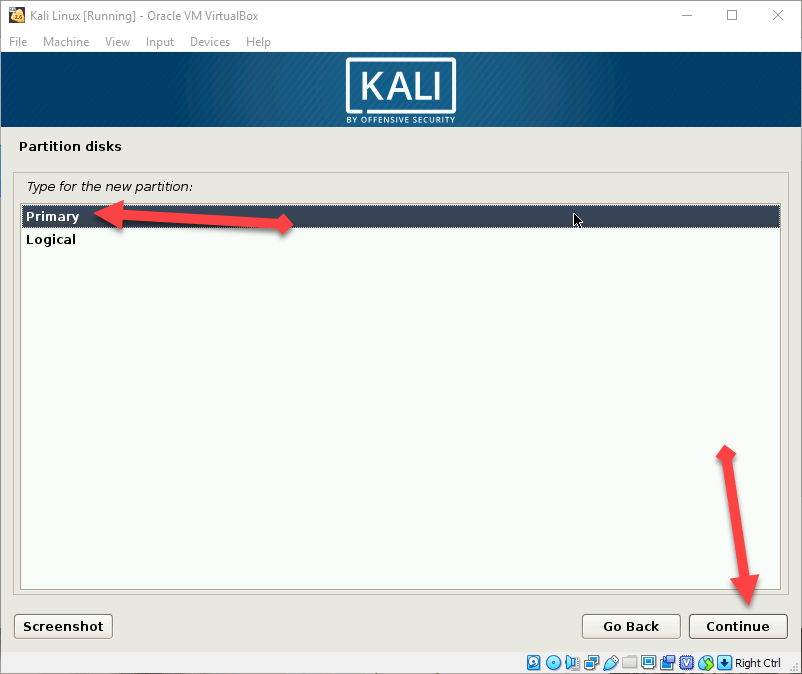 Choose primary
 Step 16: Now you need to click on the first one which is Beginning.
 Choose beginning
 Step 17: In this step, you will have lots of option you have to choose done setting up the partition.
 done setting up the partition.
 Step 18: Now you should choose the last option which is finsih partitioning and writes changes to disk.
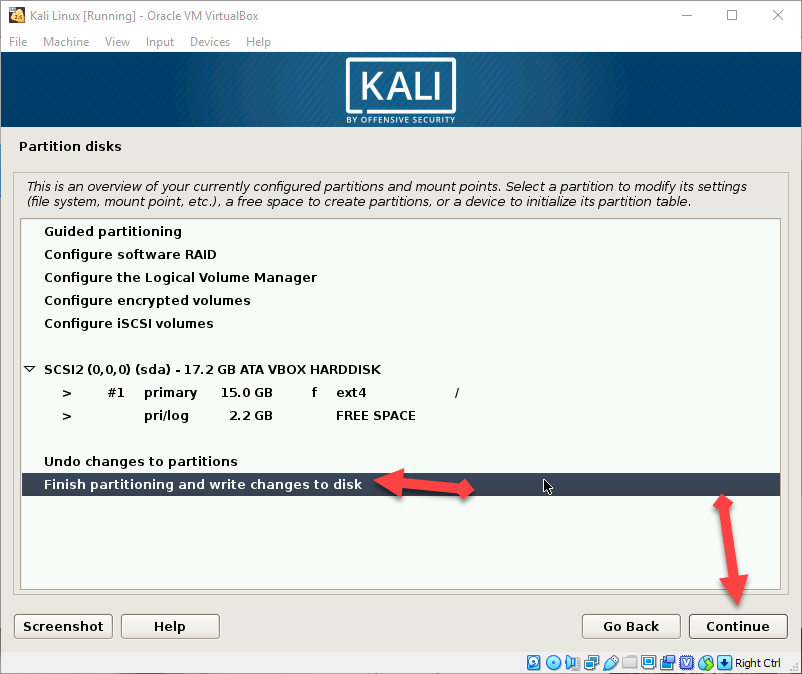 finish partitioning and writes changes to disk
 Step 19: You should the Yes Option and click on the continue button.
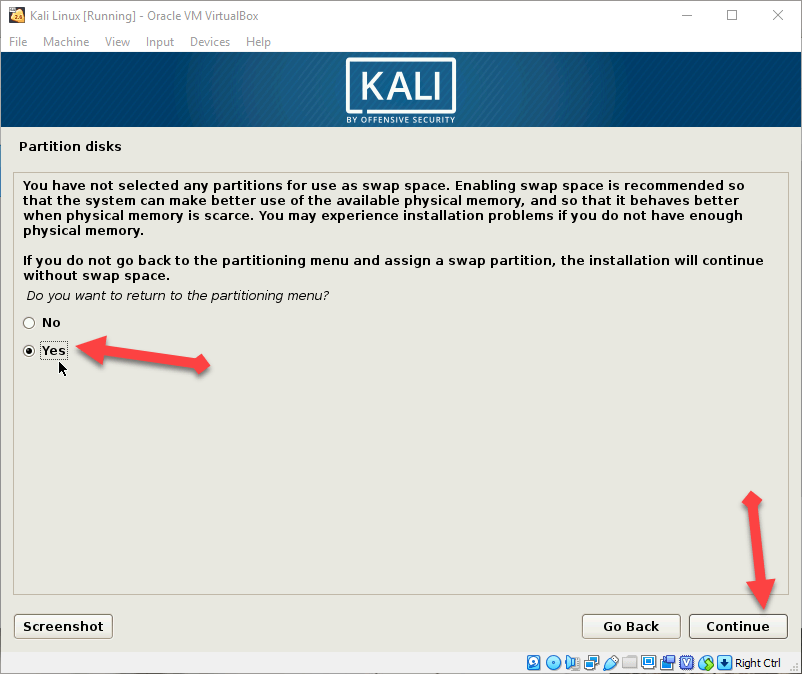 yes
yes Step 20: Use a network mirror click on the No option.
Step 21: Install GRUP boot loader click on the yes option.
Step 22: After doing these all a new window will be opened you need to choose the second option.
You may also like:
How to Install Android P on Vmware on Windows 10
Conclusion:
Therefore, It was all about How To Install Kali Linux on VirtualBox on Windows 10. So, Enjoy Kali Linux on your windows if you face any problem then feel free to comment below. So, Thanks for visiting.
Share This Article
Welcome! in this article, I am going to guide you How to Install Kali Linux on VirtualBox on Windows 10. So to install Kali Linux operating system on VirtualBox need skill which some user of the computer doesn’t know How to Install Kali Linux on VirtualBox on Windows 10. Then no worries I am here today to guide this to enjoy using Kali Linux on your Windows operating system.
What is Kali Linux?
It is a Debian delivered Linux and it is designed for digital forensics and it is maintained by Offensive Security.
How to Install Kali Linux on VirtualBox on Windows 10
First, you need to download and install the required file for installing Kali Linux on VirtualBox on Windows 10.
Required File for installing Kali Linux:
1. Kali Linux Download. 2. Download VirtualBox.
How to create a virtual machine?
First, you need to download and install Virtualbox then follow the steps below to create a virtual machine in Virtualbox.
Step 1: Once the downloading and installing is done then double-click to open VirtualBox.
VirtualBox Step 2: After that click on the New which is present at the top right.
Click New Step 3: So, now fill in the blanks. At first Blank Name, you need to write Kali Linux, machine folder: you have to select your location file, Type: Linux, and version: Linux 2.6 / 3.x / 4.x (64bit). After doing this click next.
Fill in the blanks Step 4: You need to specify the memory up to 2GB or you can increase the memory for better performance.
Specify the memory Step 5: A new window will be opened you will have three option then you should select the second one ( Create a virtual disk now ).
second option Step 6: Then you will again have three options you need to choose the default one VDI (VirtualBox Disk Image).
VDI (VirtualBox Disk Image) How to Install Kali Linux on VirtualBox on Windows 10
Step 7: Now, choose Dynamical allocated which is the default for Linux.
Step 8: In this step, choose the amount of your hard disk for Linux. So you should choose 15Gb plus.
choose the amount hard disk You have done great! successfully created a virtual machine.
Step 9: If the creating of the virtual machine then you need to click on the Setting for better performance to work.
Setting Step 10: Then click on the Display tab then increase the Video Memory for high-quality.
Increase video memory Step 11: Now go to the Storage tab, click on the Empty option, then click on the CD icon, and choose the Kali Linux iso file which you have download from the given link above. Then click on the Ok option.
Storage option How to Install Kali Linux on VirtualBox?
Click on the start Step 2: Then a new window will be opened then you will have lots of the options you need to click on the Graphical install.
Graphical Install Step 3: Now you should choose your language and keyboard language then press enter to be continued.
Select your language Step 4: In this step, you need to select your country. And it will be selected your time zone automatically.
Select your country Step 5: Now choose the hostman which will be only single word. Hostman means the person who control the operating system.
Hostman name Step 6: After that type the domain name so I will simply type techspite.com you can type whatever you want.
Domain name Step 7: Type a strong password for root user.
Strong password Step 8: Now configure the clock which you can choose as you want. I will simply select the Eastern.
Configure the clock Step 9: Now, select the partition disk you need to click on the Manual.
Partition disk Step 10: A new window will be opened then you will see five options you have to click on the third option which is ” SCS12 (0,0,0) (sda) -17.2 GB ATA VBOX HARDDISK”.
SCS12 (0,0,0) (sda) -17.2 GB ATA VBOX HARDDISK How to Install Kali Linux on VirtualBox on Windows 10
Step 11: Now, click on the Yes option.
Click yes Step 12: In this step, you need to click Free Space.
Click Free Space Step 13: Click on the Create a new partition.
Create a new partition Step 14: Therefore, select the size of the new New partition size. I will simply type 15Gb as a new partition size.
New partition size Step 15: A new window will be open after you select the partition of size then you will have two options you need to click on Primary then click on the continue.
Choose primary Step 16: Now you need to click on the first one which is Beginning.
Choose beginning Step 17: In this step, you will have lots of option you have to choose done setting up the partition.
done setting up the partition. Step 18: Now you should choose the last option which is finsih partitioning and writes changes to disk.
finish partitioning and writes changes to disk Step 19: You should the Yes Option and click on the continue button.
yes Step 20: Use a network mirror click on the No option.
Step 21: Install GRUP boot loader click on the yes option.
Step 22: After doing these all a new window will be opened you need to choose the second option.
You may also like:
How to Install Android P on Vmware on Windows 10
Conclusion:
Therefore, It was all about How To Install Kali Linux on VirtualBox on Windows 10. So, Enjoy Kali Linux on your windows if you face any problem then feel free to comment below. So, Thanks for visiting.