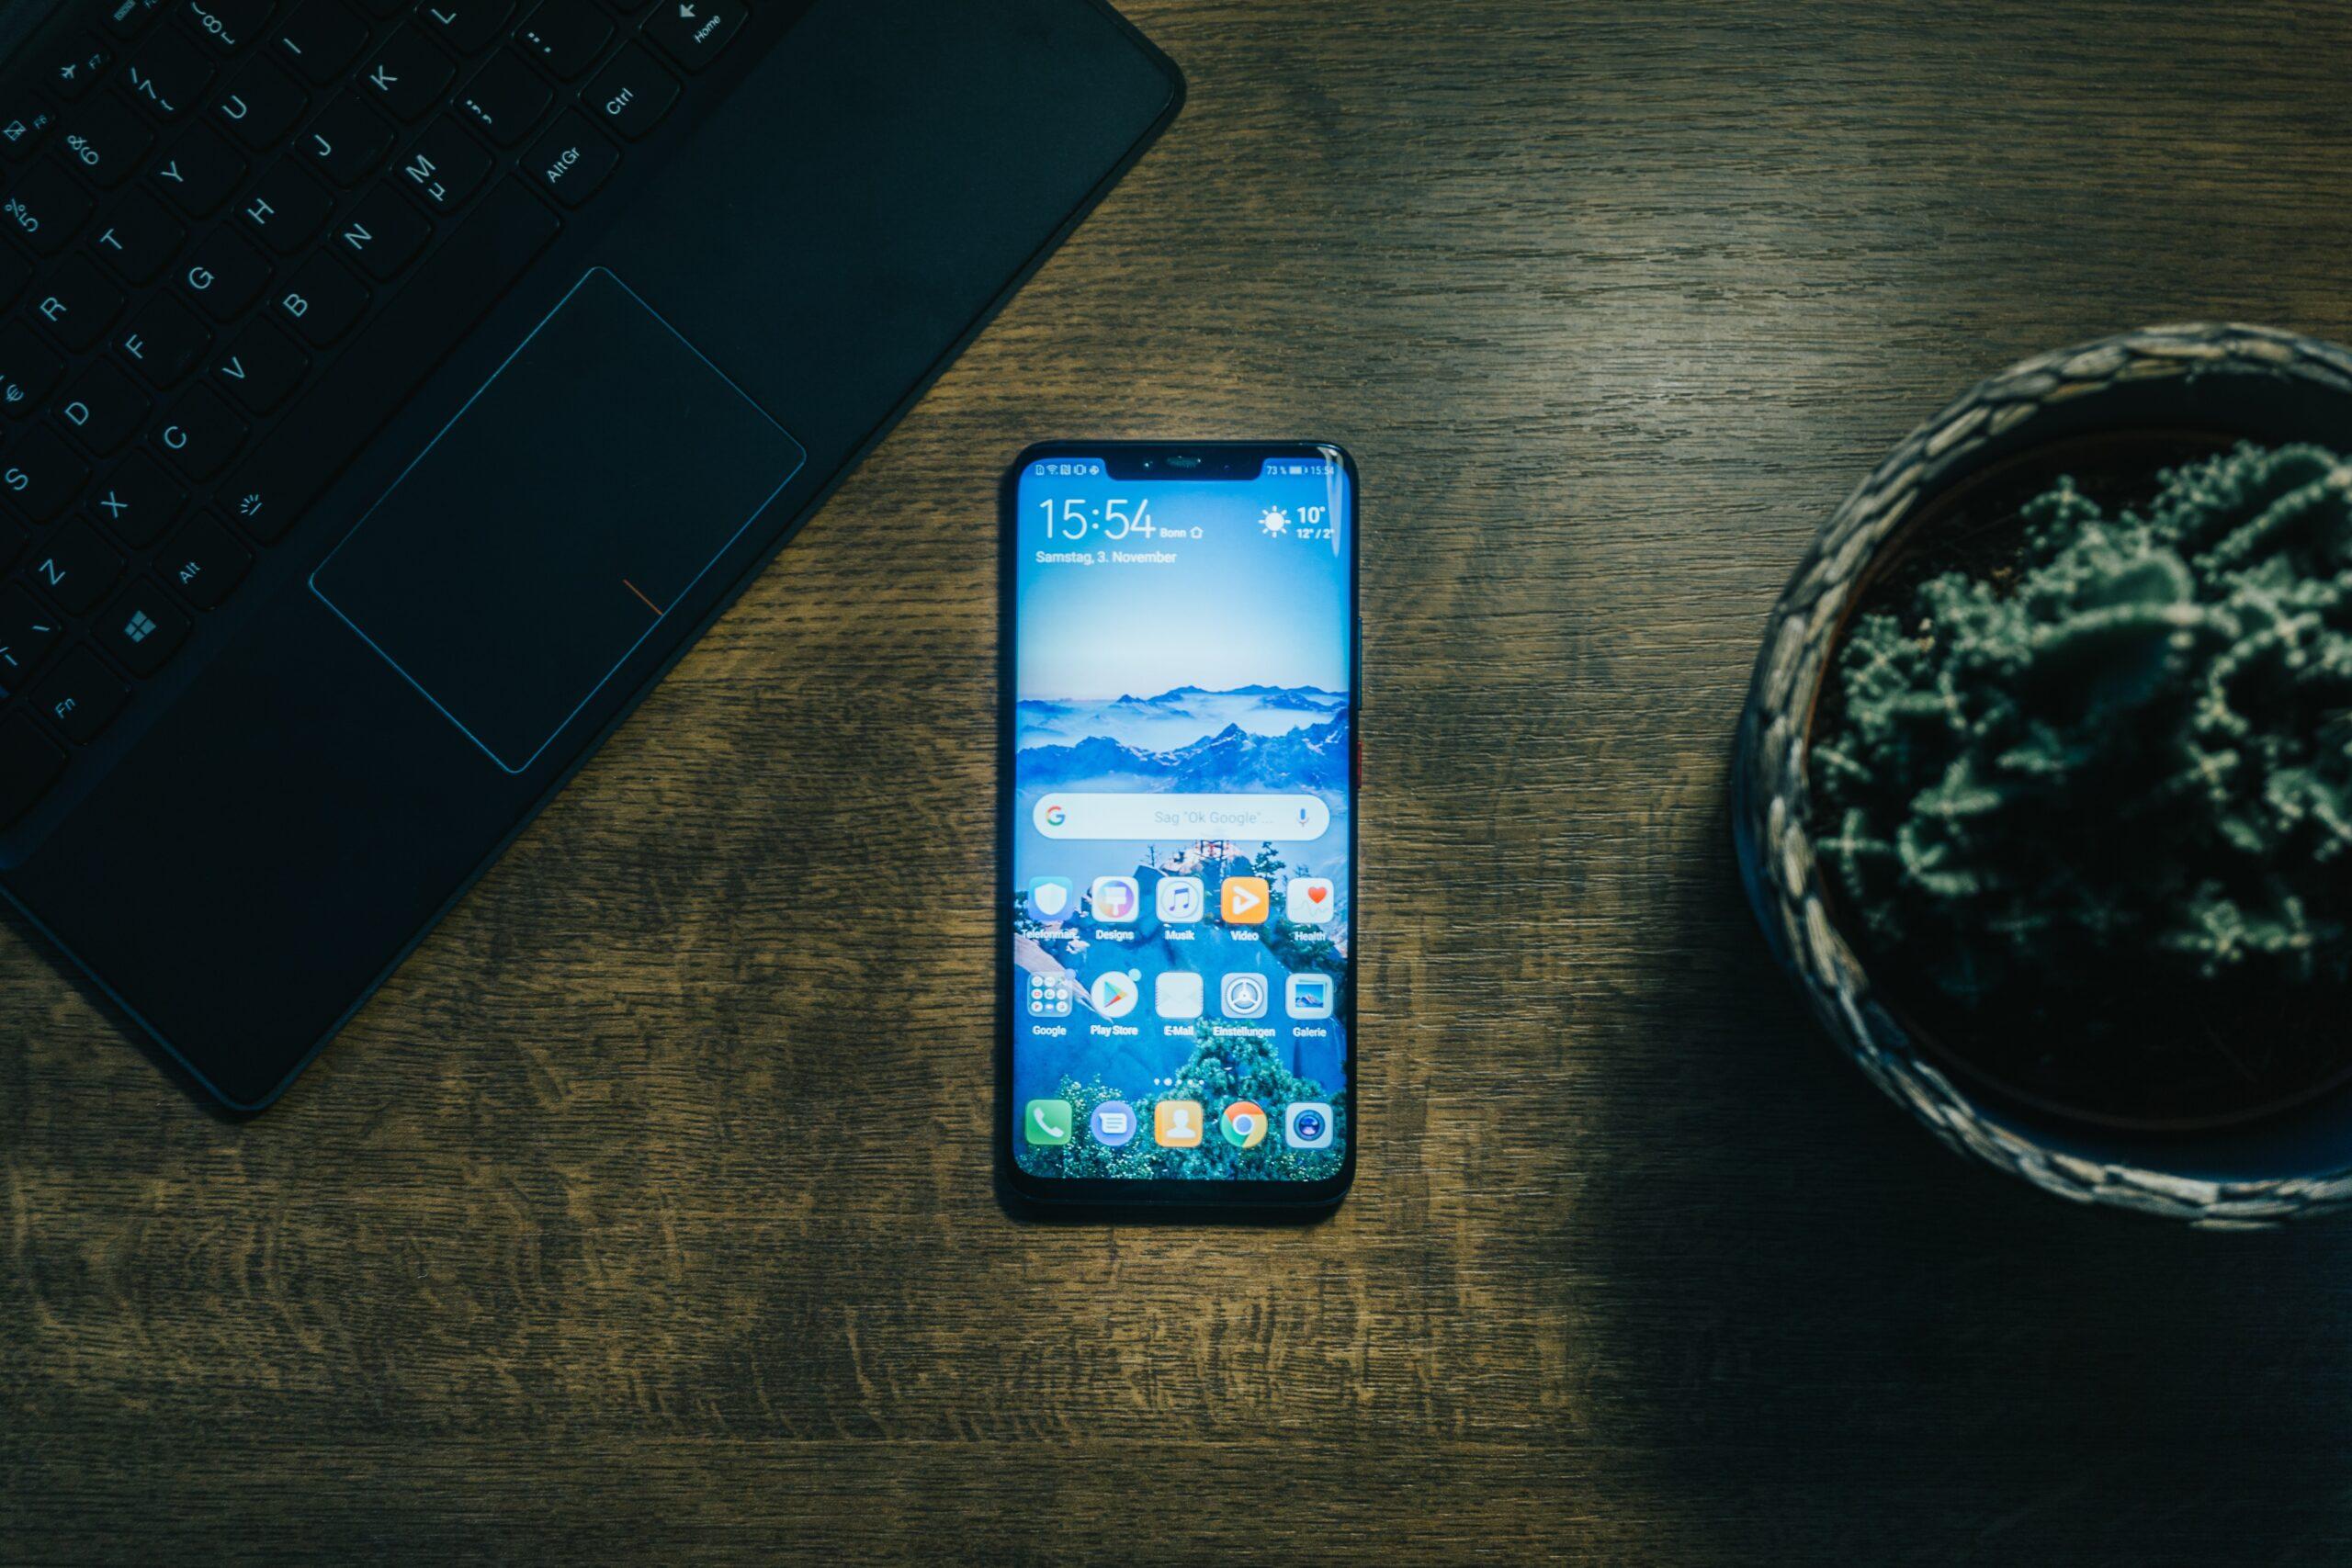
How to Install Google Assistant on Windows 11?

In this article, you will learn How to Install Google Assistant on Windows 11? Do you want to install Google Assistant on Windows 11? If then follow the steps below. If you are an Android user then you might know about Google Assistant. However, Google Assistant is just like Microsoft Cortana and Siri that can help you to search for something. If you want to set the Google Assistant as your assistant then it is a very powerful assistant to bring information for you from around the world. As you know you can access Google Assistant on an Android phone. But you can also install Google Assistant on your PC If you want to Install Google Assistant then you need to read this article.
How to Install Google Assistant on Windows 11?
Step 1. First of all, you need to click on this link to download the client for windows 10 and click on the Google_Assistant-Setup-1.0.0-rc.2.exe.
Step 2. Once the downloading is done then open it after that click on the Install at the right bottom.
Step 3. Then uncheck the box of Run Google Assistant then click on the Finish.
Step 2. Create New Project on Actions Console
Step 1. Click here to open the page of the actions console then click on the New Project.
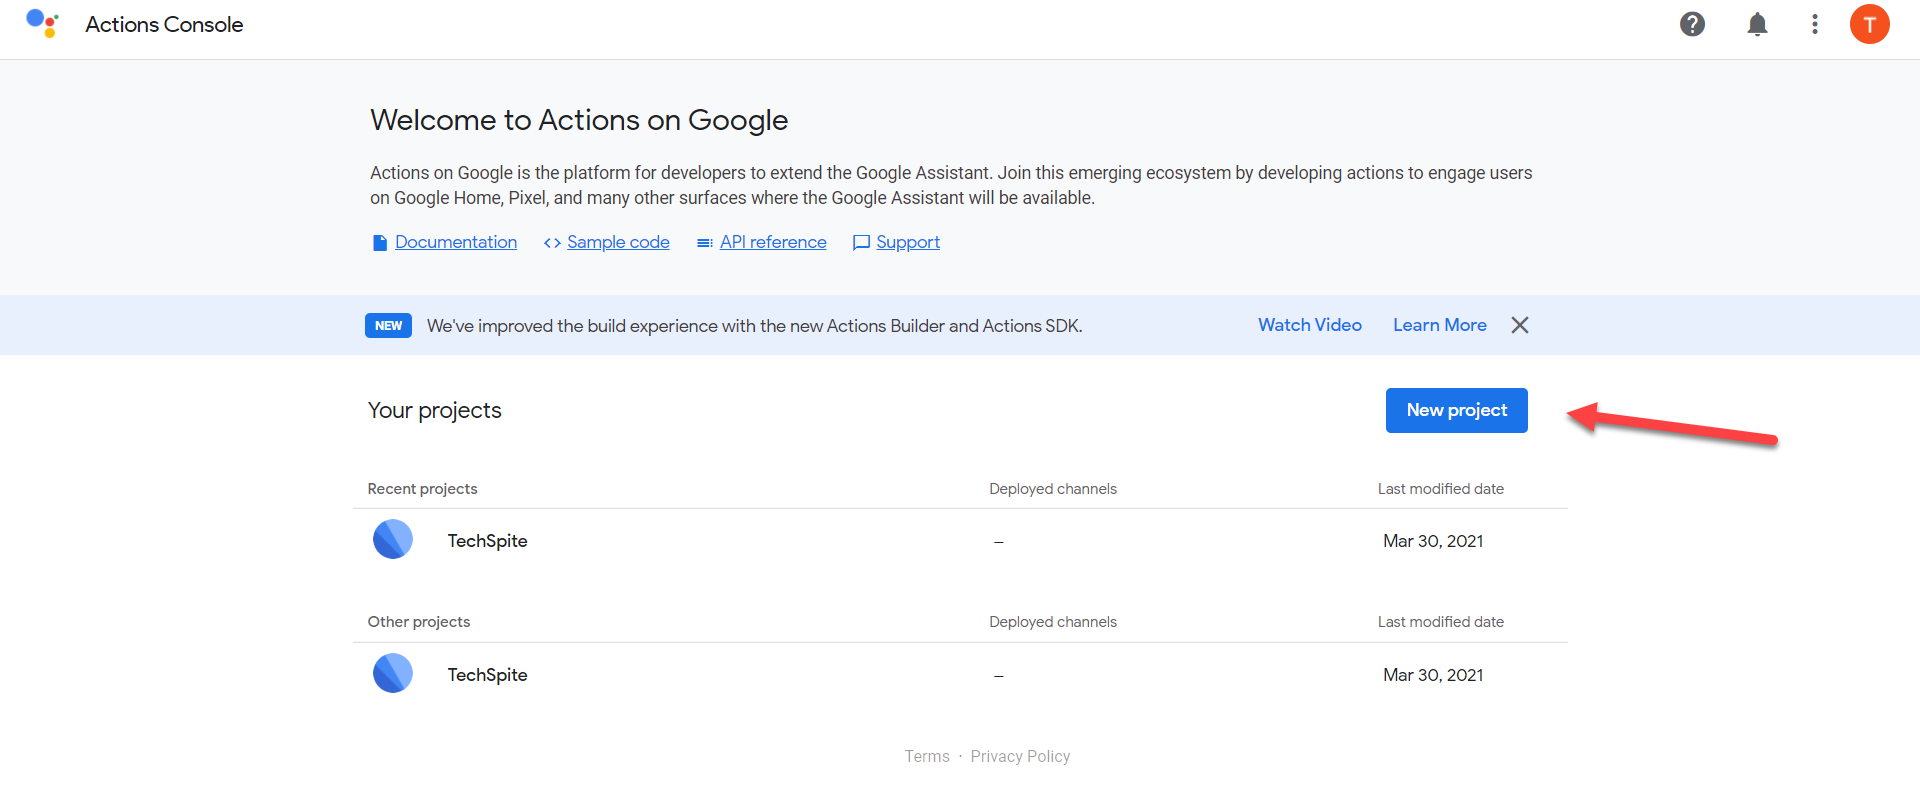 Click on the New Project
 Step 2. Now, Enter the name of your project then select your Country and Language after that click on the Create Project.
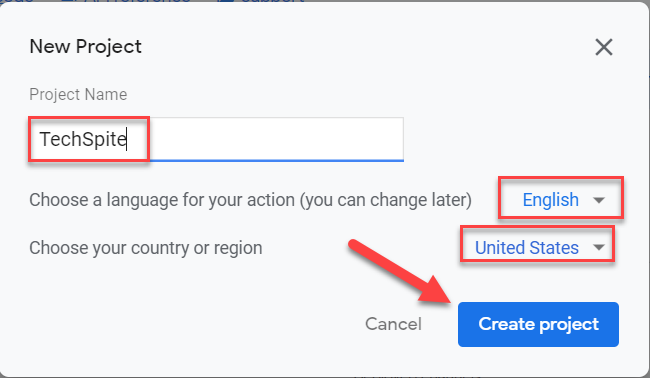 Click on the Create Project
 Step 3. Here scroll down to the bottom of your page then click on the Click Here.
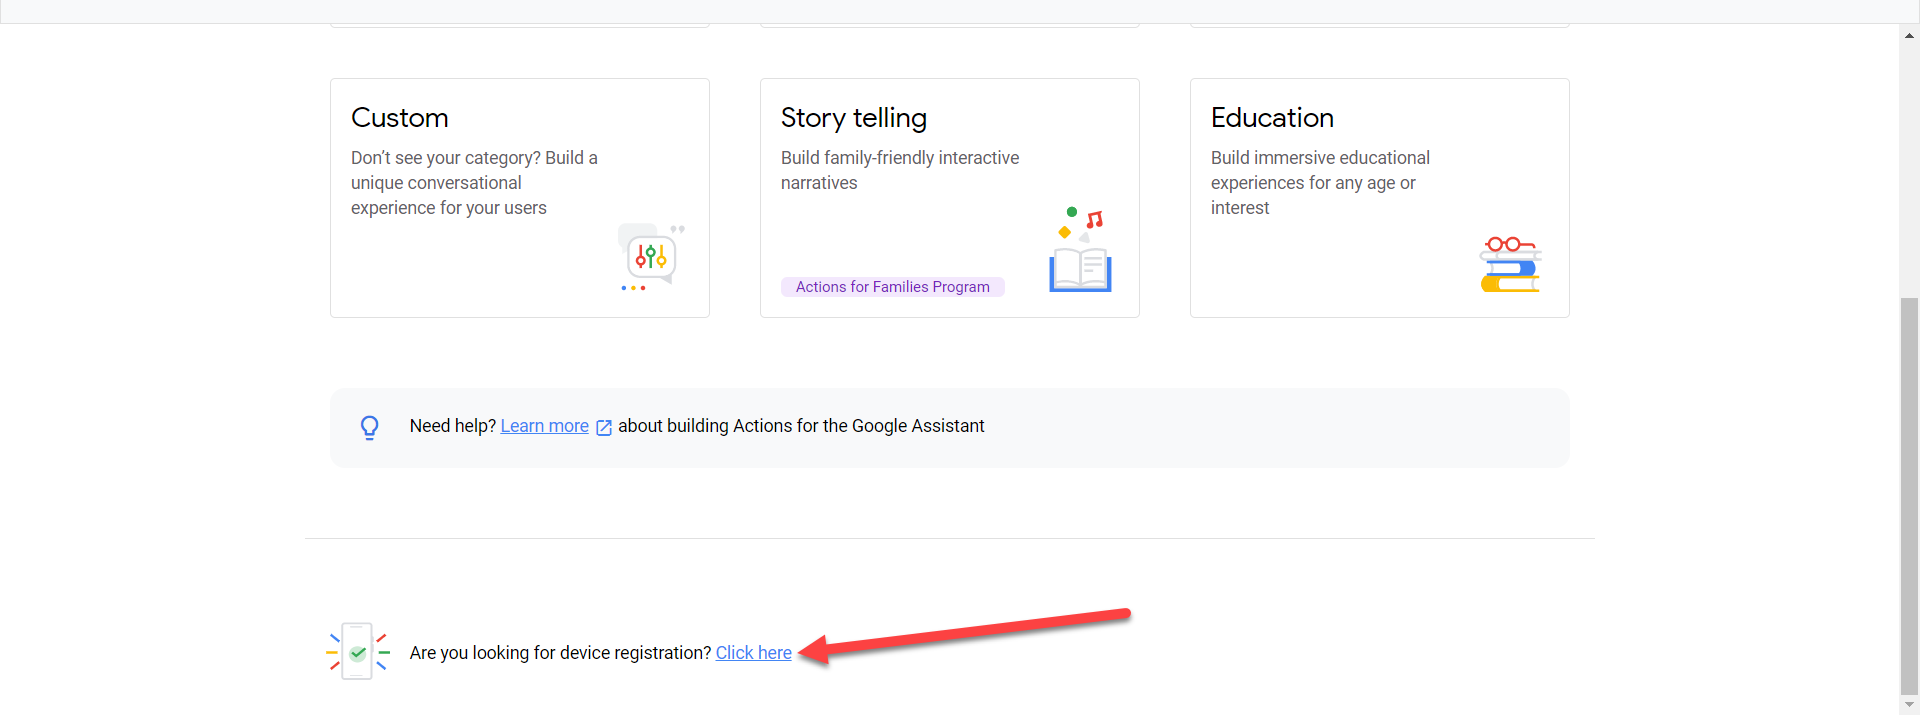 Click on the Click Here
 Step 4. Click on the Register Model.
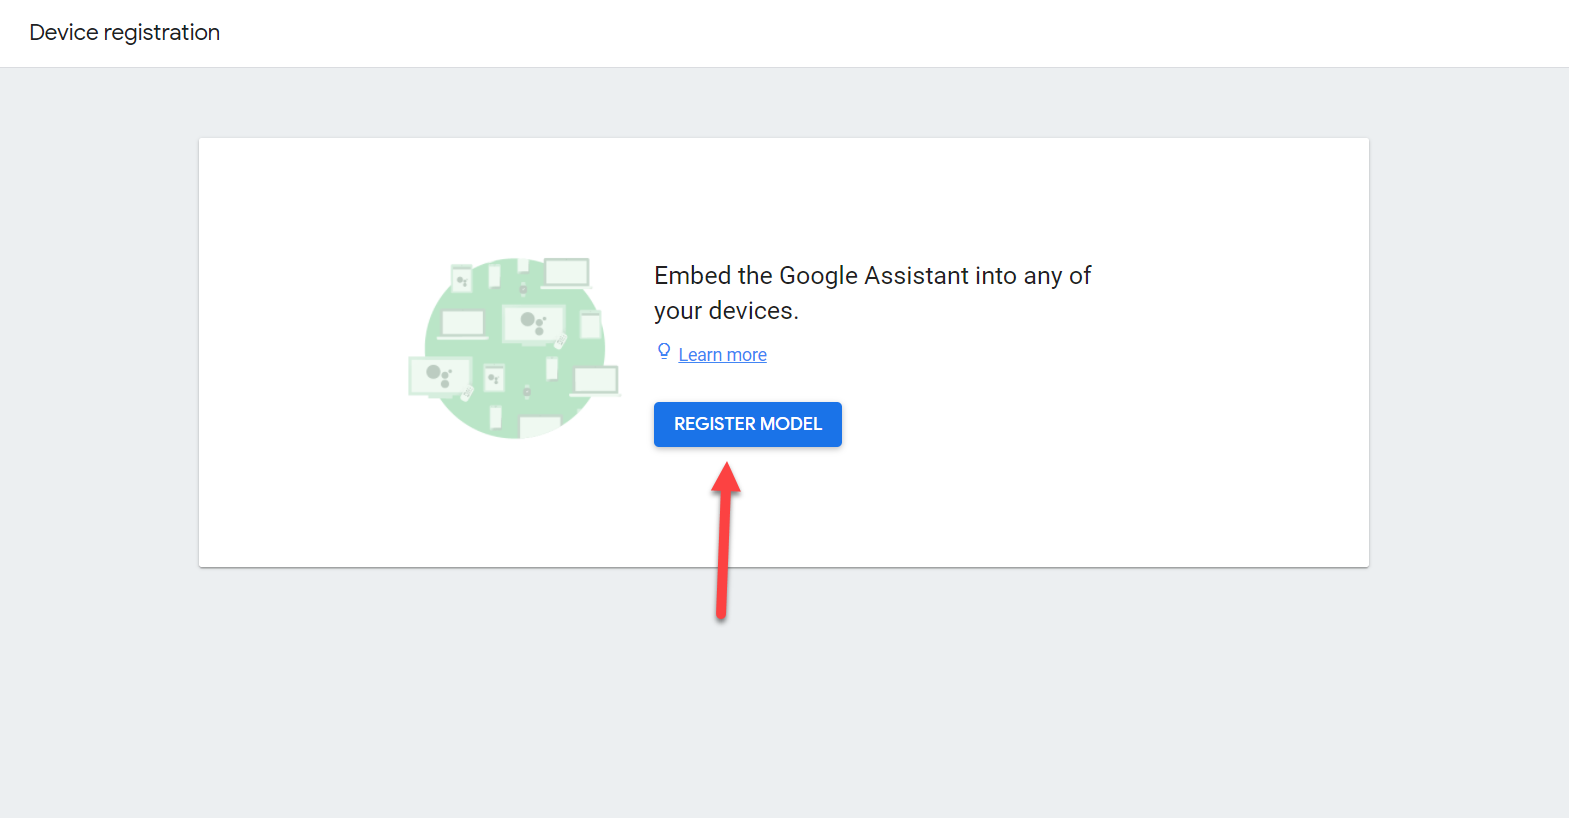 Click on the Register Model
 Step 5. In this section fill the empty set Product Name, Manufacturer Name, and Device Type then click on the Register Model.
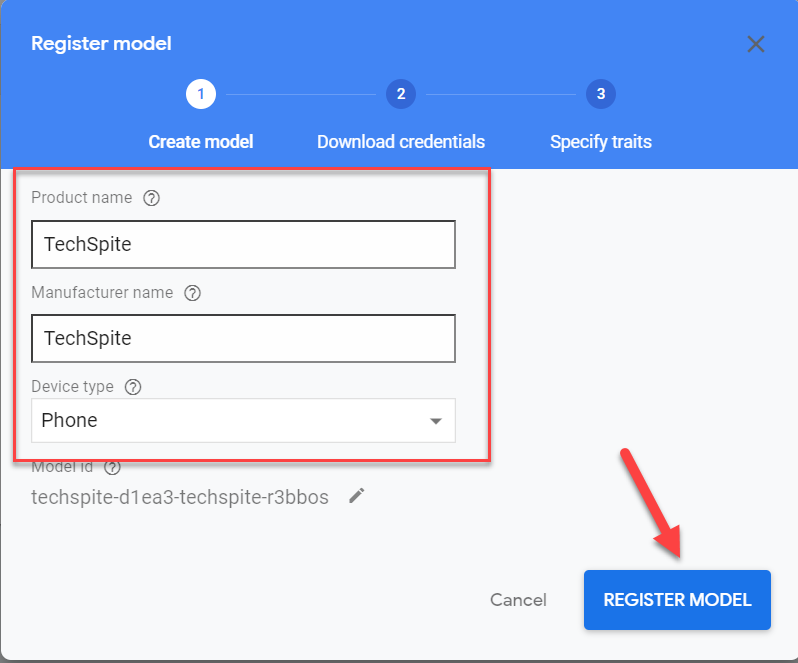 Click on the Register Model
 Step 6. Click on the Download OAuth 2.0 Credentials then hit the Next.
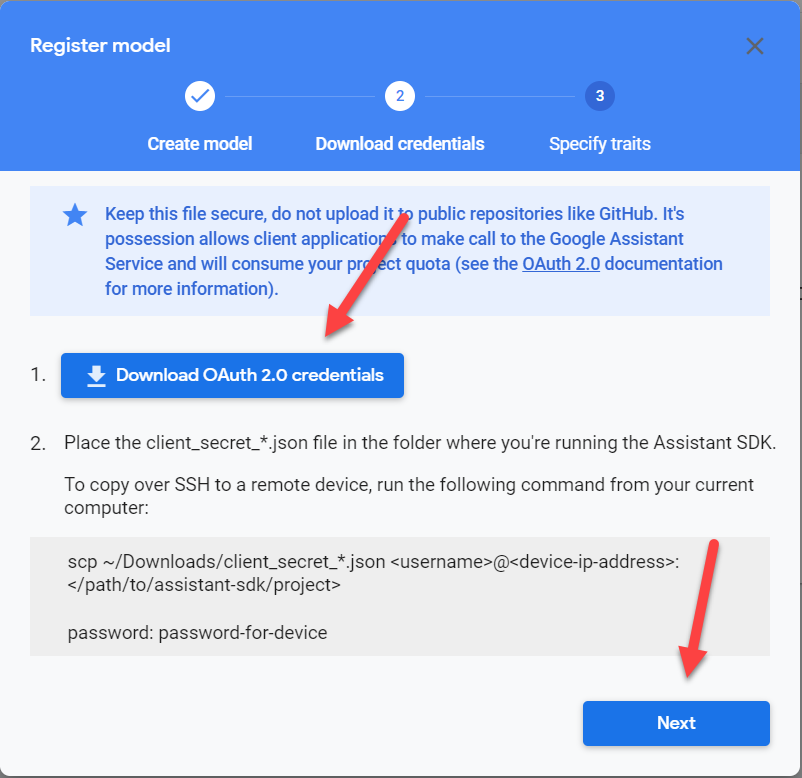 Hit the Next
 Step 7. Tap on the Save Traits.
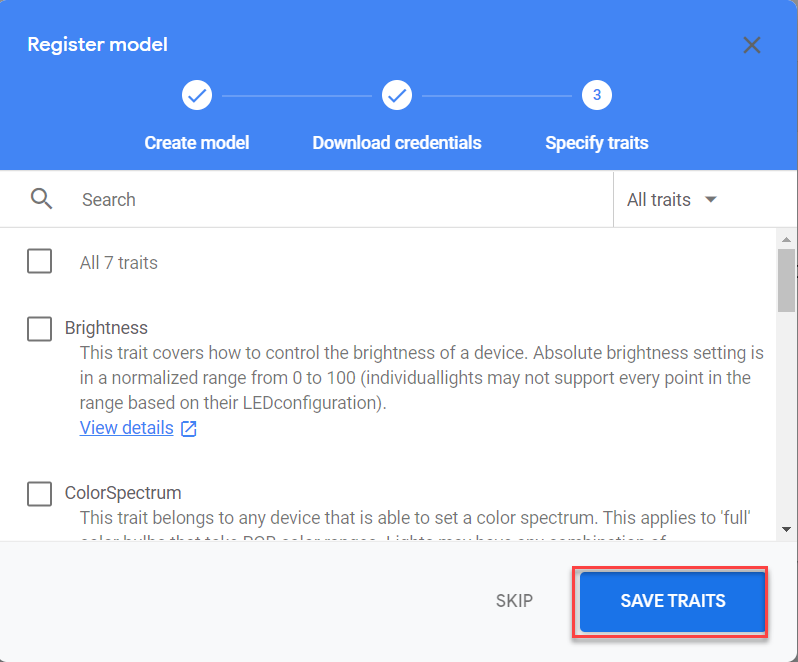 Tap on the Save Traits
 Step 3. Configure Consent Screen
Step 1. Firstly, you should open the page of Cloud Console by clicking here.
Step 2. Now, open the search then search for the project you created after that select your project.
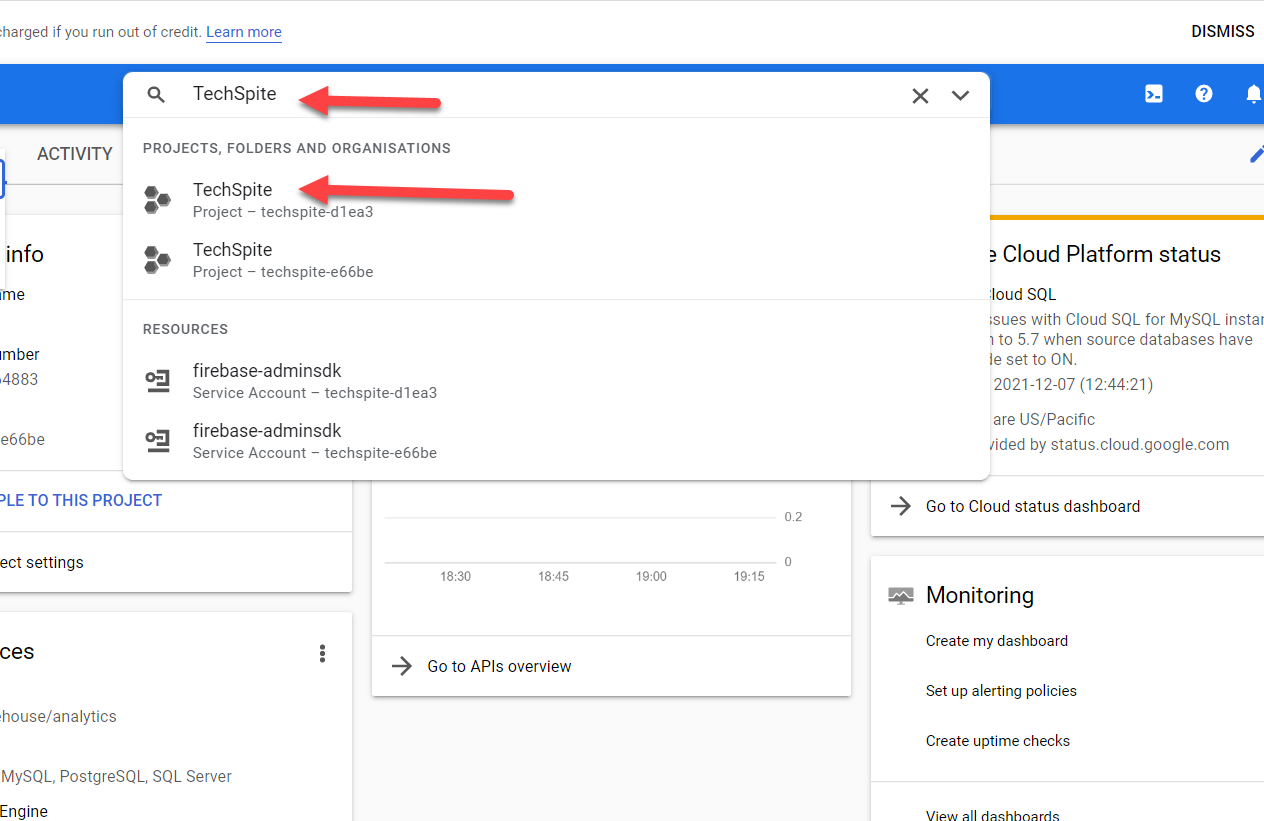 Select Your Project
 Step 3. Then click on the Three Horizontal Line after that tap on the APIs & Services.
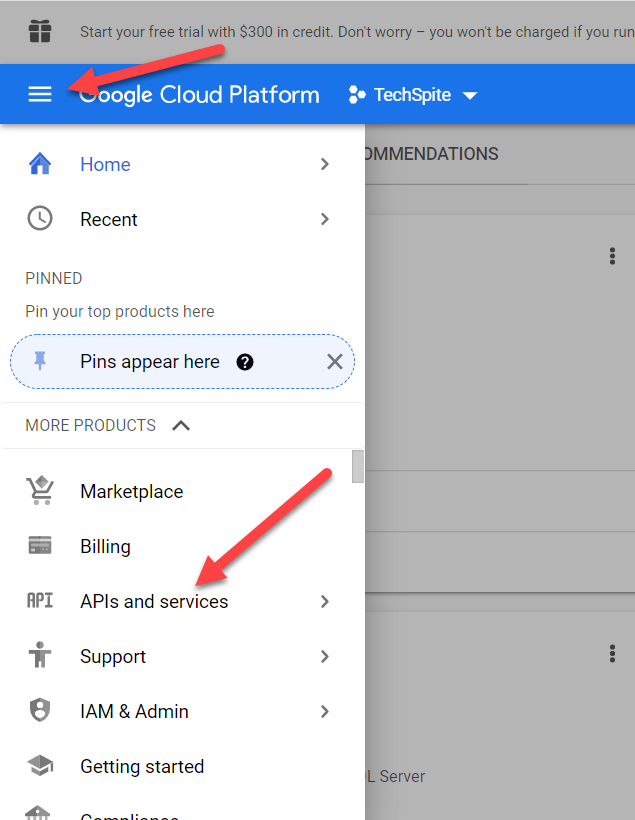 Tap on the APIs & Services
 Step 4. Next, hit the ENABLE APIS AND SERVICES.
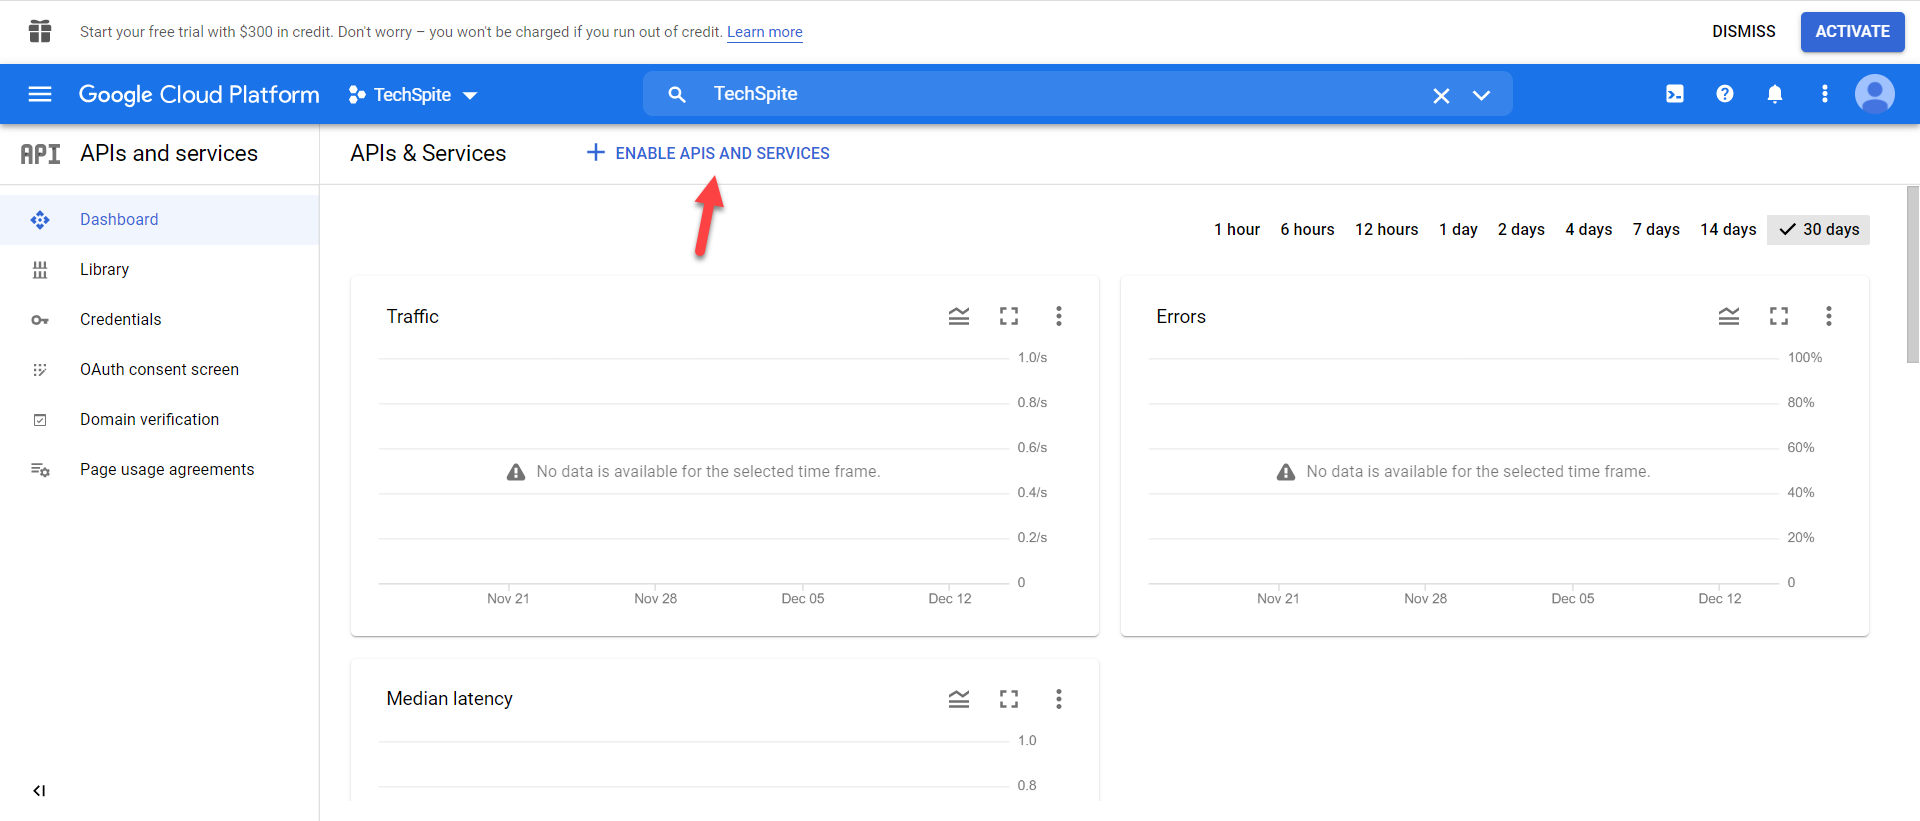 Hit the ENABLE APIS AND SERVICES
 Step 5. Go to the search box then type Assistant or Google Assistant after that click on the Google Assistant API.
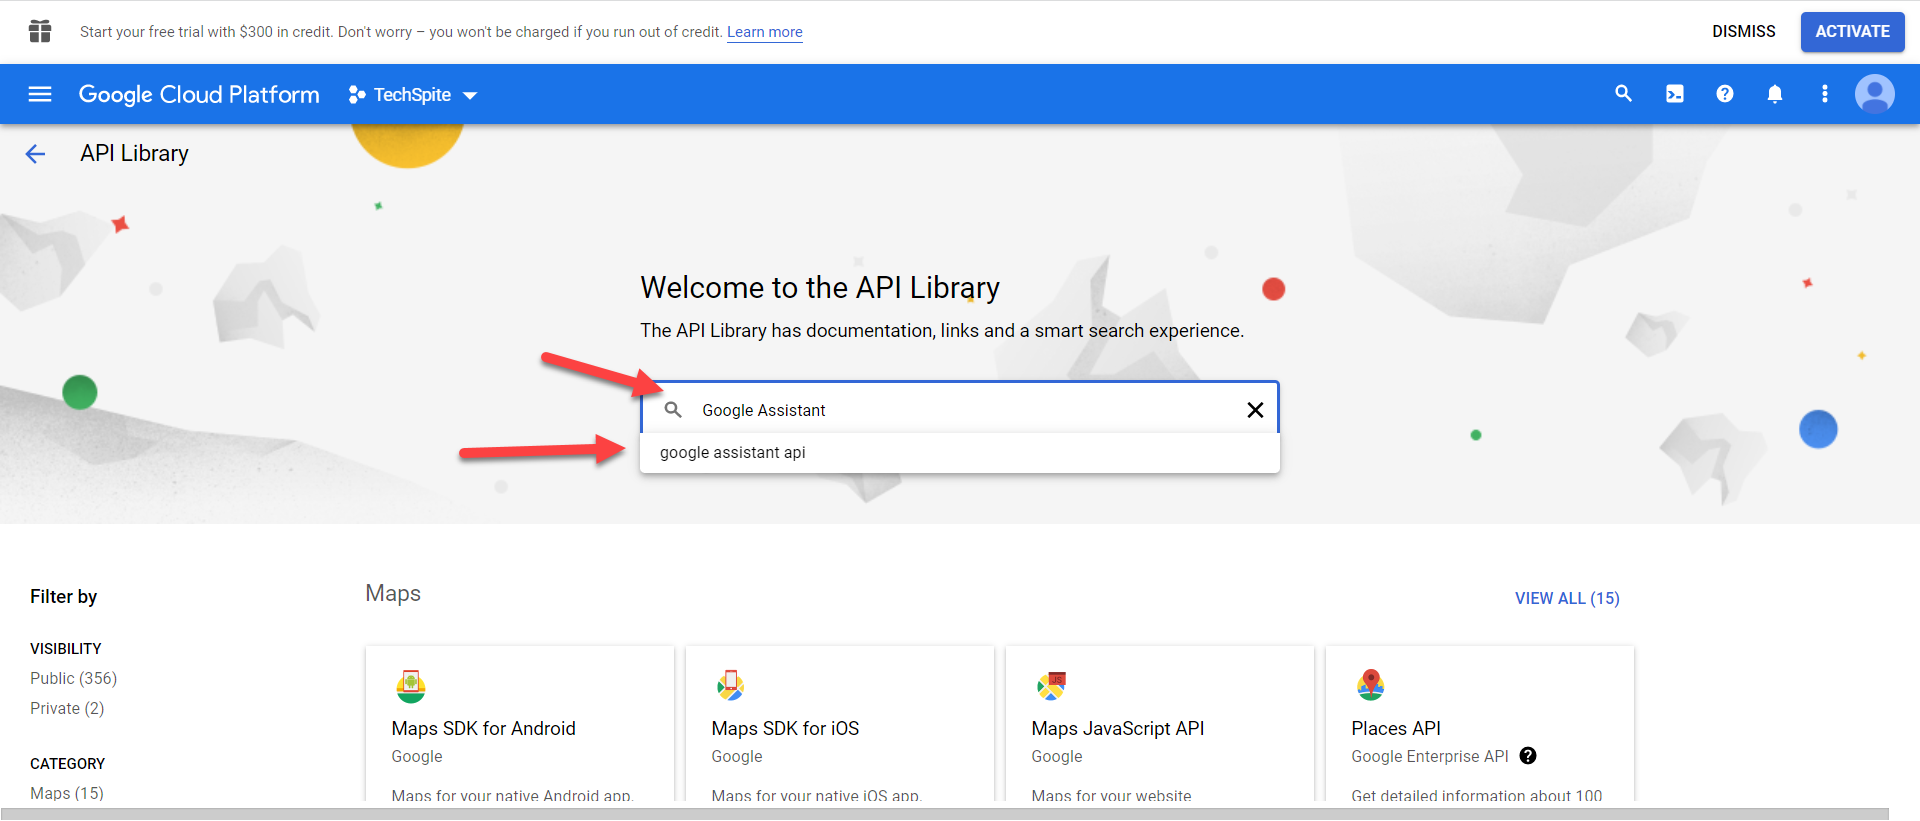 Click on the Google Assistant API
 Step 6. Click on the Enable.
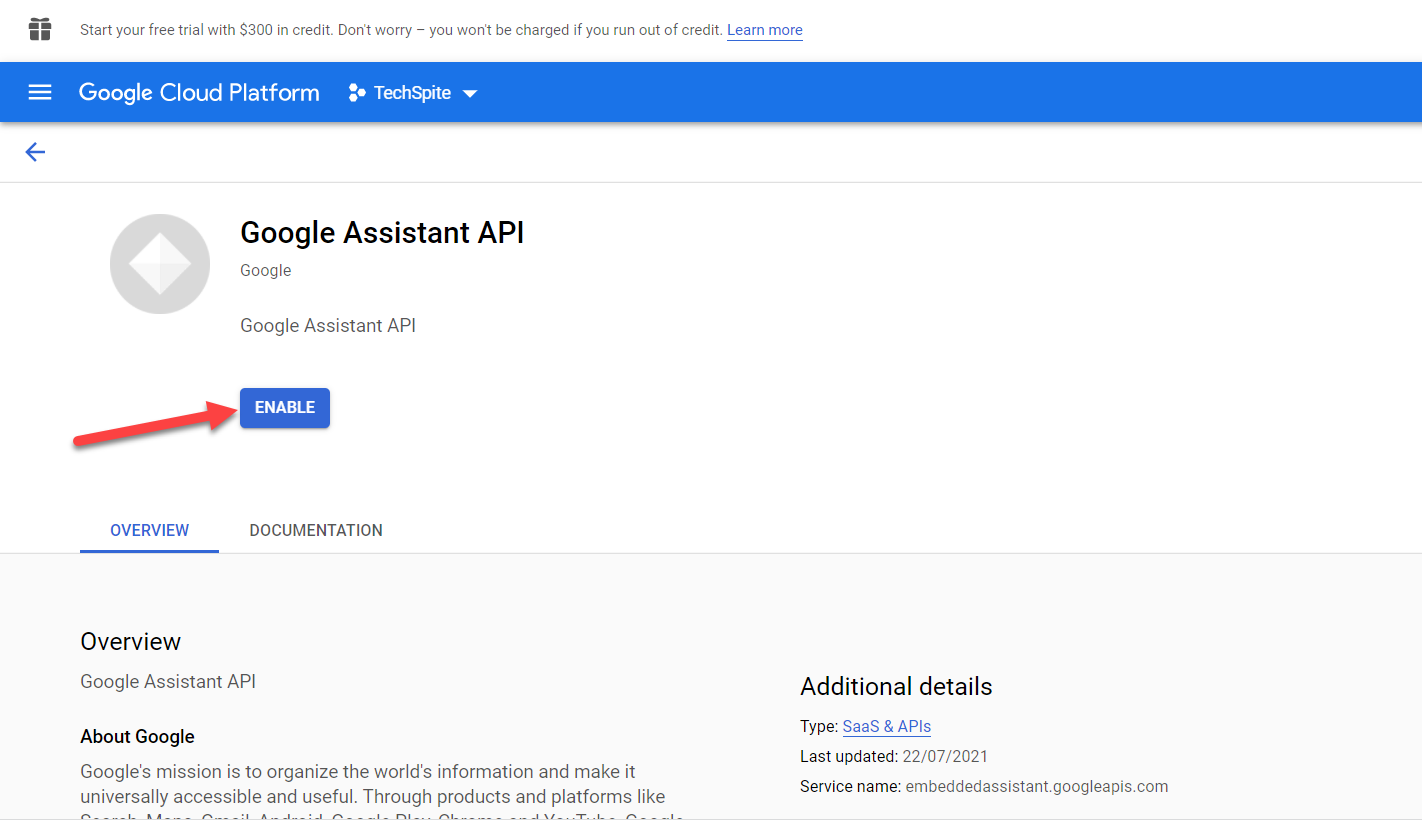 Click on the Enable
 Step 7. Tap on the Credentials.
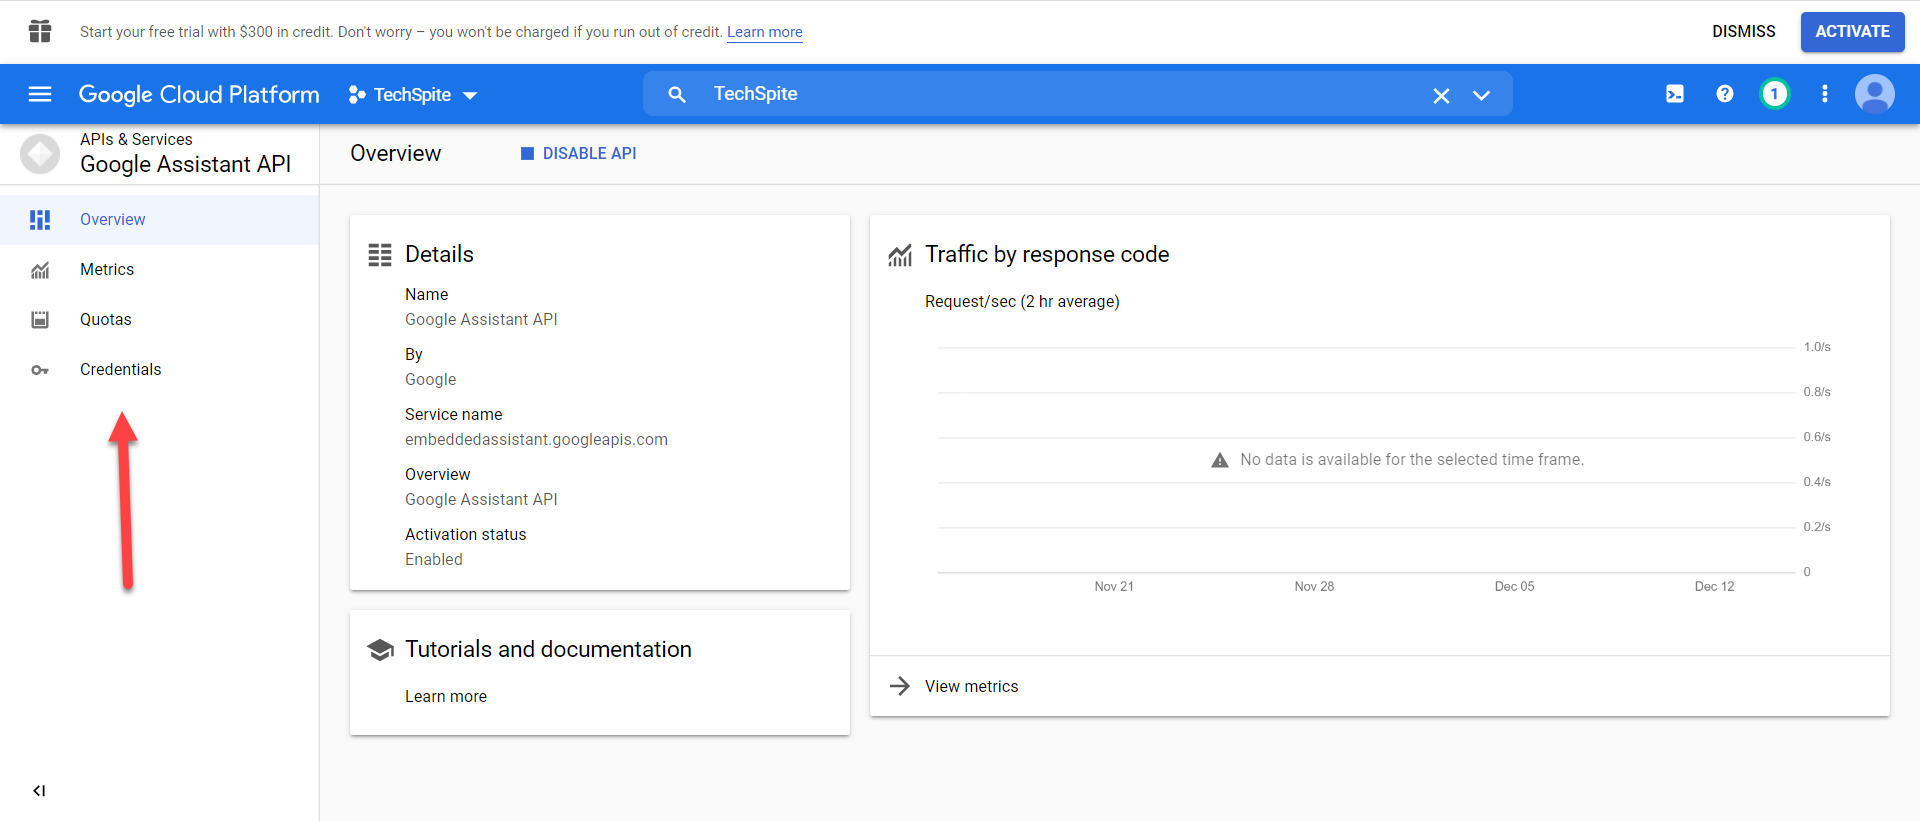 Tap on the Credentials
 Step 8. Click on the Configure Consent Screen to continue the process.
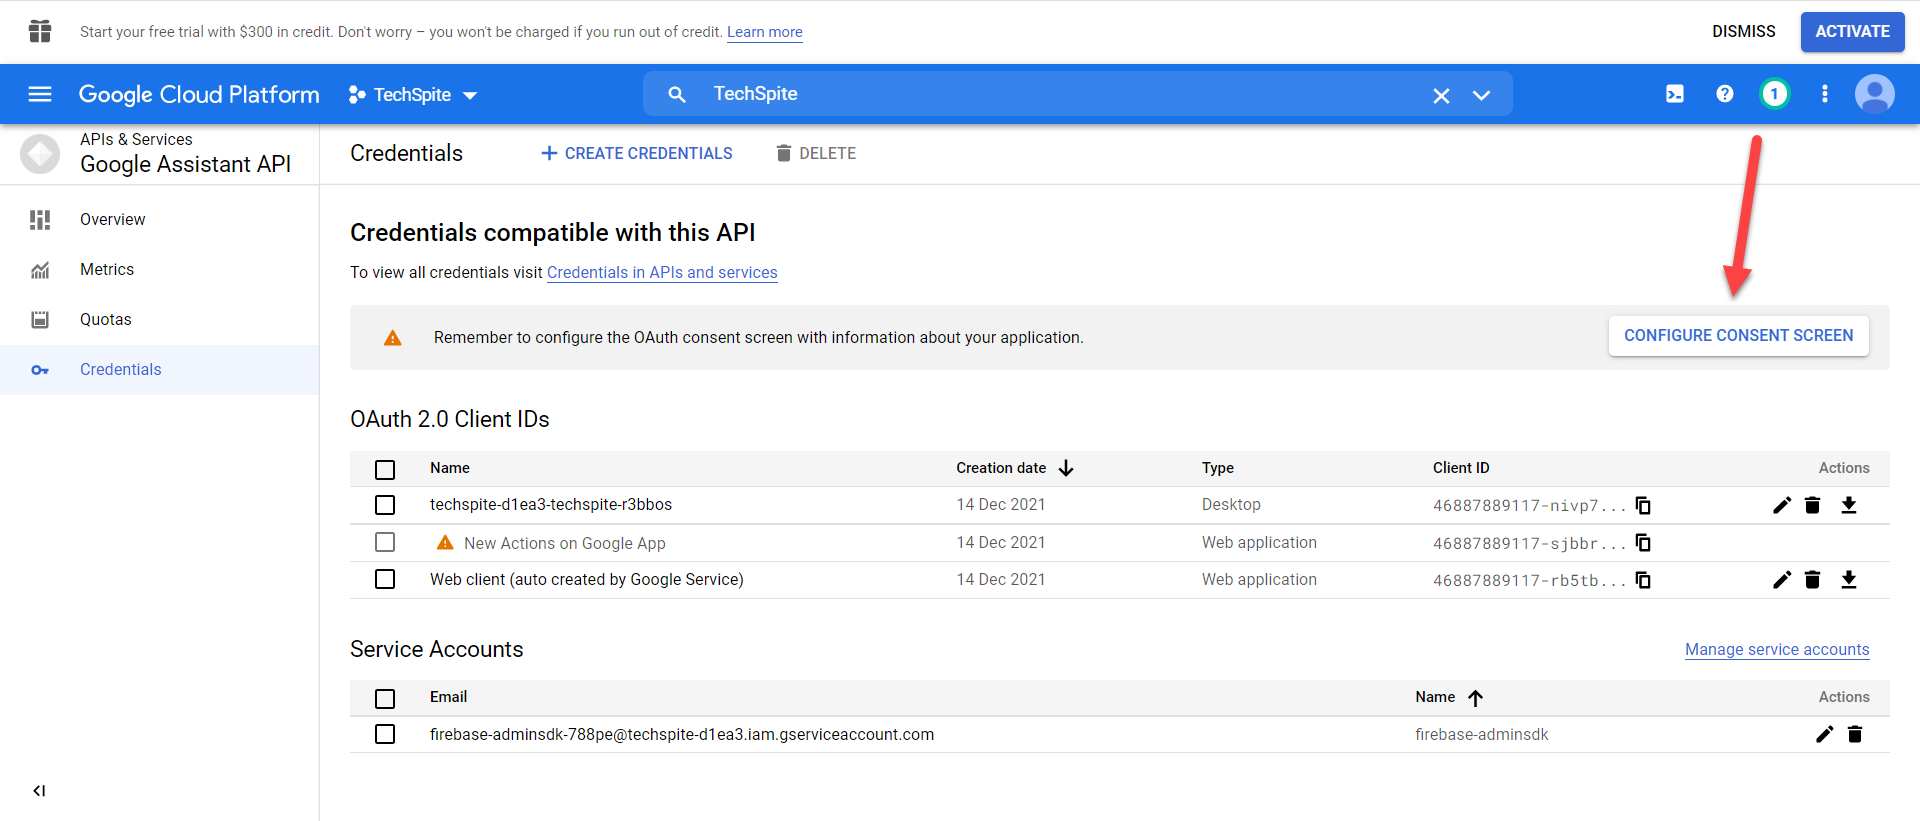 Click on the Configure Consent Screen
 Step 9. Check the External then click on the CREATE.
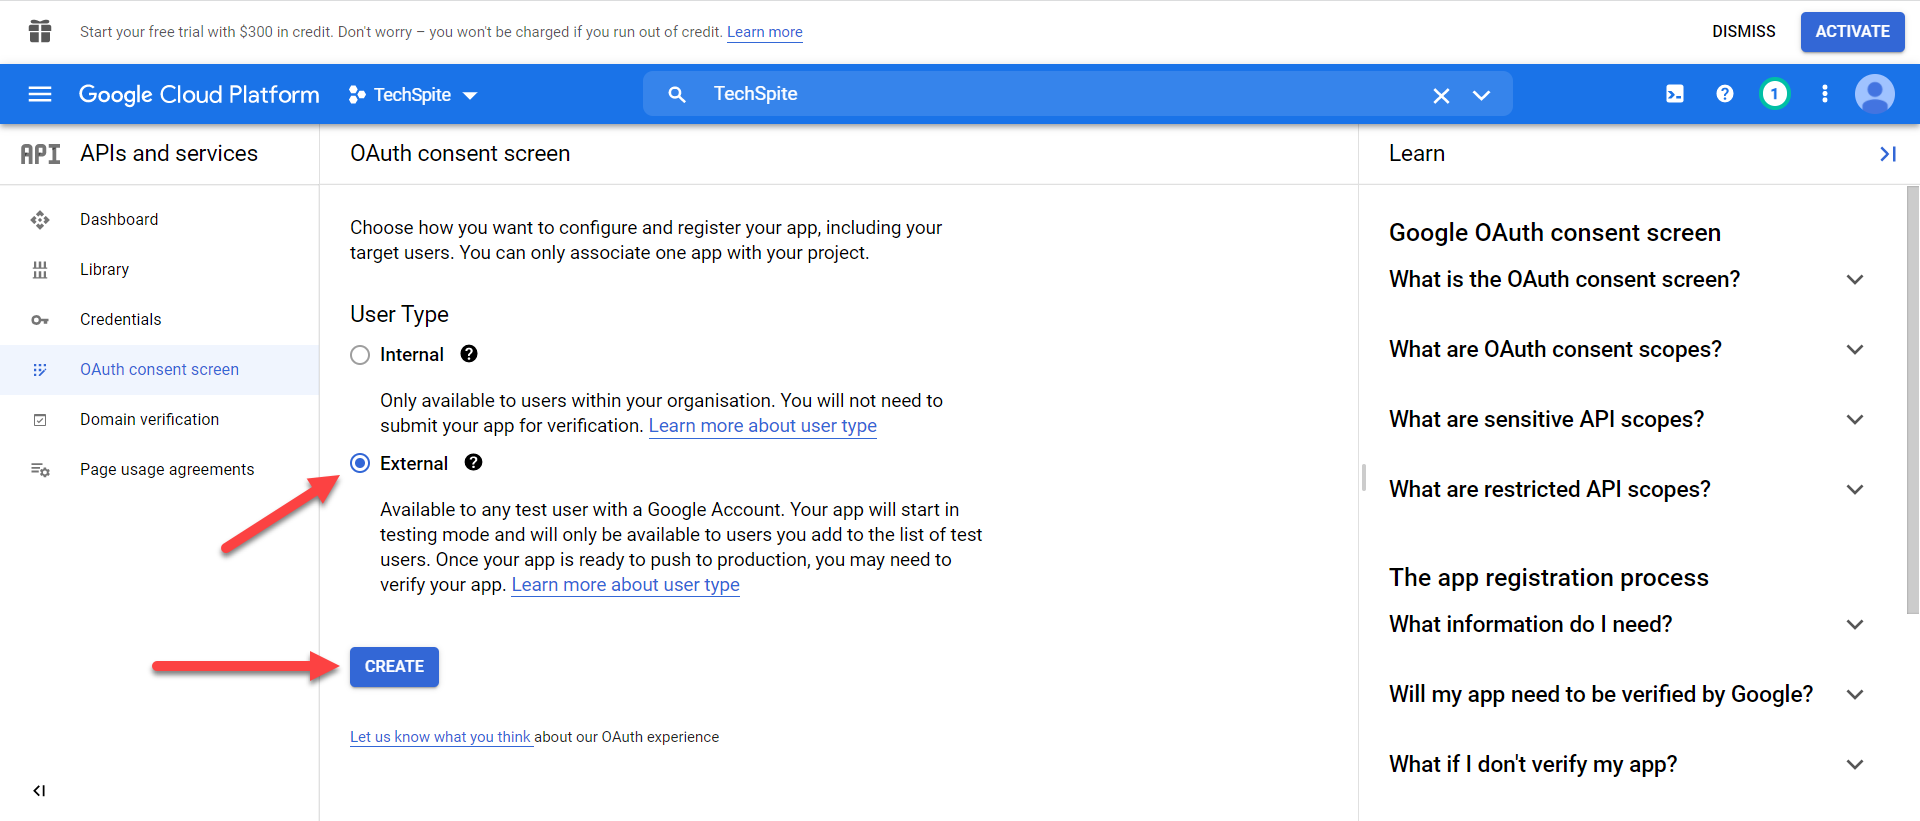 Click on the CREATE
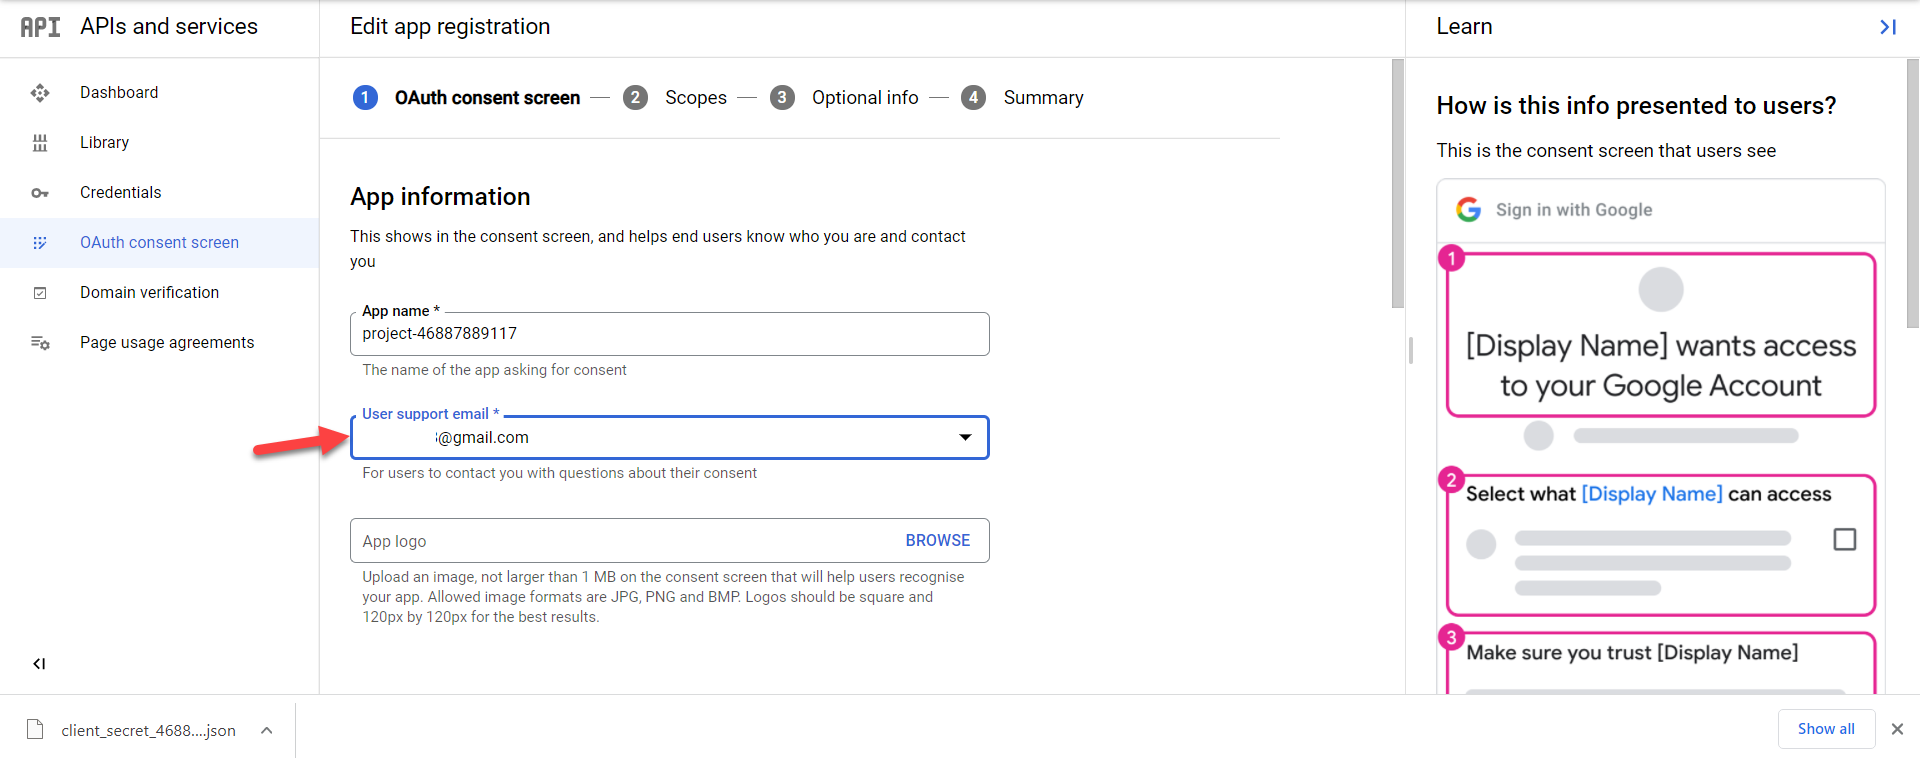
 Step 10. In this step simply select your email from the drop-down for User Support Email.
Step 11. Therefore, scroll down to the bottom of the page to find the section of Developer Contact Information then type your email address then tap on the SAVE AND CONTINUE.
Step 12. Once again click on the SAVE AND CONTINUE.
Step 13. Tap on the BACK TO DASHBOARD.
Step 14. Select ADD USERS in the section of Test Users.
Step 15. At last, type your email address then click on the SAVE.
Step 4. Setting Up Authentication in the App
Step 1. Open the Google Assistant or press and hold Win + Shift + A then click on the Get Started.
Step 2. When the Google Assistant is launched then click on the Setting icon at the top left corner.
Step 3. Click on the Browse.
Step 4. Now, select the file of Client Secret that you have downloaded after that click on the Open or double click on the file it will work.
Step 5. Tap on the Save.
Step 6. In the section of Saved Tokens Path click on the Automatically Set a Path.
Step 7. Click on the Relaunch Assistant.
Step 8. Next, you need to select your main Email then click on the Continue after that click on the Allow two times.
Step 9. Select the Code that is given to you then paste the code in the section of Get Token after that click on the Submit.
Step 10. Tap on the Relaunch Assistant.
Step 11. Here you go, you successfully install the Google Assistant on your PC.
Bottom Line
It was all about How to Install Google Assistant on Windows 11? I hope this article is very helpful for you to install Google Assistant on Windows 11. From this article, you will get sometime good. This is the right place where you can easily solve your problem. After following these steps I hope you will not face any kind of problem. If you faced any kind of problem and if you have any type of suggestions then do comment.
Related Posts:
Tagged
Share This Article
In this article, you will learn How to Install Google Assistant on Windows 11? Do you want to install Google Assistant on Windows 11? If then follow the steps below. If you are an Android user then you might know about Google Assistant. However, Google Assistant is just like Microsoft Cortana and Siri that can help you to search for something. If you want to set the Google Assistant as your assistant then it is a very powerful assistant to bring information for you from around the world. As you know you can access Google Assistant on an Android phone. But you can also install Google Assistant on your PC If you want to Install Google Assistant then you need to read this article.
How to Install Google Assistant on Windows 11?
Step 1. First of all, you need to click on this link to download the client for windows 10 and click on the Google_Assistant-Setup-1.0.0-rc.2.exe.
Step 2. Once the downloading is done then open it after that click on the Install at the right bottom.
Step 3. Then uncheck the box of Run Google Assistant then click on the Finish.
Step 2. Create New Project on Actions Console
Step 1. Click here to open the page of the actions console then click on the New Project.
Click on the New Project Step 2. Now, Enter the name of your project then select your Country and Language after that click on the Create Project.
Click on the Create Project Step 3. Here scroll down to the bottom of your page then click on the Click Here.
Click on the Click Here Step 4. Click on the Register Model.
Click on the Register Model Step 5. In this section fill the empty set Product Name, Manufacturer Name, and Device Type then click on the Register Model.
Click on the Register Model Step 6. Click on the Download OAuth 2.0 Credentials then hit the Next.
Hit the Next Step 7. Tap on the Save Traits.
Tap on the Save Traits Step 3. Configure Consent Screen
Step 1. Firstly, you should open the page of Cloud Console by clicking here.
Step 2. Now, open the search then search for the project you created after that select your project.
Select Your Project Step 3. Then click on the Three Horizontal Line after that tap on the APIs & Services.
Tap on the APIs & Services Step 4. Next, hit the ENABLE APIS AND SERVICES.
Hit the ENABLE APIS AND SERVICES Step 5. Go to the search box then type Assistant or Google Assistant after that click on the Google Assistant API.
Click on the Google Assistant API Step 6. Click on the Enable.
Click on the Enable Step 7. Tap on the Credentials.
Tap on the Credentials Step 8. Click on the Configure Consent Screen to continue the process.
Click on the Configure Consent Screen Step 9. Check the External then click on the CREATE.
Click on the CREATE Step 10. In this step simply select your email from the drop-down for User Support Email.
Step 11. Therefore, scroll down to the bottom of the page to find the section of Developer Contact Information then type your email address then tap on the SAVE AND CONTINUE.
Step 12. Once again click on the SAVE AND CONTINUE.
Step 13. Tap on the BACK TO DASHBOARD.
Step 14. Select ADD USERS in the section of Test Users.
Step 15. At last, type your email address then click on the SAVE.
Step 4. Setting Up Authentication in the App
Step 1. Open the Google Assistant or press and hold Win + Shift + A then click on the Get Started.
Step 2. When the Google Assistant is launched then click on the Setting icon at the top left corner.
Step 3. Click on the Browse.
Step 4. Now, select the file of Client Secret that you have downloaded after that click on the Open or double click on the file it will work.
Step 5. Tap on the Save.
Step 6. In the section of Saved Tokens Path click on the Automatically Set a Path.
Step 7. Click on the Relaunch Assistant.
Step 8. Next, you need to select your main Email then click on the Continue after that click on the Allow two times.
Step 9. Select the Code that is given to you then paste the code in the section of Get Token after that click on the Submit.
Step 10. Tap on the Relaunch Assistant.
Step 11. Here you go, you successfully install the Google Assistant on your PC.
Bottom Line
It was all about How to Install Google Assistant on Windows 11? I hope this article is very helpful for you to install Google Assistant on Windows 11. From this article, you will get sometime good. This is the right place where you can easily solve your problem. After following these steps I hope you will not face any kind of problem. If you faced any kind of problem and if you have any type of suggestions then do comment.
Related Posts: