How to Check VRAM in Windows 11?

In this article, you will learn How to Check VRAM in Windows 11? Do you want to check VRAM in Windows 11? If yes then you will check it easily by following our below methods. As you know that RAM function store the files on your machine and VRAM is the same it will store the data of the image on your PC. This VRAM is working somehow quickly than Ram in our PC. If you want to check VRAM then you need read this article. So, without wasting any time let’s get has started.
What is VRAM?
VRAM stands for (video random access memory) and the latest name suggests it is short-term memory for your graphics card. Now, it is actually completely separate from your system memory those two don’t directly interact with each other. Or at least they don’t need to work together in the same type. For instance, when your graphic card may have GDDR6 for example like both of these cards your system memory can still be DDR4 without any problem. What is VRAM used for? Well, it’s often referred to as the frame buffer. When any kind of picture or video is displayed on the screen of your PC then firstly the data will be read by a process after that it will be written to VRAM (Video RAM).
Method 1. Check VRAM Using Settings
Step 1. First of all, you need to open the Settings of your PC.
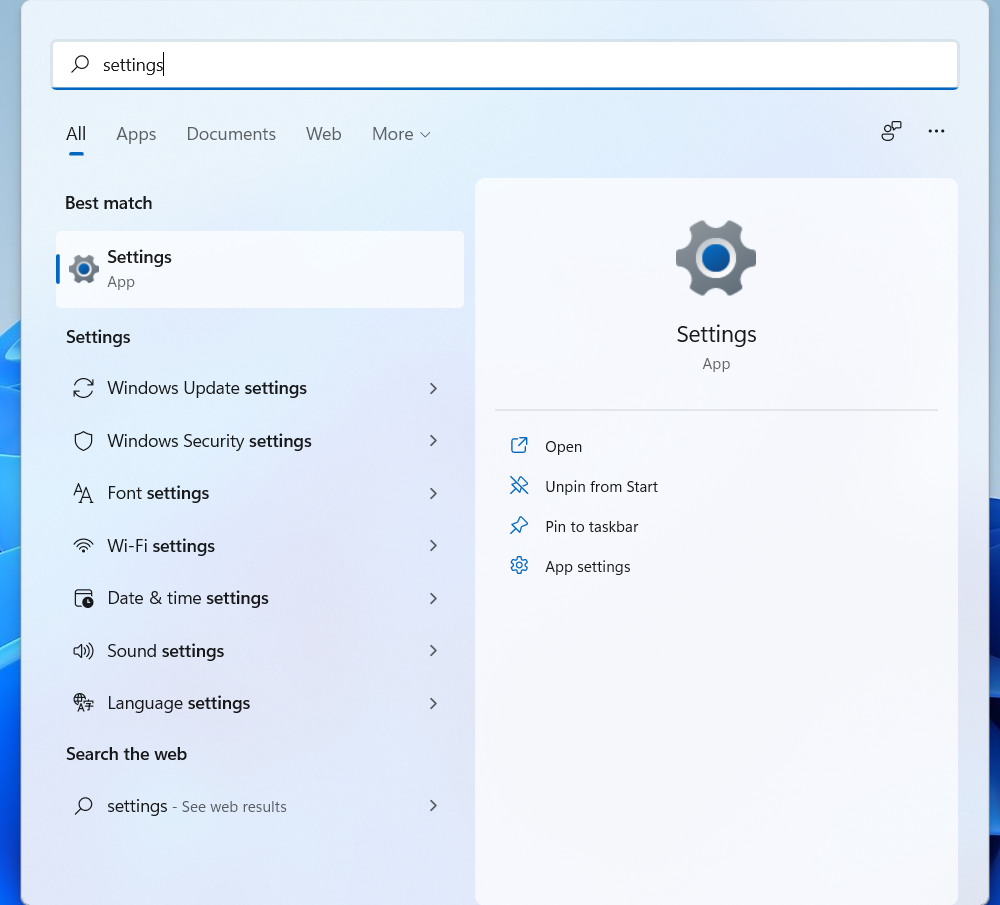 Settings
 Step 2. Once the settings are successfully open then click on the Display from the right side.
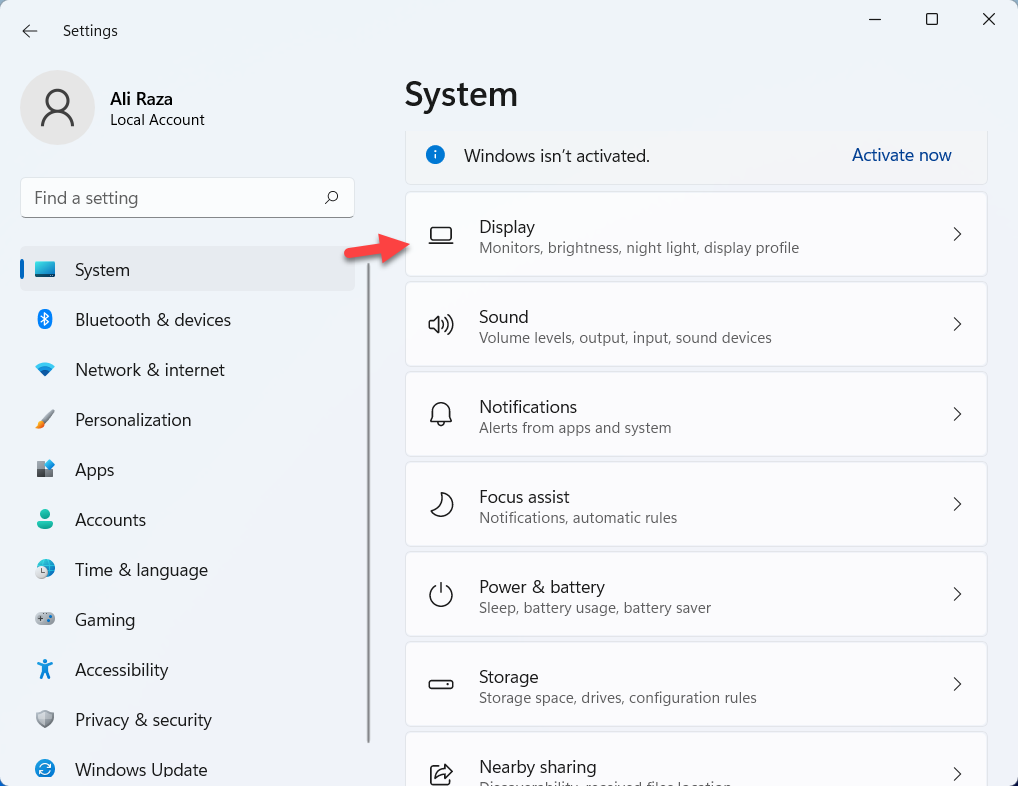 Display
 Step 3. Now, click on the Advanced Display in the section of related settings.
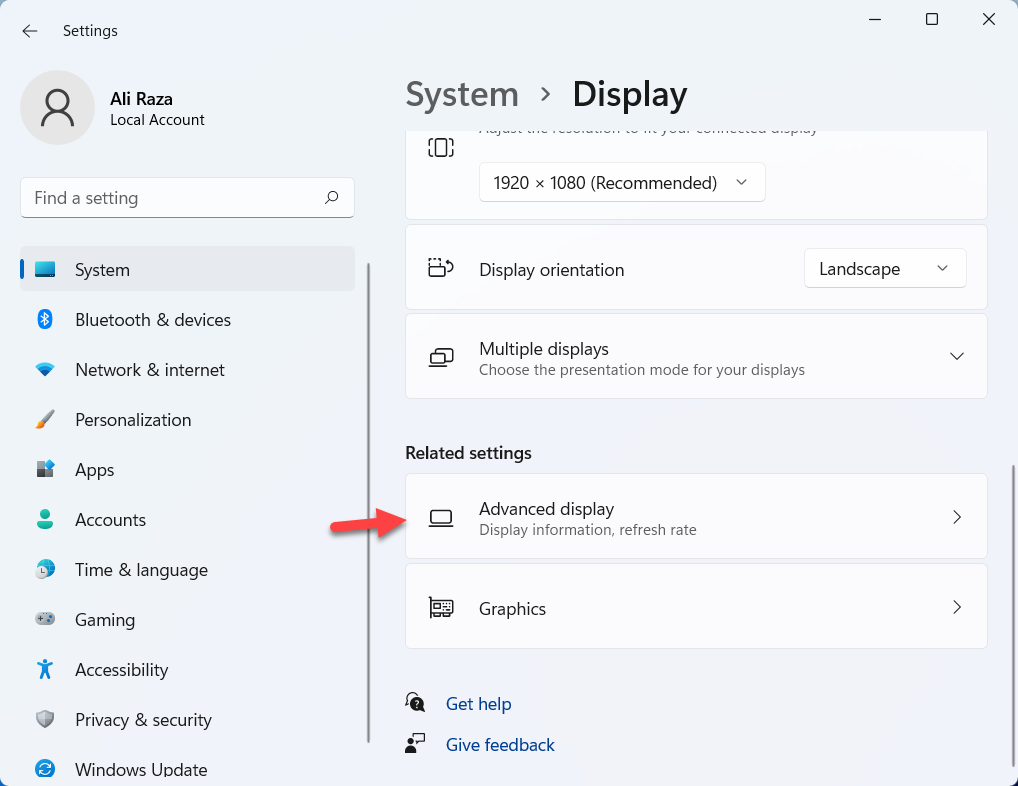 Advanced Display
 Step 4. Next, tap on the Display Adapter Properties for Display 1.
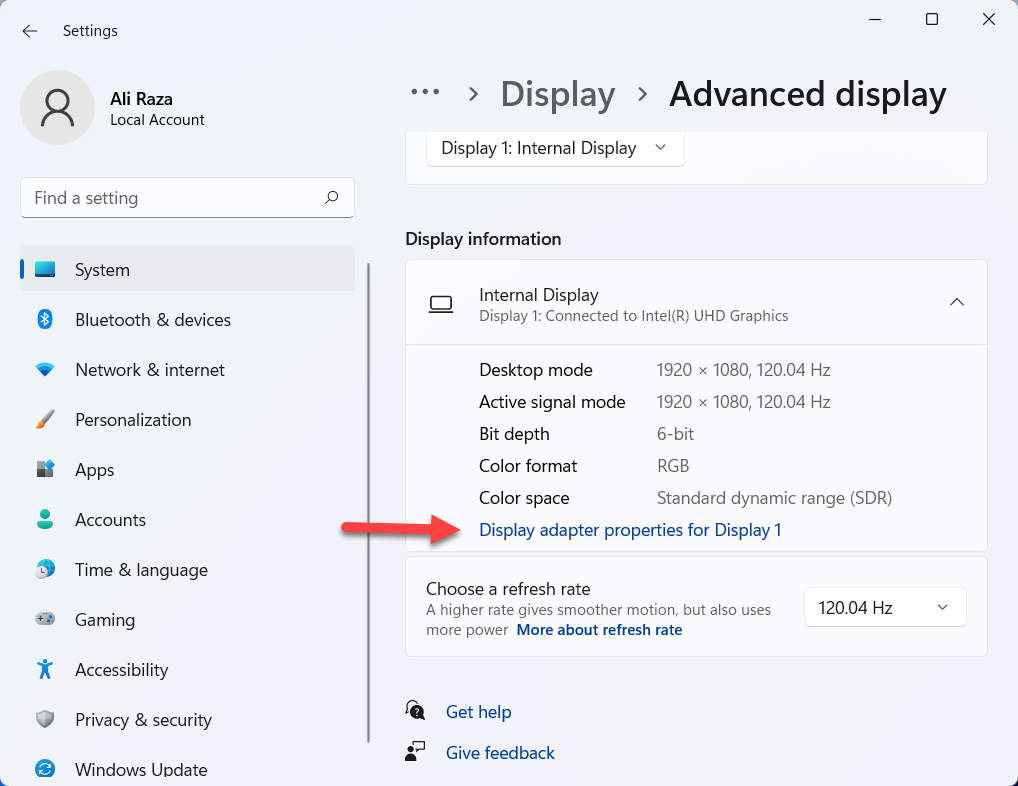 Display Adapter Properties
 Step 5. Here you will check the VRAM in the section of dedicated video memory.
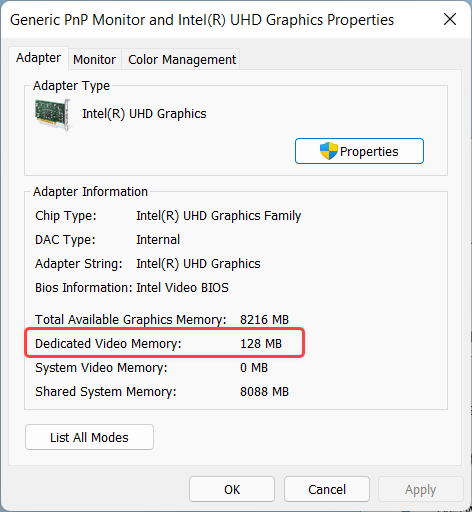 Dedicated Video memory
 Method 2. Check VRAM Via DirectX Diagnostic Tool
Step 1. At first, press and hold Win Key + R to open the run then type Dxdiag open it by hitting Enter key from the keyboard.
Step 2. Then go to the Display tab after that look towards the section Display memory.
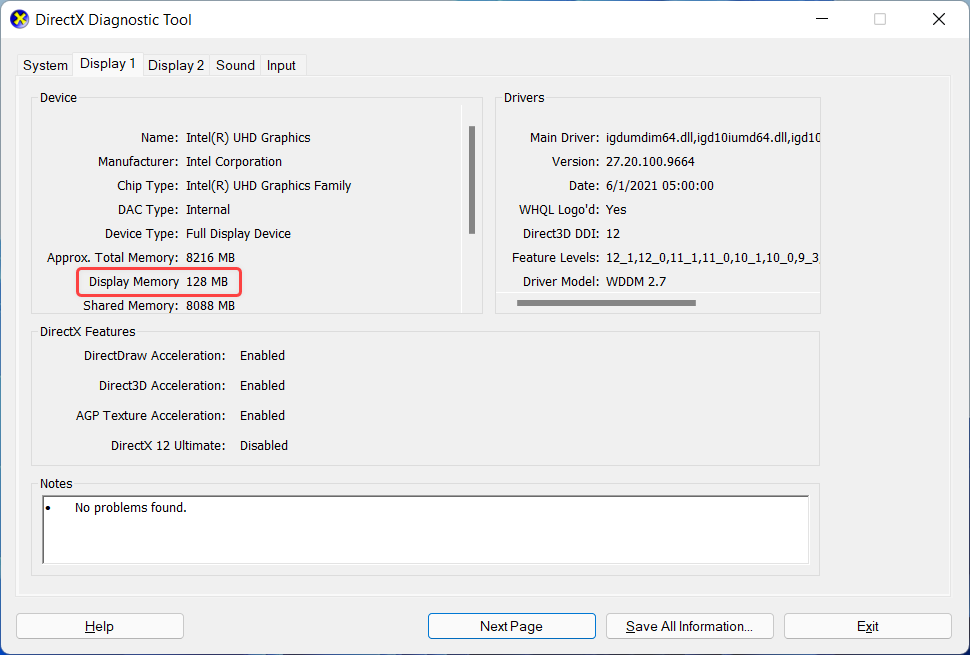 Display Memory
 Method 3. Check VRAM With CPU-Z
For this method, you need to download CPU-Z. This software will help you to check the VRAM of your PC. CPU-Z is totally safe free to download and install software. So, follow the other steps down below.
Step 1. Firstly, open the software when the CPU-Z is downloaded.
Step 2. Now, head towards the tab of Graphics then in the section of Memory you will get the size of VRAM but something it will not show us.
Bottom Line
It was all about How to Check VRAM in Windows 11? I hope this article is very helpful for you to check VRAM in Windows 11. From this article, you will get something good. This is the right place where you can easily solve for your problem. After following these steps I hope you will not face any kind of problem. If you faced any kind of problem and if you have any type of suggestions then do comment.
Explore More:
Share This Article
In this article, you will learn How to Check VRAM in Windows 11? Do you want to check VRAM in Windows 11? If yes then you will check it easily by following our below methods. As you know that RAM function store the files on your machine and VRAM is the same it will store the data of the image on your PC. This VRAM is working somehow quickly than Ram in our PC. If you want to check VRAM then you need read this article. So, without wasting any time let’s get has started.
What is VRAM?
VRAM stands for (video random access memory) and the latest name suggests it is short-term memory for your graphics card. Now, it is actually completely separate from your system memory those two don’t directly interact with each other. Or at least they don’t need to work together in the same type. For instance, when your graphic card may have GDDR6 for example like both of these cards your system memory can still be DDR4 without any problem. What is VRAM used for? Well, it’s often referred to as the frame buffer. When any kind of picture or video is displayed on the screen of your PC then firstly the data will be read by a process after that it will be written to VRAM (Video RAM).
Method 1. Check VRAM Using Settings
Step 1. First of all, you need to open the Settings of your PC.
Settings Step 2. Once the settings are successfully open then click on the Display from the right side.
Display Step 3. Now, click on the Advanced Display in the section of related settings.
Advanced Display Step 4. Next, tap on the Display Adapter Properties for Display 1.
Display Adapter Properties Step 5. Here you will check the VRAM in the section of dedicated video memory.
Dedicated Video memory Method 2. Check VRAM Via DirectX Diagnostic Tool
Step 1. At first, press and hold Win Key + R to open the run then type Dxdiag open it by hitting Enter key from the keyboard.
Step 2. Then go to the Display tab after that look towards the section Display memory.
Display Memory Method 3. Check VRAM With CPU-Z
For this method, you need to download CPU-Z. This software will help you to check the VRAM of your PC. CPU-Z is totally safe free to download and install software. So, follow the other steps down below.
Step 1. Firstly, open the software when the CPU-Z is downloaded.
Step 2. Now, head towards the tab of Graphics then in the section of Memory you will get the size of VRAM but something it will not show us.
Bottom Line
It was all about How to Check VRAM in Windows 11? I hope this article is very helpful for you to check VRAM in Windows 11. From this article, you will get something good. This is the right place where you can easily solve for your problem. After following these steps I hope you will not face any kind of problem. If you faced any kind of problem and if you have any type of suggestions then do comment.
Explore More: